Display panel
Change the brightness of the SoundBar display panel.
1 Press SETUP repeatedly to select DISPLAY on the display panel (see ‘Setup menu
2 | options and settings’ on page 18). |
Press OK. | |
3 | Press the Navigation buttons ( / ) to |
select BRIGHT, DIM 1, or DIM 2, and then press OK.
Apply factory settings
You can reset your SoundBar to the default settings programmed at the factory.
In AUX mode, within three seconds, press TREBLE+,
»» When the factory settings restore is complete, the SoundBar automatically switches off and restarts.
8 Wall mount and
stand | nglish |
| E |
Before you mount your SoundBar to the wall or onto a single stand, read all safety precautions (see ‘Safety’ on page 5).
If you have any query, contact Philips Consumer Care in your country.
Wall mount
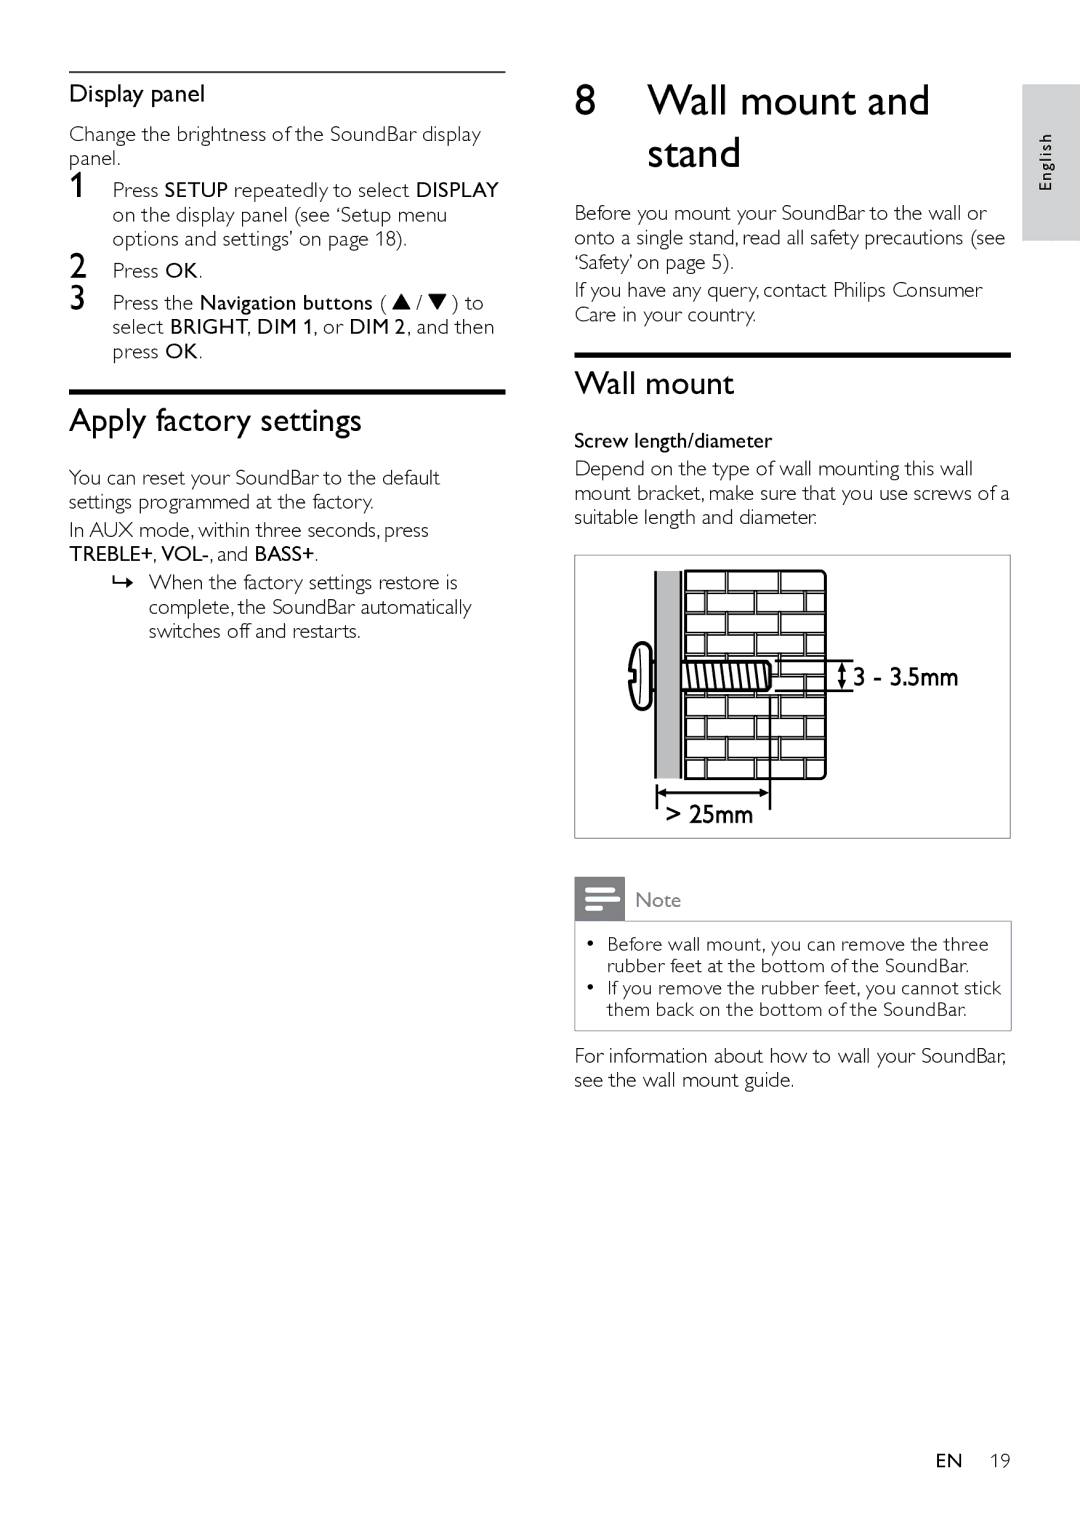
Screw length/diameter
Depend on the type of wall mounting this wall mount bracket, make sure that you use screws of a suitable length and diameter.


 3 - 3.5mm
> 25mm
![]() Note
Note
•• Before wall mount, you can remove the three rubber feet at the bottom of the SoundBar.
•• If you remove the rubber feet, you cannot stick them back on the bottom of the SoundBar.
For information about how to wall your SoundBar, see the wall mount guide.
EN 19