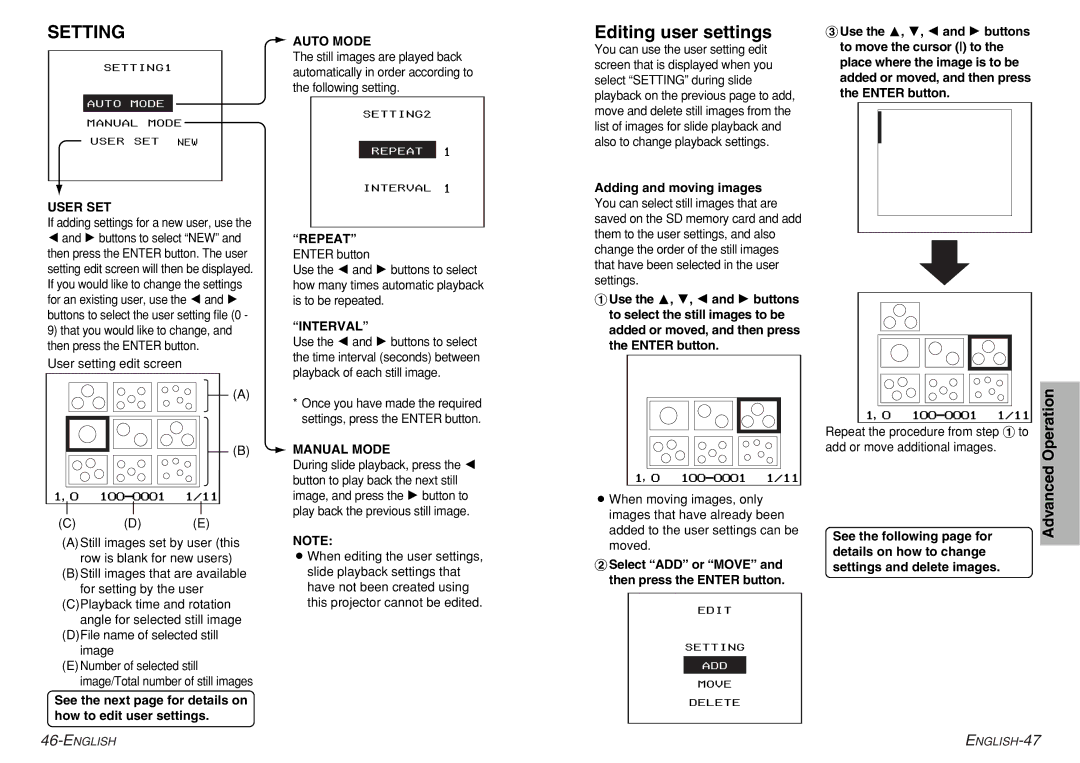
SETTING | AUTO MODE | |
| ||
SETTING1 | The still images are played back | |
automatically in order according to | ||
| ||
| the following setting. |
AUTO MODE
SETTING2
MANUAL MODE
USER SET NEW
REPEAT 1
INTERVAL 1
Editing user settings
You can use the user setting edit screen that is displayed when you select “SETTING” during slide playback on the previous page to add, move and delete still images from the list of images for slide playback and also to change playback settings.
Adding and moving images
%Use the F, G, I and H buttons to move the cursor () to the place where the image is to be added or moved, and then press the ENTER button.
USER SET
If adding settings for a new user, use the
Iand H buttons to select “NEW” and then press the ENTER button. The user setting edit screen will then be displayed. If you would like to change the settings for an existing user, use the I and H buttons to select the user setting file (0 - 9) that you would like to change, and then press the ENTER button.
User setting edit screen
“REPEAT”
ENTER button
Use the I and H buttons to select how many times automatic playback is to be repeated.
“INTERVAL”
Use the I and H buttons to select the time interval (seconds) between playback of each still image.
You can select still images that are saved on the SD memory card and add them to the user settings, and also change the order of the still images that have been selected in the user settings.
#Use the F, G, I and H buttons to select the still images to be added or moved, and then press the ENTER button.
(A)
*Once you have made the required settings, press the ENTER button.
1,0 100-0001 1/11
,
Repeat the procedure from step # to
Operation
| , |
|
1,0 |
| 1/11 |
, |
|
|
(C) | (D) | (E) |
(B) MANUAL MODE
During slide playback, press the I button to play back the next still image, and press the H button to play back the previous still image.
1,0 100-0001 1/11
,
BWhen moving images, only |
images that have already been |
added to the user settings can be |
add or move additional images.
Advanced
(A)Still images set by user (this row is blank for new users)
(B)Still images that are available for setting by the user
(C)Playback time and rotation angle for selected still image
(D)File name of selected still image
(E)Number of selected still image/Total number of still images
See the next page for details on how to edit user settings.
NOTE:
BWhen editing the user settings, slide playback settings that have not been created using this projector cannot be edited.
moved. |
$Select “ADD” or “MOVE” and then press the ENTER button.
EDIT
SETTING
ADD
MOVE
DELETE
See the following page for details on how to change settings and delete images.