7. INSTALLATION | Connecting to audio equipment/remote control mouse receiver |
|
|
CONNECTING TO AUDIO EQUIPMENT/THE REMOTE CONTROL MOUSE RECEIVER
General
–The figures in brackets (1) correspond to the figures in the diagram on page 11.
–The characters in brackets (A) correspond to characters in fig. 3 on page 4.
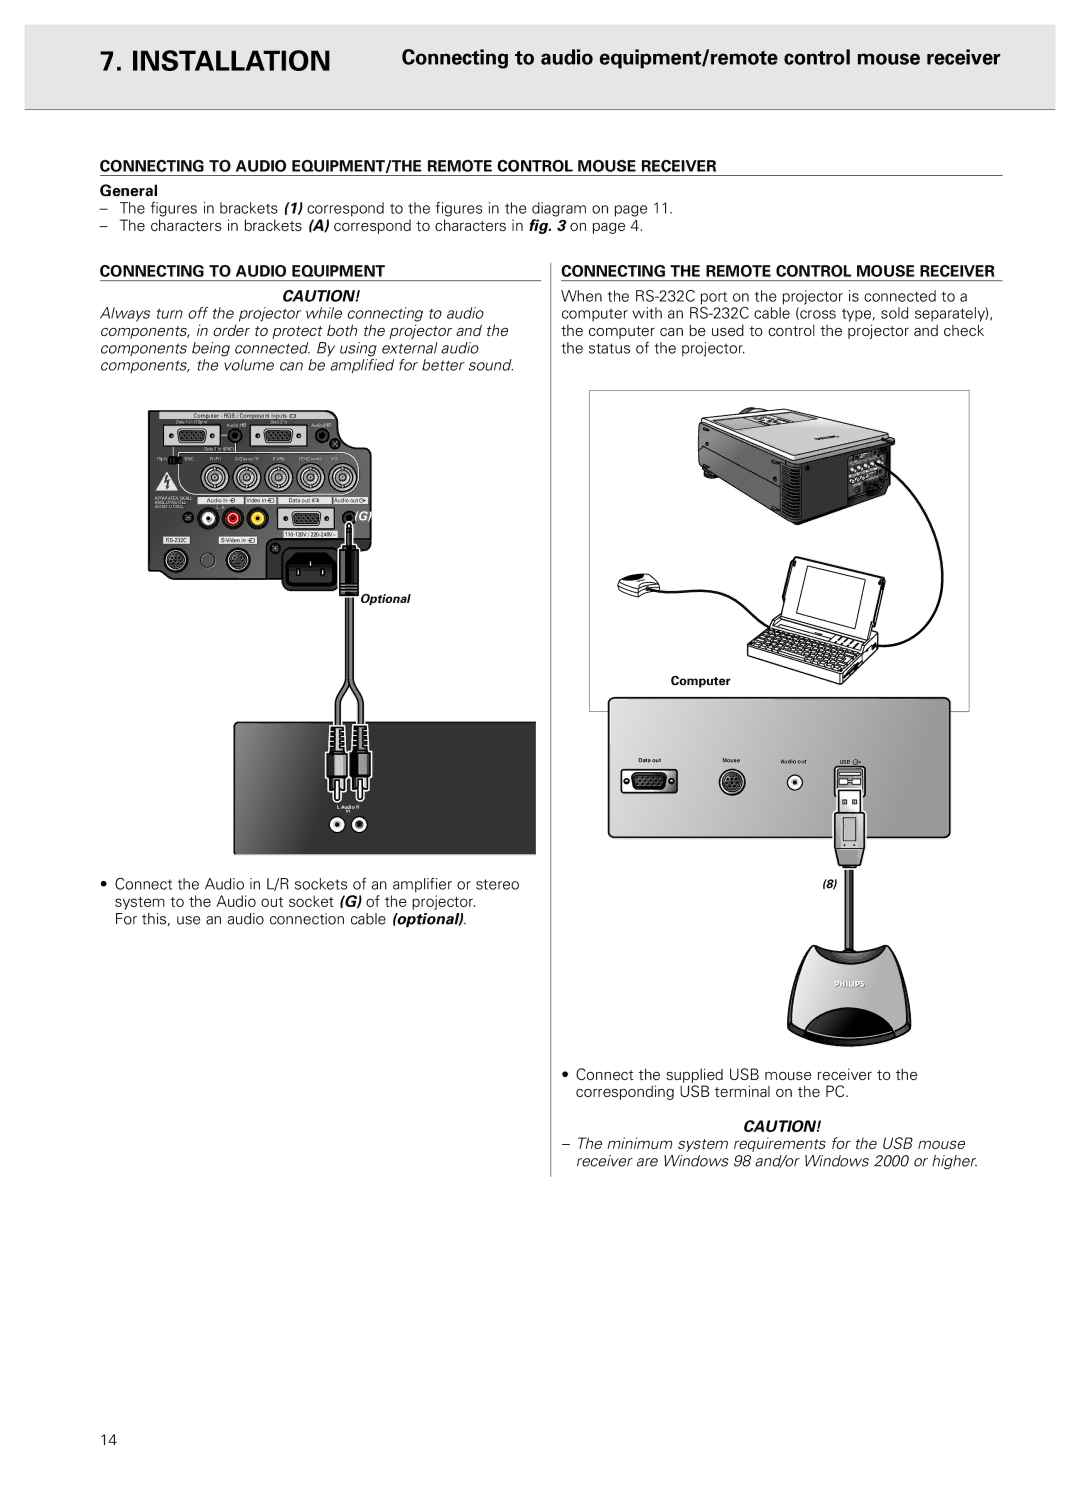
CONNECTING TO AUDIO EQUIPMENT
CAUTION!
Always turn off the projector while connecting to audio components, in order to protect both the projector and the components being connected. By using external audio components, the volume can be amplified for better sound.
Computer - RGB / Component inputs |
| ||
Data 1 in (15pin) | Audio1 | Data 2 in | Audio2 |
|
| ||
Data 1 in (BNC) |
|
| |
15pin | BNC | R (Pr) | G/G sync (Y) | B (Pb) | HD (C sync) | VD |
APPARATEN SKALL | Audio in | Video in |
| Data out | Audio out | |
ANSLUTAS TILL |
| |||||
JODAT UTTAG. |
| L R |
|
|
|
|
![]() (G)
(G)
Optional
L Audio R
in
•Connect the Audio in L/R sockets of an amplifier or stereo system to the Audio out socket (G) of the projector.
For this, use an audio connection cable (optional).
CONNECTING THE REMOTE CONTROL MOUSE RECEIVER
When the
| Computer |
|
|
Data out | Mouse | Audioio out | USB |
|
|
| (8) |
•Connect the supplied USB mouse receiver to the corresponding USB terminal on the PC.
CAUTION!
–The minimum system requirements for the USB mouse receiver are Windows 98 and/or Windows 2000 or higher.
14