28 Timer Recording (cont’d)
7
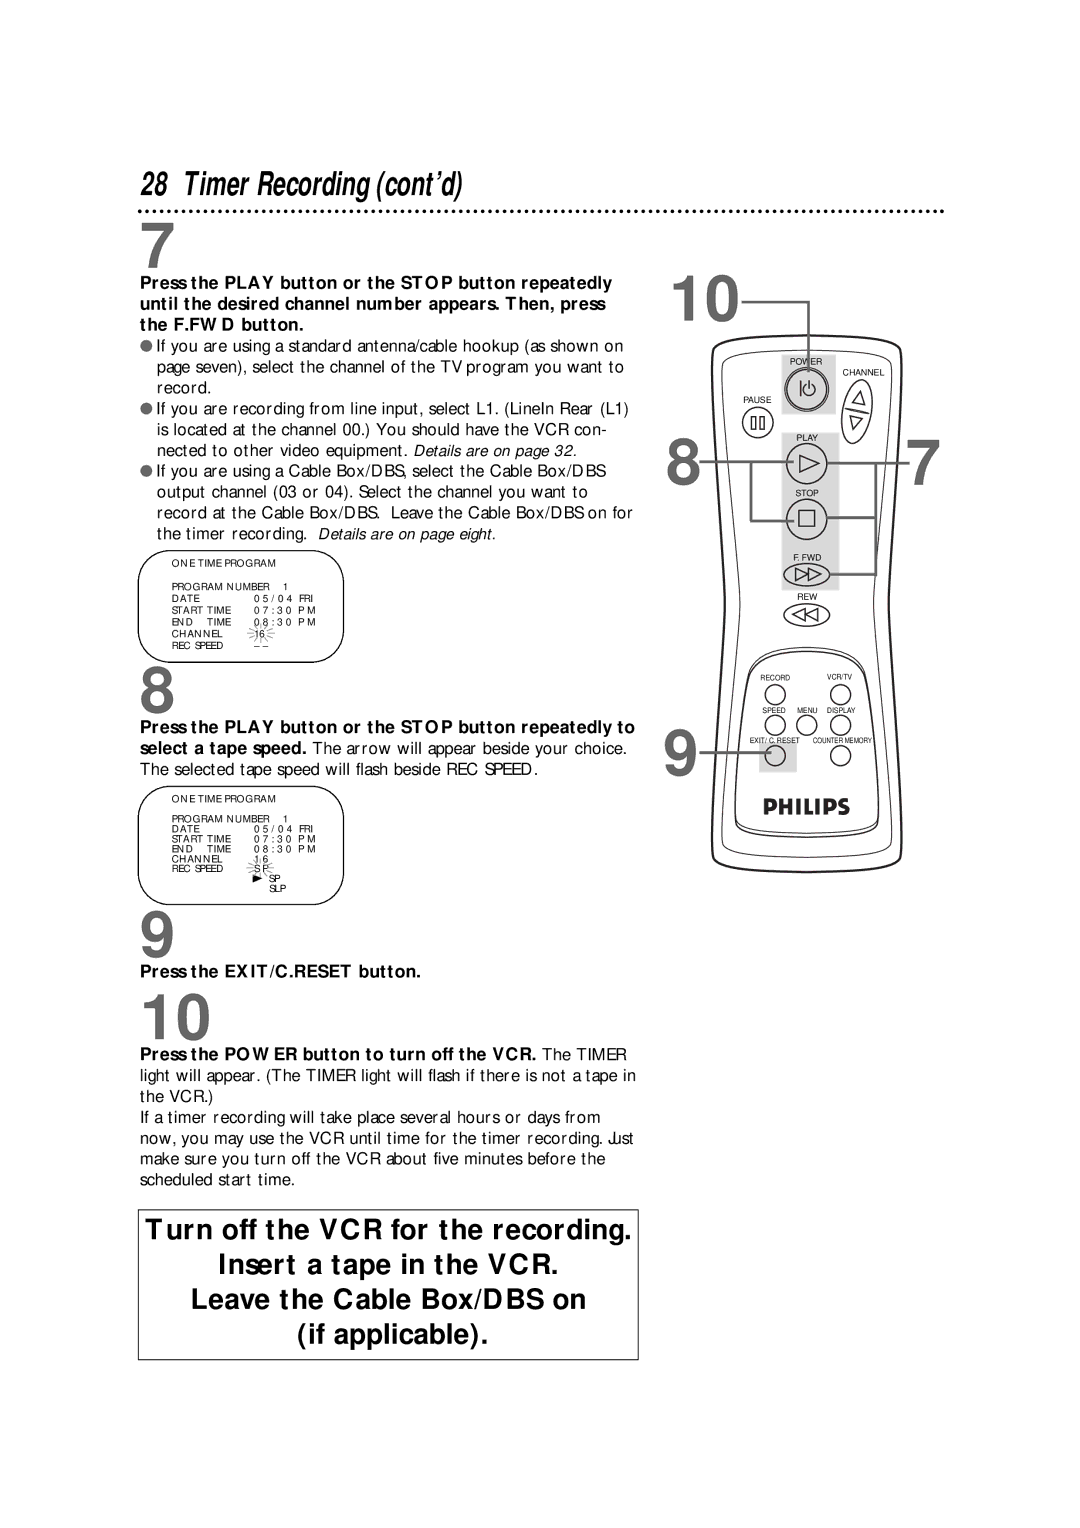
Press the PLAY button or the STOP button repeatedly until the desired channel number appears. Then, press the F.FWD button.
●If you are using a standard antenna/cable hookup (as shown on page seven), select the channel of the TV program you want to record.
●If you are recording from line input, select L1. (LineIn Rear (L1) is located at the channel 00.) You should have the VCR con- nected to other video equipment. Details are on page 32.
●If you are using a Cable Box/DBS, select the Cable Box/DBS output channel (03 or 04). Select the channel you want to record at the Cable Box/DBS. Leave the Cable Box/DBS on for the timer recording. Details are on page eight.
ONE TIME PROGRAM |
| |||||
PROGRAM NUMBER | 1 |
| ||||
DATE | 0 5 | / 0 4 | FRI | |||
START TIME | 0 7 | : 3 0 | P M | |||
END TIME | 0 8 | : 3 0 | P M | |||
CHANNEL |
| 16 |
|
|
|
|
|
|
|
|
| ||
REC SPEED |
| – – |
|
|
| |
8
Press the PLAY button or the STOP button repeatedly to select a tape speed. The arrow will appear beside your choice. The selected tape speed will flash beside REC SPEED.
ONE TIME PROGRAM |
| |||||
PROGRAM NUMBER | 1 | FRI | ||||
DATE | 0 5 | / 0 4 | ||||
START TIME | 0 7 | : 3 0 | P M | |||
END TIME | 0 8 | : 3 0 | P M | |||
CHANNEL | 1 6 |
|
|
| ||
REC SPEED |
| S P |
|
|
|
|
|
|
|
|
| ||
| B SP |
| ||||
|
|
|
| SLP |
| |
9
Press the EXIT/C.RESET button.
10
Press the POWER button to turn off the VCR. The TIMER light will appear. (The TIMER light will flash if there is not a tape in the VCR.)
If a timer recording will take place several hours or days from now, you may use the VCR until time for the timer recording. Just make sure you turn off the VCR about five minutes before the scheduled start time.
Turn off the VCR for the recording.
Insert a tape in the VCR.
Leave the Cable Box/DBS on (if applicable).
10
POWER
CHANNEL
PAUSE
8 | PLAY | 7 |
STOP | ||
| F. FWD |
|
| REW |
|
| RECORD | VCR/TV |
9 | SPEED MENU DISPLAY | |
EXIT/ C. RESET | COUNTER MEMORY | |
