24 Recording
Read and follow the steps below to record a television program.
1
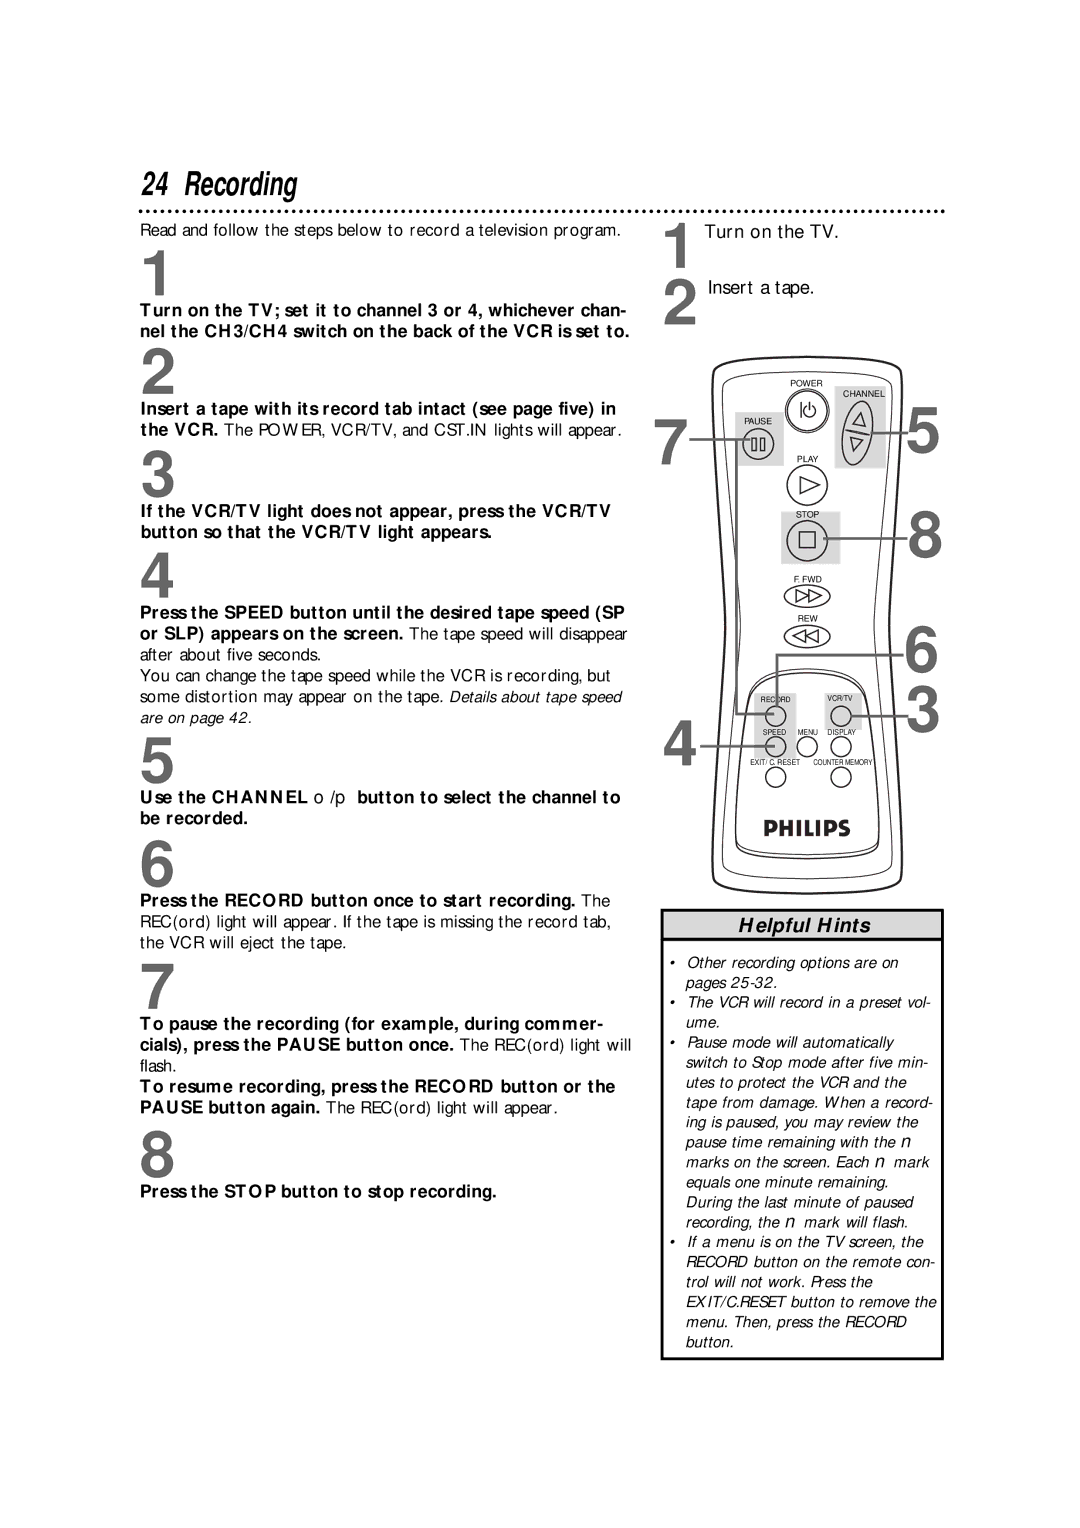
Turn on the TV; set it to channel 3 or 4, whichever chan- nel the CH3/CH4 switch on the back of the VCR is set to.
2
Insert a tape with its record tab intact (see page five) in the VCR. The POWER, VCR/TV, and CST.IN lights will appear.
3
If the VCR/TV light does not appear, press the VCR/TV button so that the VCR/TV light appears.
4
Press the SPEED button until the desired tape speed (SP or SLP) appears on the screen. The tape speed will disappear after about five seconds.
You can change the tape speed while the VCR is recording, but some distortion may appear on the tape. Details about tape speed are on page 42.
5
Use the CHANNEL o/p button to select the channel to be recorded.
1Turn on the TV.
2 Insert a tape.
POWER
|
|
| CHANNEL | 5 | |
7 | PAUSE | PLAY |
| ||
|
| STOP |
| 8 | |
|
|
|
| ||
|
| F. FWD |
|
| |
|
| REW |
| 6 | |
|
|
|
| ||
4 | RECORD |
| VCR/TV | 3 | |
SPEED | MENU | DISPLAY | |||
|
EXIT/ C. RESET COUNTER MEMORY
6
Press the RECORD button once to start recording. The REC(ord) light will appear. If the tape is missing the record tab, the VCR will eject the tape.
7
To pause the recording (for example, during commer- cials), press the PAUSE button once. The REC(ord) light will flash.
To resume recording, press the RECORD button or the PAUSE button again. The REC(ord) light will appear.
8
Press the STOP button to stop recording.
Helpful Hints
•Other recording options are on pages
•The VCR will record in a preset vol- ume.
•Pause mode will automatically switch to Stop mode after five min- utes to protect the VCR and the tape from damage. When a record- ing is paused, you may review the pause time remaining with the ■ marks on the screen. Each ■ mark equals one minute remaining. During the last minute of paused recording, the ■ mark will flash.
•If a menu is on the TV screen, the RECORD button on the remote con- trol will not work. Press the EXIT/C.RESET button to remove the menu. Then, press the RECORD button.
