Initial Set Up

On Screen Display

There are a number of possible ways to hook up the receiver to your video components, like a DVD player, and hook up to your receiver to your TV, but some of them won't allow you to use the on-screen display of this unit. To avoid this one simply needs to follow two rules.

1Always use the same type of video cords to hook up your video components to the receiver as you use to hook up the receiver and your TV. For example, if you use composite video cords to hook up your DVD and the receiver, use composite video cords to hook up the receiver to your TV. If you use S video cords to hook up your DVD and the receiver, use S video cords to hook up the receiver to your TV.

2Always make sure your TV is set to the appropriate input channel (for example, video 1). Your TV may have a number of input channels and if you don't select the proper one you won't be able to use this receiver's on- screen display, or, in fact, see any picture from this receiver at all. If you are unsure how to choose an input channel for your TV, refer to the manual which came with your TV.

You might, for example, use both composite and S video cords to hook up your video components with this receiver and then use composite video cords to hook up this receiver to your TV. This arrangement would still NOT let you see the on screen displays from this receiver on your TV. The best idea is just to use one type of video cord for all your video component and TV hook ups.

Switching video system between PAL and NTSC

This receiver is able to use two types of video systems for its OSD (on screen display) either PAL or NTSC. If you don't match the system on the receiver with your home system no OSD will appear on your TV. The default setting is NTSC, which is the standard in North America. If you use this system you don't need to make any settings here. People with multi-system TVs, don’t need to worry about changing the setting. If necessary, follow the instructions below to switch the type of video system.

SET UP

STANDBY/ON

LOUDNESS

1Put the receiver in the STANDBY mode.

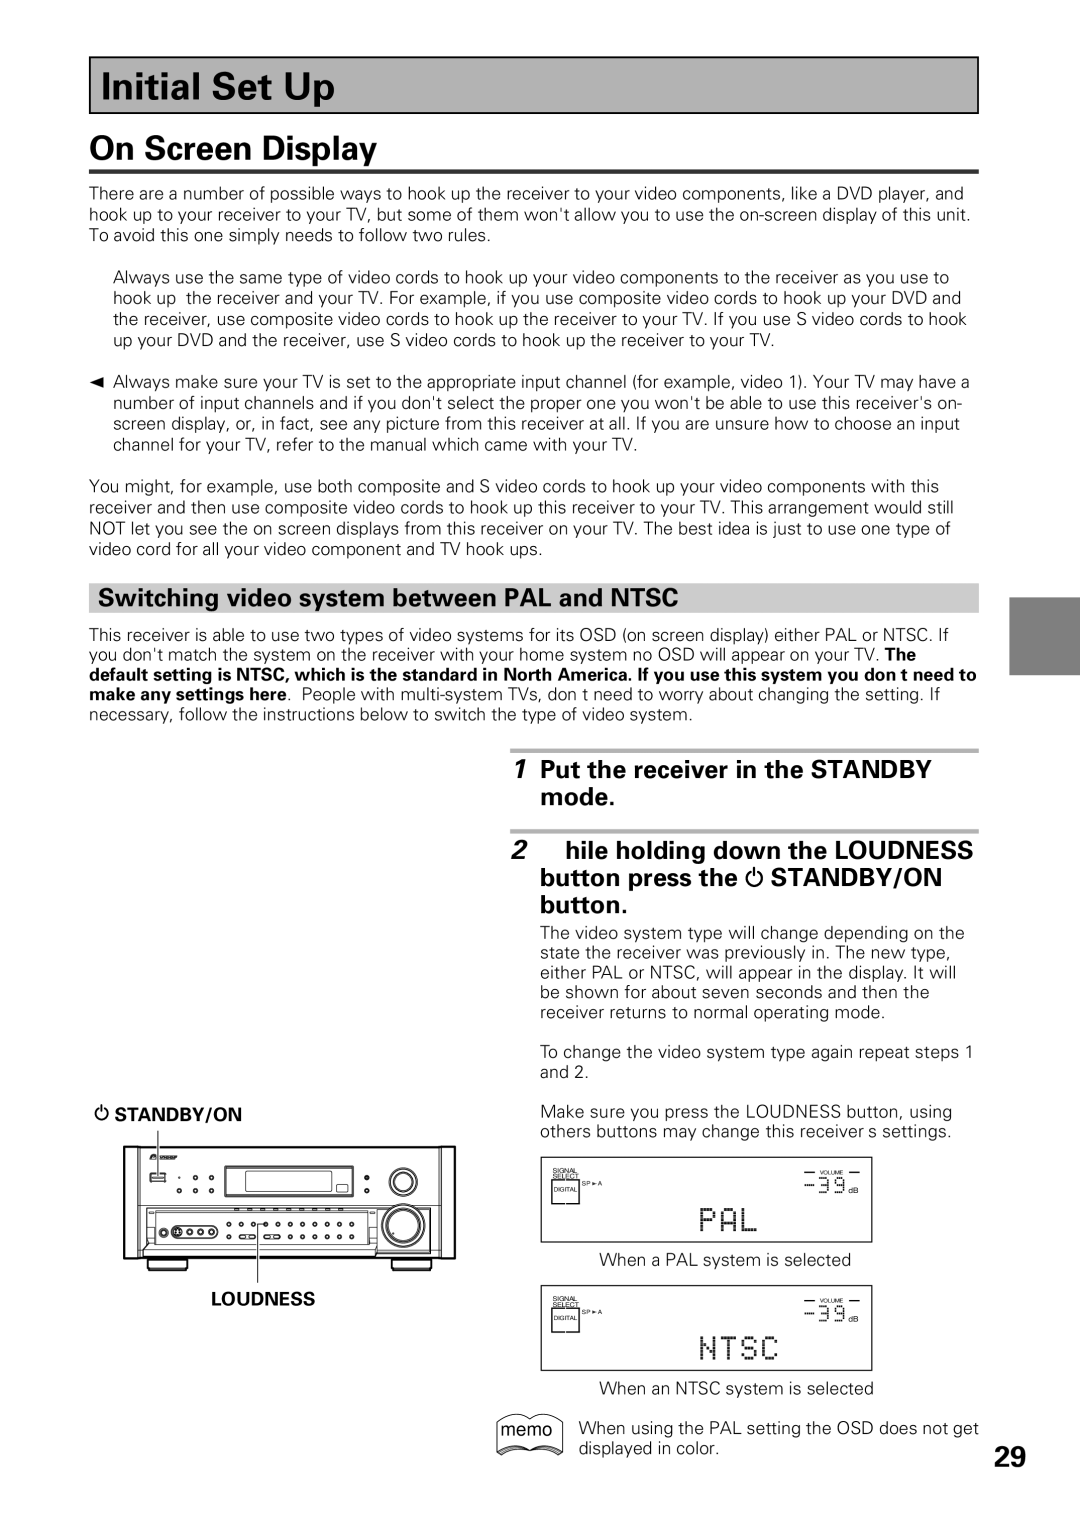
2While holding down the LOUDNESS button press the STANDBY/ON

button.

The video system type will change depending on the state the receiver was previously in. The new type, either PAL or NTSC, will appear in the display. It will be shown for about seven seconds and then the receiver returns to normal operating mode.

To change the video system type again repeat steps 1 and 2.

Make sure you press the LOUDNESS button, using others buttons may change this receiver’s settings.

SIGNAL


VOLUME


SELECT

A


SP

DIGITAL


dB


When a PAL system is selected


SIGNAL


VOLUME


SELECT

SP A


DIGITAL


dB


When an NTSC system is selected


memo When using the PAL setting the OSD does not get


displayed in color.

29


Page 29
Image 29
Pioneer VSX-39TX manual Initial Set Up, On Screen Display, Switching video system between PAL and Ntsc

VSX-39TX specifications

The Pioneer VSX-39TX is a high-performance audio/video receiver that exemplifies the brand's commitment to delivering superior sound quality and advanced technology. Released as part of Pioneer's flagship series, the VSX-39TX is designed for audiophiles and home theater enthusiasts seeking an immersive entertainment experience.

One of the standout features of the VSX-39TX is its robust amplification system. It boasts a 7.1-channel configuration that delivers powerful and clear audio across multiple channels. With a total power output of 110 watts per channel, this receiver is capable of driving a wide range of speakers, ensuring an engaging listening experience whether you're enjoying music or diving into a cinematic film.

The VSX-39TX also supports various audio formats, including Dolby Digital EX, DTS-ES, and the latest Dolby TrueHD and DTS-HD Master Audio. This extensive surround sound support allows for a truly immersive audio experience. The receiver’s advanced audio processing technology helps in accurately decoding these formats, ensuring that the sound is not only powerful but also precise and detailed.

Another significant aspect of the Pioneer VSX-39TX is its video capabilities. The receiver features multiple HDMI inputs, supporting 1080p video resolution and providing a complete connection solution for high-definition devices. Its integrated video upscaling feature enhances lower resolution content, allowing users to enjoy their entire media library at the highest quality possible.

The VSX-39TX also emphasizes flexibility with its extensive connectivity options. In addition to HDMI, it includes composite and component video inputs, making it compatible with a variety of source devices. Furthermore, the receiver features a built-in AM/FM tuner and is equipped with a direct-access port for digital audio input, providing versatility for users.

To enhance user experience, the VSX-39TX comes with a well-designed remote control and an intuitive on-screen display, allowing for easy navigation through the setup process and adjustment of settings. The receiver also supports Pioneer's Multi-Room function, enabling audio playback in different zones of the home.

In summary, the Pioneer VSX-39TX stands out with its combination of powerful amplification, extensive surround sound support, and versatile connectivity options. Its commitment to delivering high-quality audio and video makes it a formidable choice for anyone looking to elevate their home entertainment system. Whether you are listening to music or watching movies, the VSX-39TX is built to provide a captivating audio-visual experience.