Pioneer VSX-72TXV, VSX-74TXVI manual Bi-amping your front speakers, Switching the speaker system

Models: VSX-72TXV VSX-74TXVi-S VSX-72TXV-S VSX-74TXVI

1 88
Download 88 pages 61.46 Kb
Page 53
Image 53

Other connections

After selecting 2nd Zone in Surround back speaker setting on page 34, you can use the speakers connected to the (surround back) B speaker terminals on the rear panel to listen to stereo playback in another room. See Switching the speaker system below for the listening options with this setup.

1Connect a pair of speakers to the surround back speaker terminals on the rear panel.

Connect them the same way you connected your speakers in Installing your speaker system on page 17. Make sure to review Placing the speakers on page 18 when placing the speakers in another room.

2Select ‘2nd Zone’ from the ‘Surr Back System’ menu. See Surround back speaker setting on page 34 to do this.

Switching the speaker system

If you selected 2nd Zone in Surround back speaker setting on page 34, three speaker system settings are possible using the SPEAKERS button. If you selected Normal (SB) or Front Bi-Amp, the button will simply switch your main speaker system on or off. The options below are for the

08

Bi-amping your front speakers

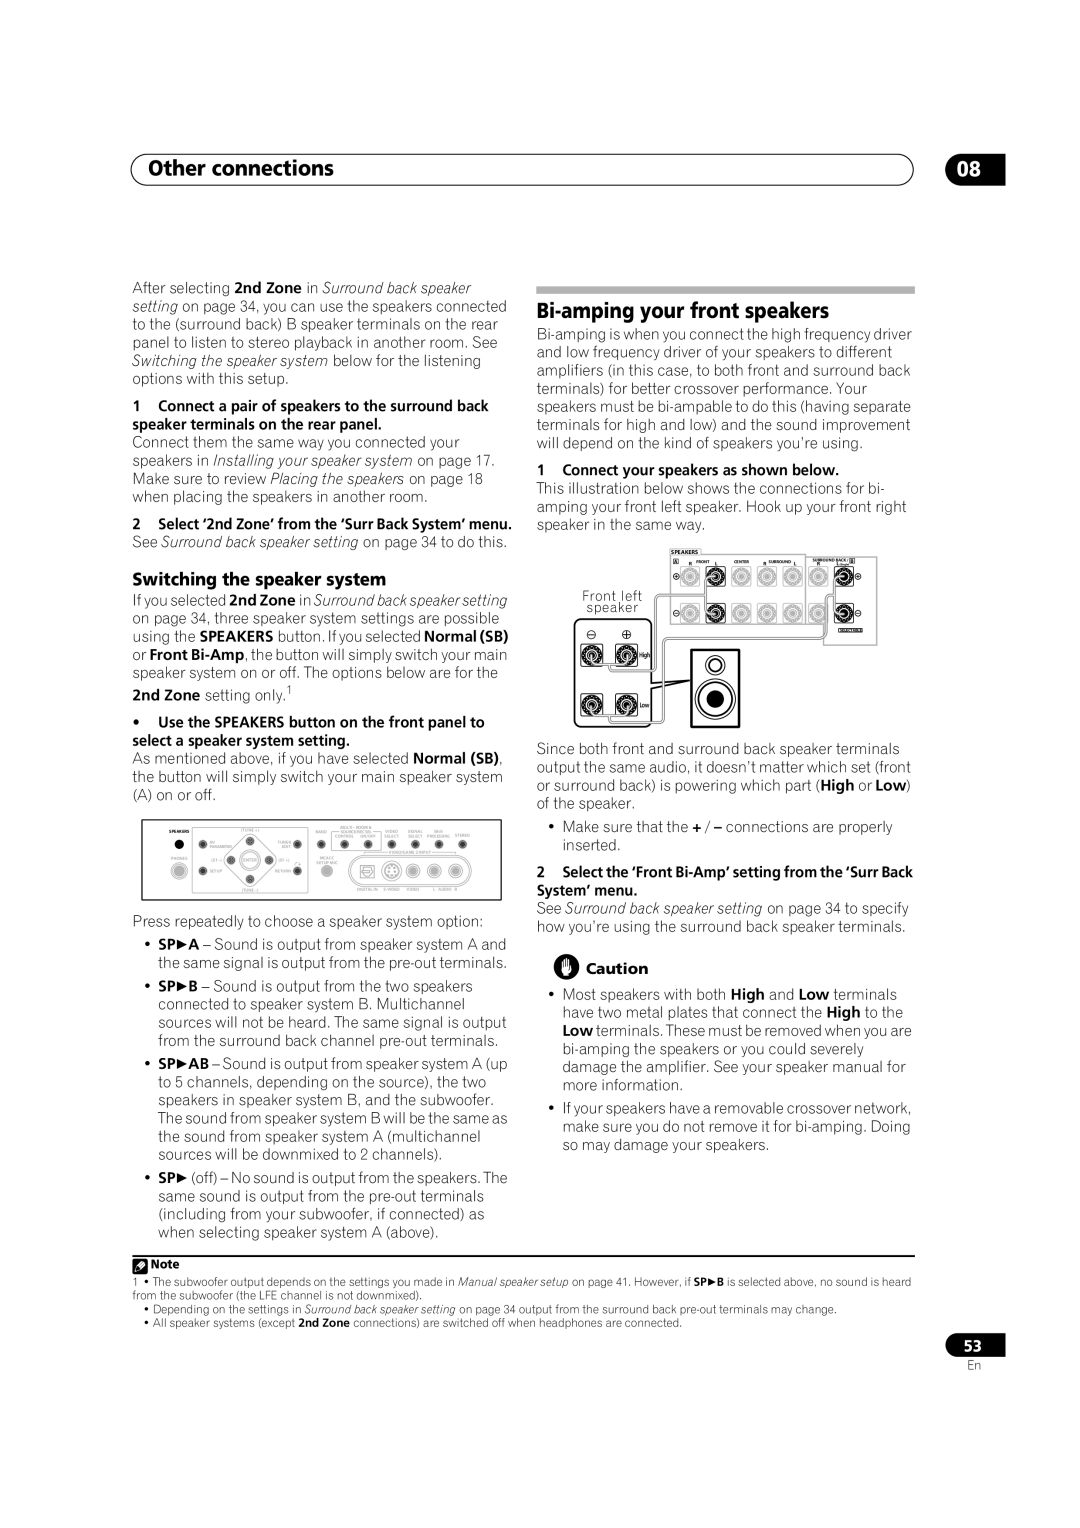
Bi-amping is when you connect the high frequency driver and low frequency driver of your speakers to different amplifiers (in this case, to both front and surround back terminals) for better crossover performance. Your speakers must be bi-ampable to do this (having separate terminals for high and low) and the sound improvement will depend on the kind of speakers you’re using.

1 Connect your speakers as shown below.

This illustration below shows the connections for bi- amping your front left speaker. Hook up your front right speaker in the same way.

SPEAKERS


A

R

FRONT

L

CENTER

R

SURROUND

L

SURROUND BACK / B


R

L(Single)

Front left


speaker


SELECTABLE

High

2nd Zone setting only.1

Use the SPEAKERS button on the front panel to select a speaker system setting.

As mentioned above, if you have selected Normal (SB), the button will simply switch your main speaker system

(A) on or off.

SPEAKERS


(TUNE +)


BAND

MULTI – ROOM &

VIDEO

SIGNAL

SBch


SOURCE/REC SEL

STEREO


CONTROL ON/OFF

SELECT

SELECT

PROCESSING


AV


TUNER


PARAMETER


EDIT


VIDEO/GAME 2 INPUT


PHONES

(ST –)

ENTER

(ST +)

MCACC


SETUP MIC


SETUP


RETURN


(TUNE –)


DIGITAL IN

S-VIDEO

VIDEO

L AUDIO

R

Press repeatedly to choose a speaker system option:

SP A – Sound is output from speaker system A and the same signal is output from the pre-out terminals.

SP B – Sound is output from the two speakers connected to speaker system B. Multichannel sources will not be heard. The same signal is output from the surround back channel pre-out terminals.

SP AB – Sound is output from speaker system A (up to 5 channels, depending on the source), the two speakers in speaker system B, and the subwoofer. The sound from speaker system B will be the same as the sound from speaker system A (multichannel sources will be downmixed to 2 channels).

SP (off) – No sound is output from the speakers. The same sound is output from the pre-out terminals (including from your subwoofer, if connected) as when selecting speaker system A (above).

Low

Since both front and surround back speaker terminals output the same audio, it doesn’t matter which set (front or surround back) is powering which part (High or Low) of the speaker.

Make sure that the + / connections are properly inserted.

2Select the ‘Front Bi-Amp’ setting from the ‘Surr Back System’ menu.

See Surround back speaker setting on page 34 to specify how you’re using the surround back speaker terminals.

Caution

Most speakers with both High and Low terminals have two metal plates that connect the High to the Low terminals. These must be removed when you are bi-amping the speakers or you could severely damage the amplifier. See your speaker manual for more information.

If your speakers have a removable crossover network, make sure you do not remove it for bi-amping. Doing so may damage your speakers.

Note

1 • The subwoofer output depends on the settings you made in Manual speaker setup on page 41. However, if SP B is selected above, no sound is heard from the subwoofer (the LFE channel is not downmixed).

Depending on the settings in Surround back speaker setting on page 34 output from the surround back pre-out terminals may change.

All speaker systems (except 2nd Zone connections) are switched off when headphones are connected.

53

En

Page 53
Image 53
Pioneer VSX-72TXV manual Bi-amping your front speakers, Switching the speaker system, Connect your speakers as shown below