08Other connections

Connecting a PC for Advanced MCACC output

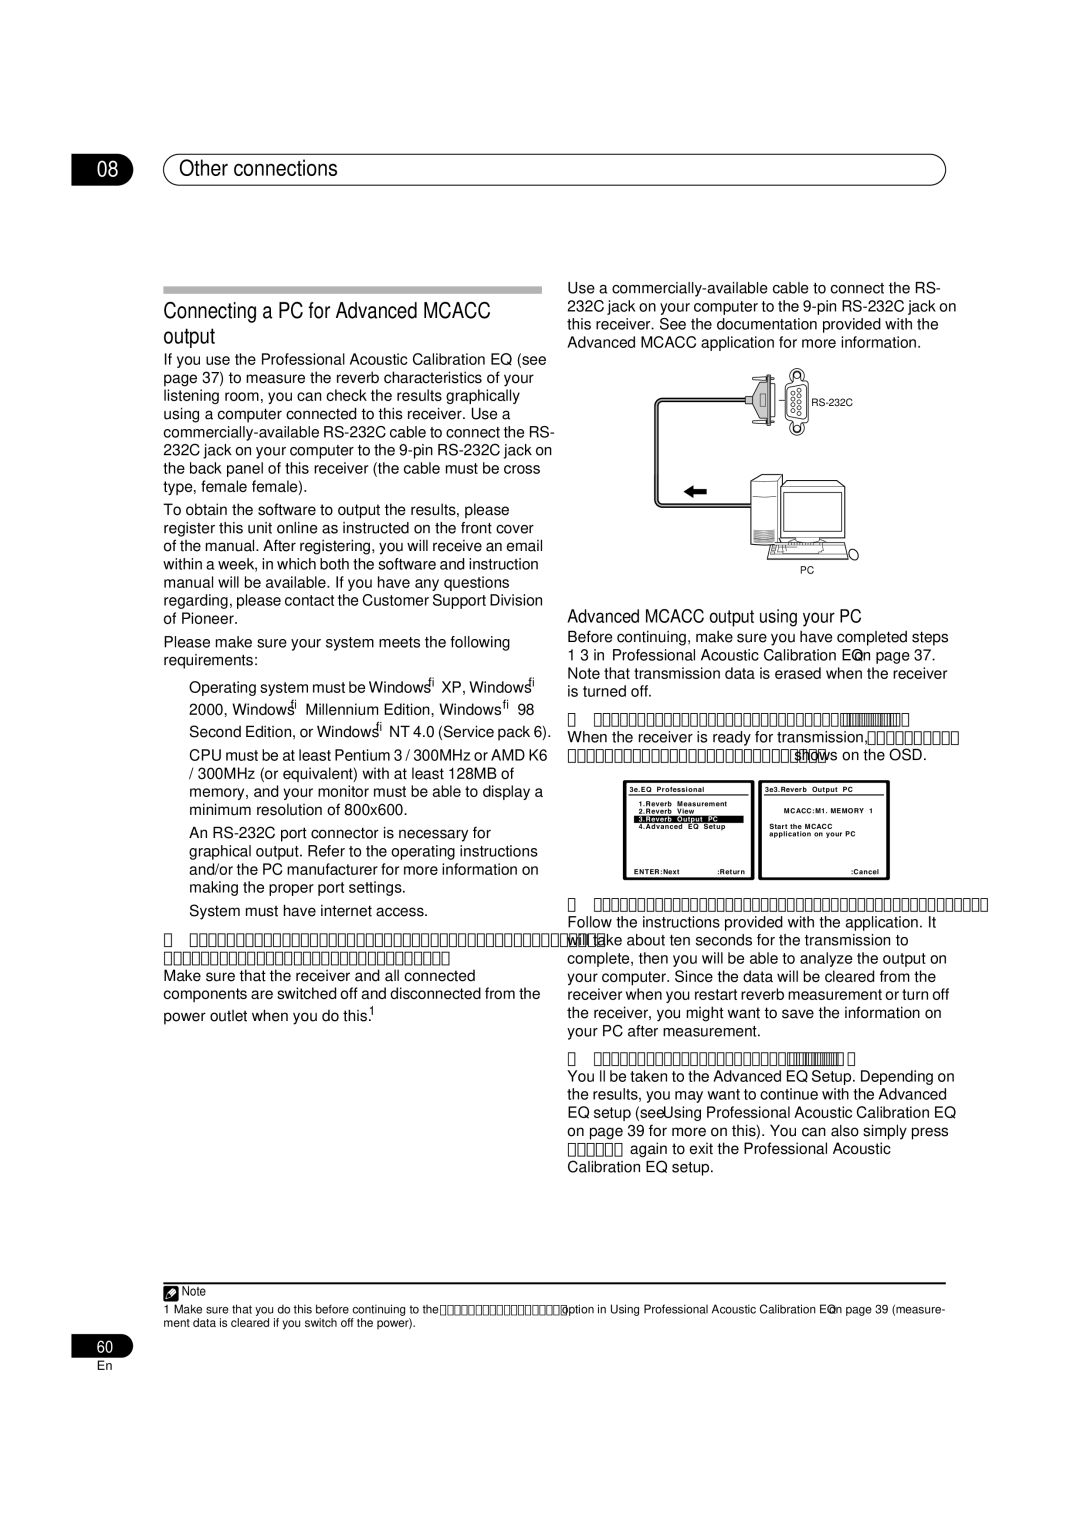
If you use the Professional Acoustic Calibration EQ (see page 37) to measure the reverb characteristics of your listening room, you can check the results graphically using a computer connected to this receiver. Use a commercially-available RS-232C cable to connect the RS- 232C jack on your computer to the 9-pin RS-232C jack on the back panel of this receiver (the cable must be cross type, female–female).

To obtain the software to output the results, please register this unit online as instructed on the front cover of the manual. After registering, you will receive an email within a week, in which both the software and instruction manual will be available. If you have any questions regarding, please contact the Customer Support Division of Pioneer.

Please make sure your system meets the following requirements:

Operating system must be Windows® XP, Windows® 2000, Windows® Millennium Edition, Windows® 98 Second Edition, or Windows® NT 4.0 (Service pack 6).

CPU must be at least Pentium 3 / 300MHz or AMD K6 / 300MHz (or equivalent) with at least 128MB of memory, and your monitor must be able to display a minimum resolution of 800x600.

An RS-232C port connector is necessary for graphical output. Refer to the operating instructions and/or the PC manufacturer for more information on making the proper port settings.

System must have internet access.

Connect your computer to the RS-232C jack on the rear panel of the receiver.

Make sure that the receiver and all connected components are switched off and disconnected from the power outlet when you do this.1

Use a commercially-available cable to connect the RS- 232C jack on your computer to the 9-pin RS-232C jack on this receiver. See the documentation provided with the Advanced MCACC application for more information.

RS-232C

PC

Advanced MCACC output using your PC

Before continuing, make sure you have completed steps 1–3 in Professional Acoustic Calibration EQ on page 37. Note that transmission data is erased when the receiver is turned off.

1Select ‘Reverb Output PC’ and press ENTER. When the receiver is ready for transmission, Start the MCACC application on your PC shows on the OSD.


3e.EQ Professional


3e3.Reverb Output PC


1.Reverb

Measurement


MCACC:M1. MEMORY 1


2.Reverb

View


3.Reverb

Output

PC


Start the MCACC


4.Advanced EQ

Setup


application on your PC


ENTER:Next

:Return


:Cancel


2Start the MCACC application on your computer. Follow the instructions provided with the application. It will take about ten seconds for the transmission to complete, then you will be able to analyze the output on your computer. Since the data will be cleared from the receiver when you restart reverb measurement or turn off the receiver, you might want to save the information on your PC after measurement.

3When you’re finished, press RETURN.

You’ll be taken to the Advanced EQ Setup. Depending on the results, you may want to continue with the Advanced EQ setup (see Using Professional Acoustic Calibration EQ on page 39 for more on this). You can also simply press RETURN again to exit the Professional Acoustic Calibration EQ setup.

Note

1Make sure that you do this before continuing to the Reverb Measurement option in Using Professional Acoustic Calibration EQ on page 39 (measure- ment data is cleared if you switch off the power).

60

En

Page 60
Image 60
Pioneer VSX-74TXVI manual Other connections Connecting a PC for Advanced Mcacc output, Advanced Mcacc output using your PC

VSX-72TXV, VSX-74TXVi-S, VSX-72TXV-S, VSX-74TXVI specifications

The Pioneer VSX-74TXVi and VSX-72TXV series are renowned for their exceptional sound quality and versatile features, making them a popular choice among audio enthusiasts and home theater aficionados. These models stand out for their advanced technologies and comprehensive functionalities, catering to both music and movie lovers.

The VSX-74TXVi is a high-performance receiver that supports a wide range of audio formats and provides impressive connectivity options. One of its main features is the incorporation of Dolby TrueHD and DTS-HD Master Audio decoding, allowing users to experience studio-quality sound. The model also supports multi-channel audio setups, making it ideal for immersive 7.1 surround sound environments. The Automatic MCACC (Multi-Channel Acoustic Calibration System) optimizes the sound based on the room's acoustic characteristics, enhancing the overall listening experience.

On the other hand, the VSX-72TXV-S offers many similar features but focuses on delivering high-definition audio and video. With support for HDMI inputs, it facilitates easy switching between multiple HD sources while maintaining top-notch audio quality. The inclusion of 1080p video upscaling allows users to enjoy standard-definition content in much higher resolutions, enhancing picture clarity for a better viewing experience.

Both models boast Zone 2 and Zone 3 capabilities, enabling audio distribution to different areas of a home, thus providing flexibility for playing music in various rooms. They also feature a user-friendly interface with an on-screen display, allowing users to navigate through options with ease.

In addition to robust audio performance, these Pioneers are designed with a focus on aesthetic appeal and durability. Their sleek designs make them an elegant addition to any entertainment setup. The VSX-74TXVi and VSX-72TXV also include built-in amplifier technologies, ensuring efficient power delivery and reliable performance over extended periods.

The VSX series exemplifies Pioneer's commitment to quality and innovation, providing features that enhance the home entertainment experience while ensuring compatibility with modern technologies. Overall, these models embody a combination of versatility, high fidelity, and user-friendly functionality, making them standout choices for any home theater system.