Controlling the rest of your system

11

4Point the two remote controls towards each other then press the button that will be doing the learning on this receiver’s remote control.

PRES KEY starts flashing to indicate the remote is ready to accept a signal.

The remote controls should be 1–2 inches apart.

1 – 2 inches

5Press the corresponding button on the other remote control that is sending (teaching) the signal to this receiver’s remote control.

For example, if you want to learn the playback control

signal, press and hold briefly. The LCD display will show OK if the operation has been learned.1

If for some reasons the operation hasn’t been learned the LCD will display ERROR briefly and then display PRES KEY again. If this happens, keep pressing the (teaching) button as you vary the distance between the two remotes,

until the LCD display shows OK.2

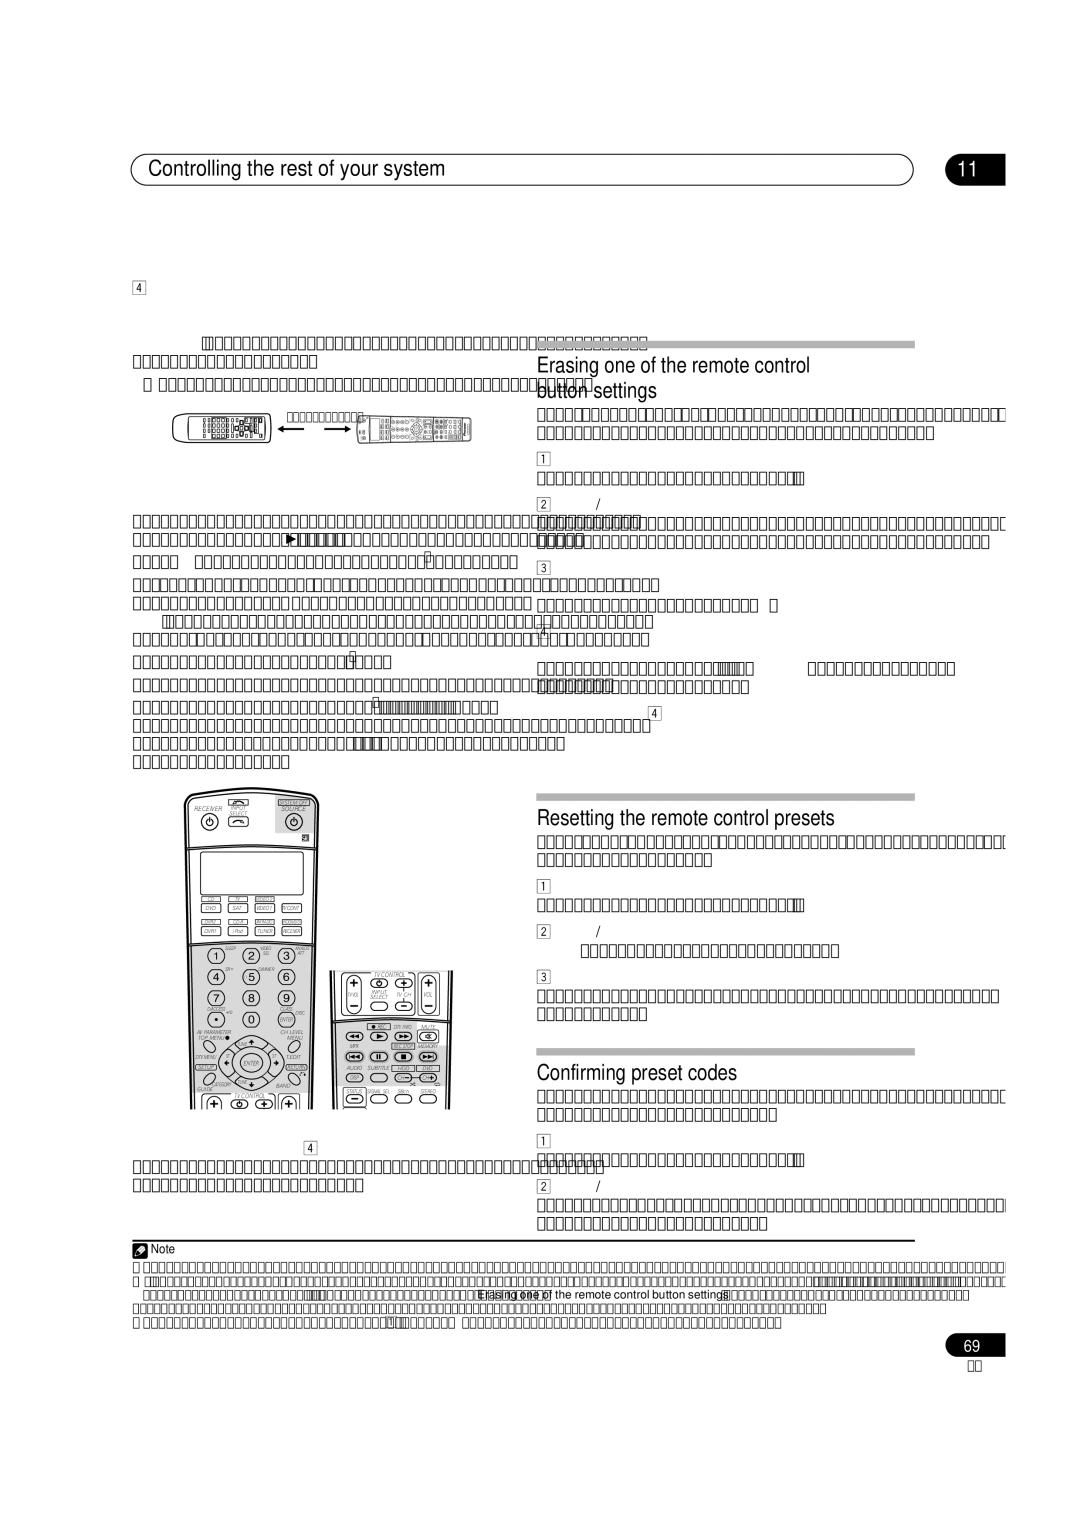
Certain buttons represent operations that cannot be

learned from other remote controls.3 The buttons available are shown below (with the exception of the TV controls, a combination of SHIFT and these buttons can also be learned):

RECEIVER INPUT

SYSTEM OFF

SOURCE

SELECT


7Press and hold the RECEIVER button for a couple of seconds to exit and store the operation(s).

Erasing one of the remote control button settings

This erases one of the buttons you have programmed and restores the button to the factory default.

1While pressing the RECEIVER button, press SETUP. The remote LCD display shows SETUP.

2 Use to select ERASE then press ENTER.

The LCD on the remote prompts you for the component corresponding to the button setting to be erased.

3Press the input source button corresponding to the command to be erased then press ENTER.

The LCD display flashes PRES KEY.

4Press and hold the button to be erased for two seconds.

The LCD display shows OK or NO CODE to confirm the button has been erased.

5Repeat step 4 to erase other buttons.

6Press and hold the RECEIVER button for a couple of seconds when you’re done.

Resetting the remote control presets


CD


TV


VIDEO 2


DVD


SAT


VIDEO1


TVCONT


DVR2


CD-R


XMRADIO


ROOM2/3

This will erase all preset remote control preset codes and programmed buttons.

1While pressing the RECEIVER button, press SETUP. The remote LCD display shows SETUP.

DVR1

iPod

TUNER

RECEIVER


SLEEP

VIDEO

ANALOG


SEL

ATT


SR+

DIMMER


TV CONTROL


TV VOL

INPUT

TV CH

VOL


SELECT


D.ACCESS

+10


CLASS


DISC


ENTER


AVPARAMETER


CH LEVEL


REC

DTV INFO

MUTE


TOP MENU


MENU


TUNE


MPX


REC STOP

MEMORY


DTVMENU

ST

ST

T.EDIT


SETUP

ENTER

RETURN

AUDIO

SUBTITLE

HDD

DVD


CATEGORY TUNE


DISP


CH

CH

BAND


GUIDE


STATUS

SIGNAL SEL

SBch

STEREO

TV CONTROL

6To program additional signals for the current component repeat steps 4 and 5.

To program signals for another component, exit and repeat steps 1 through 5.

2 Use to select RESET then press ENTER.

RESET flashes in the LCD display.

3Press and hold ENTER for about two seconds. The LCD shows OK to confirm the remote presets have been erased.

Confirming preset codes

Use this feature to check which preset code is assigned to an input source button.

1While pressing the RECEIVER button, press SETUP. The remote LCD display shows SETUP.

2 Use to select READ ID then press ENTER.

The LCD on the remote prompts you for the input source button you want to check.

Note

1 Note that interference from TVs or other devices will sometimes result in the remote control learning the wrong signal.

2• Some commands from other remote controls cannot be learned, but in most cases the remotes just need to be moved closer together or farther apart.

If the remote LCD shows FULL, it means the memory is full. See Erasing one of the remote control button settings below to erase a programmed button you’re not using to free up more memory (note that some signals may take more memory than others).

3Note that the number key decimal button (+10/D.ACCESS) may not be learned with some components.

69

En

Page 69
Image 69
Pioneer VSX-72TXV, VSX-74TXVI manual Controlling the rest of your system, Erasing one of the remote control button settings

VSX-72TXV, VSX-74TXVi-S, VSX-72TXV-S, VSX-74TXVI specifications

The Pioneer VSX-74TXVi and VSX-72TXV series are renowned for their exceptional sound quality and versatile features, making them a popular choice among audio enthusiasts and home theater aficionados. These models stand out for their advanced technologies and comprehensive functionalities, catering to both music and movie lovers.

The VSX-74TXVi is a high-performance receiver that supports a wide range of audio formats and provides impressive connectivity options. One of its main features is the incorporation of Dolby TrueHD and DTS-HD Master Audio decoding, allowing users to experience studio-quality sound. The model also supports multi-channel audio setups, making it ideal for immersive 7.1 surround sound environments. The Automatic MCACC (Multi-Channel Acoustic Calibration System) optimizes the sound based on the room's acoustic characteristics, enhancing the overall listening experience.

On the other hand, the VSX-72TXV-S offers many similar features but focuses on delivering high-definition audio and video. With support for HDMI inputs, it facilitates easy switching between multiple HD sources while maintaining top-notch audio quality. The inclusion of 1080p video upscaling allows users to enjoy standard-definition content in much higher resolutions, enhancing picture clarity for a better viewing experience.

Both models boast Zone 2 and Zone 3 capabilities, enabling audio distribution to different areas of a home, thus providing flexibility for playing music in various rooms. They also feature a user-friendly interface with an on-screen display, allowing users to navigate through options with ease.

In addition to robust audio performance, these Pioneers are designed with a focus on aesthetic appeal and durability. Their sleek designs make them an elegant addition to any entertainment setup. The VSX-74TXVi and VSX-72TXV also include built-in amplifier technologies, ensuring efficient power delivery and reliable performance over extended periods.

The VSX series exemplifies Pioneer's commitment to quality and innovation, providing features that enhance the home entertainment experience while ensuring compatibility with modern technologies. Overall, these models embody a combination of versatility, high fidelity, and user-friendly functionality, making them standout choices for any home theater system.