06Using the tuner

Chapter 6:

Using the tuner

Listening to the radio

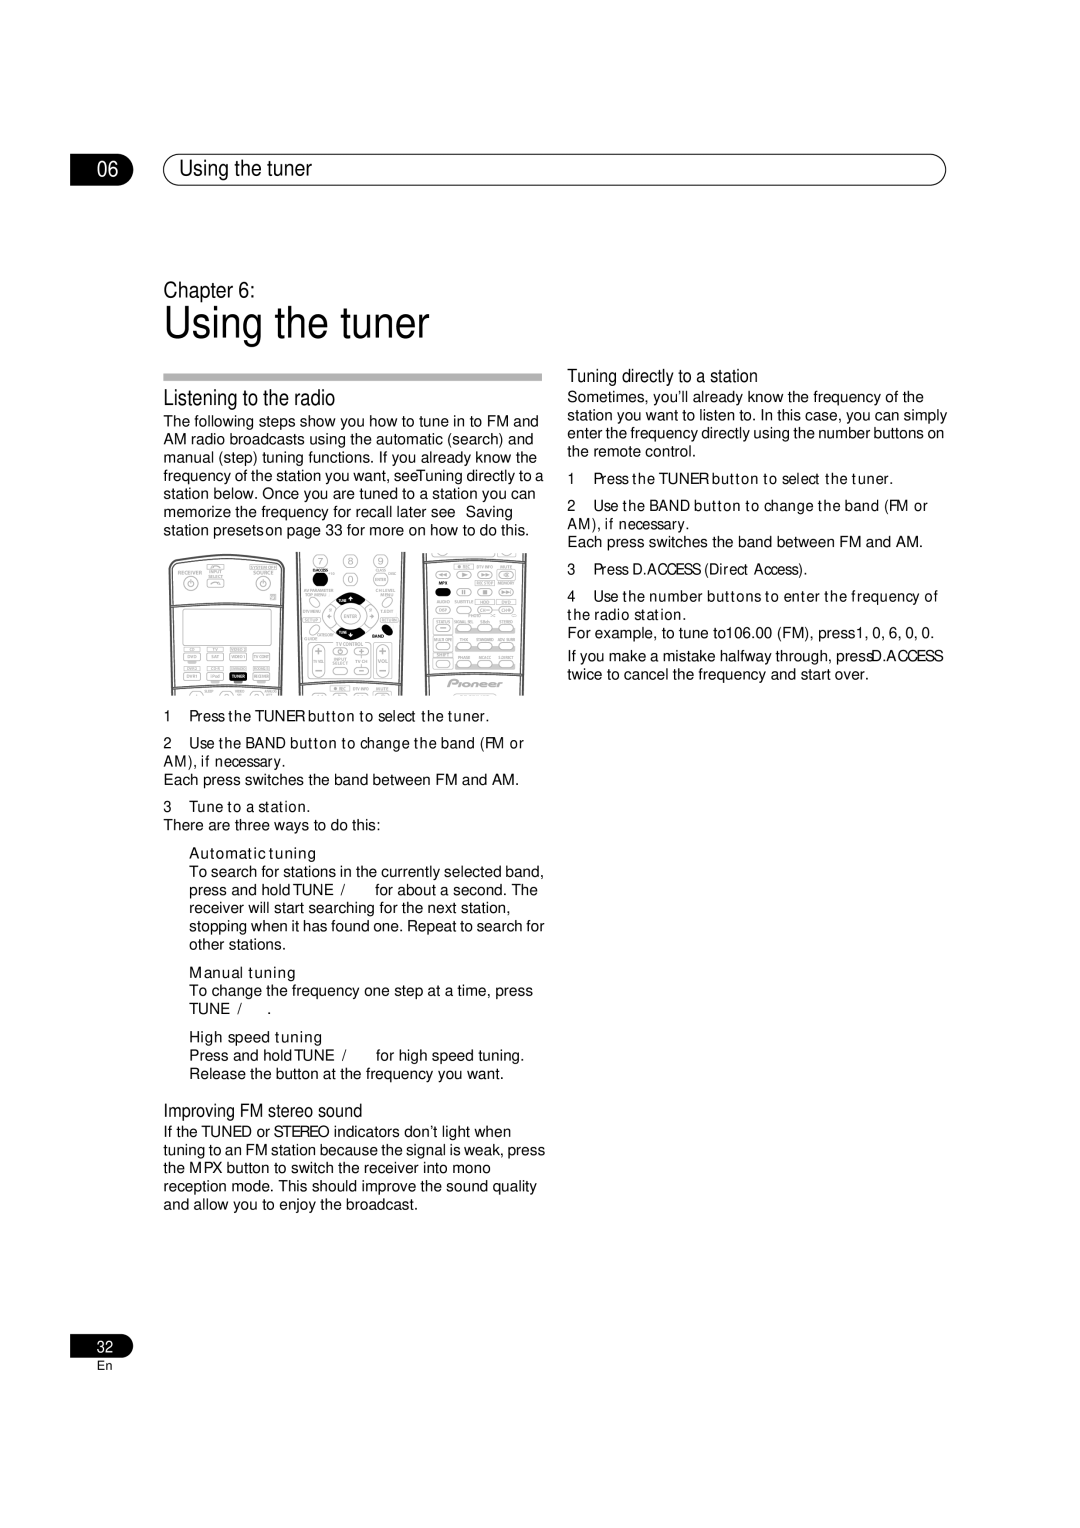
The following steps show you how to tune in to FM and AM radio broadcasts using the automatic (search) and manual (step) tuning functions. If you already know the frequency of the station you want, see Tuning directly to a station below. Once you are tuned to a station you can memorize the frequency for recall later—see Saving station presets on page 33 for more on how to do this.


INPUT


SYSTEM OFF

D.ACCESS


CLASS


REC

DTV INFO

MUTE

RECEIVER


SOURCE


+10


DISC


SELECT


ENTER


MPX


REC STOP

MEMORY


AV PARAMETER


CH LEVEL


TOP MENU


MENU


TUNE


AUDIO

SUBTITLE

HDD

DVD


DTVMENU

ST


ST T.EDIT

DISP


CH

CH


SETUP


ENTER

RETURN


PHOTO


STATUS

SIGNAL SEL

SBch

STEREO


CATEGORY

TUNE


BAND


MULTI OPE

THX

STANDARD

ADV. SURR


GUIDE


TV CONTROL


CD

TV

VIDEO 2


DVD

SAT

VIDEO1

TVCONT

TV VOL

INPUT

TV CH

VOL

SHIFT

PHASE

MCACC

S.DIRECT


SELECT


DVR2

CD-R

XMRADIO

ROOM2/3


DVR1

i Pod

TUNER

RECEIVER


SLEEP

VIDEO

ANALOG


REC

DTV INFO

MUTE


SEL

ATT


RECEIVER


1Press the TUNER button to select the tuner.

2Use the BAND button to change the band (FM or AM), if necessary.

Each press switches the band between FM and AM.

3Tune to a station.

There are three ways to do this:

Automatic tuning

To search for stations in the currently selected band,

press and hold TUNE for about a second. The receiver will start searching for the next station, stopping when it has found one. Repeat to search for other stations.

Manual tuning

To change the frequency one step at a time, press

TUNE .

High speed tuning

Press and hold TUNE for high speed tuning. Release the button at the frequency you want.

Improving FM stereo sound

If the TUNED or STEREO indicators don't light when tuning to an FM station because the signal is weak, press the MPX button to switch the receiver into mono reception mode. This should improve the sound quality and allow you to enjoy the broadcast.

32

Tuning directly to a station

Sometimes, you'll already know the frequency of the station you want to listen to. In this case, you can simply enter the frequency directly using the number buttons on the remote control.

1Press the TUNER button to select the tuner.

2Use the BAND button to change the band (FM or AM), if necessary.

Each press switches the band between FM and AM.

3Press D.ACCESS (Direct Access).

4Use the number buttons to enter the frequency of the radio station.

For example, to tune to 106.00 (FM), press 1, 0, 6, 0, 0.

If you make a mistake halfway through, press D.ACCESS twice to cancel the frequency and start over.

En

Page 32
Image 32
Pioneer VSX-84TXSI, VSX-82TXS-S manual Using the tuner Chapter, Listening to the radio, Improving FM stereo sound

VSX-84TXSi-S, VSX-82TXS, VSX-82TXS-S, VSX-84TXSI specifications

The Pioneer VSX-84TXSi, VSX-82TXS, VSX-84TXSi-S, and VSX-82TXS are part of Pioneer's renowned lineup of home theater receivers, notable for their impressive audio capabilities and advanced features. Designed for enthusiasts who appreciate high-quality sound, these receivers stand out in the crowded market of A/V receivers.

The VSX-84TXSi and VSX-84TXSi-S come equipped with a robust 7.1-channel amplifier configuration, delivering a powerful output that ensures dynamic and immersive audio experience. Both models boast Pioneer's sophisticated Class D3 amplification technology, which efficiently provides high power output while minimizing distortion and heat. This feature allows listeners to enjoy their favorite music and movies with clarity and depth.

One standout feature of these receivers is the Advanced MCACC (Multi-Channel Acoustic Calibration System) technology. This automatically adjusts the speaker settings to fit the unique acoustics of the room, ensuring balanced sound across all channels. The calibration process is user-friendly, allowing even novice users to achieve optimal sound performance.

In terms of connectivity, the VSX-84TXSi and VSX-82TXS are equipped with multiple HDMI inputs, supporting the latest audio and video formats, including 4K Ultra HD. They also support Dolby TrueHD and DTS-HD Master Audio, which deliver lossless audio quality for a truly cinematic experience at home.

The VSX-84TXSi and VSX-82TXS models feature a user-friendly interface that includes on-screen displays and intuitive controls. They also offer extensive compatibility with various formats, including MP3, WMA, and AAC. For those who want to stream their music, both models have built-in support for networking capabilities, allowing users to connect to their home network and stream content from devices seamlessly.

The VSX-82TXS, while slightly less powerful than the VSX-84TXSi, offers many features that appeal to casual users and audiophiles alike. It retains the same high-quality audio processing and supports a variety of surround sound formats, making it a versatile choice for different media types.

Overall, the Pioneer VSX-84TXSi, VSX-82TXS, VSX-84TXSi-S, and VSX-82TXS are excellent choices for anyone looking to enhance their home entertainment experience. With a blend of advanced technology, impressive audio performance, and user-friendly features, these receivers continue to be favored options for home theater setups.