The System Setup menu

07

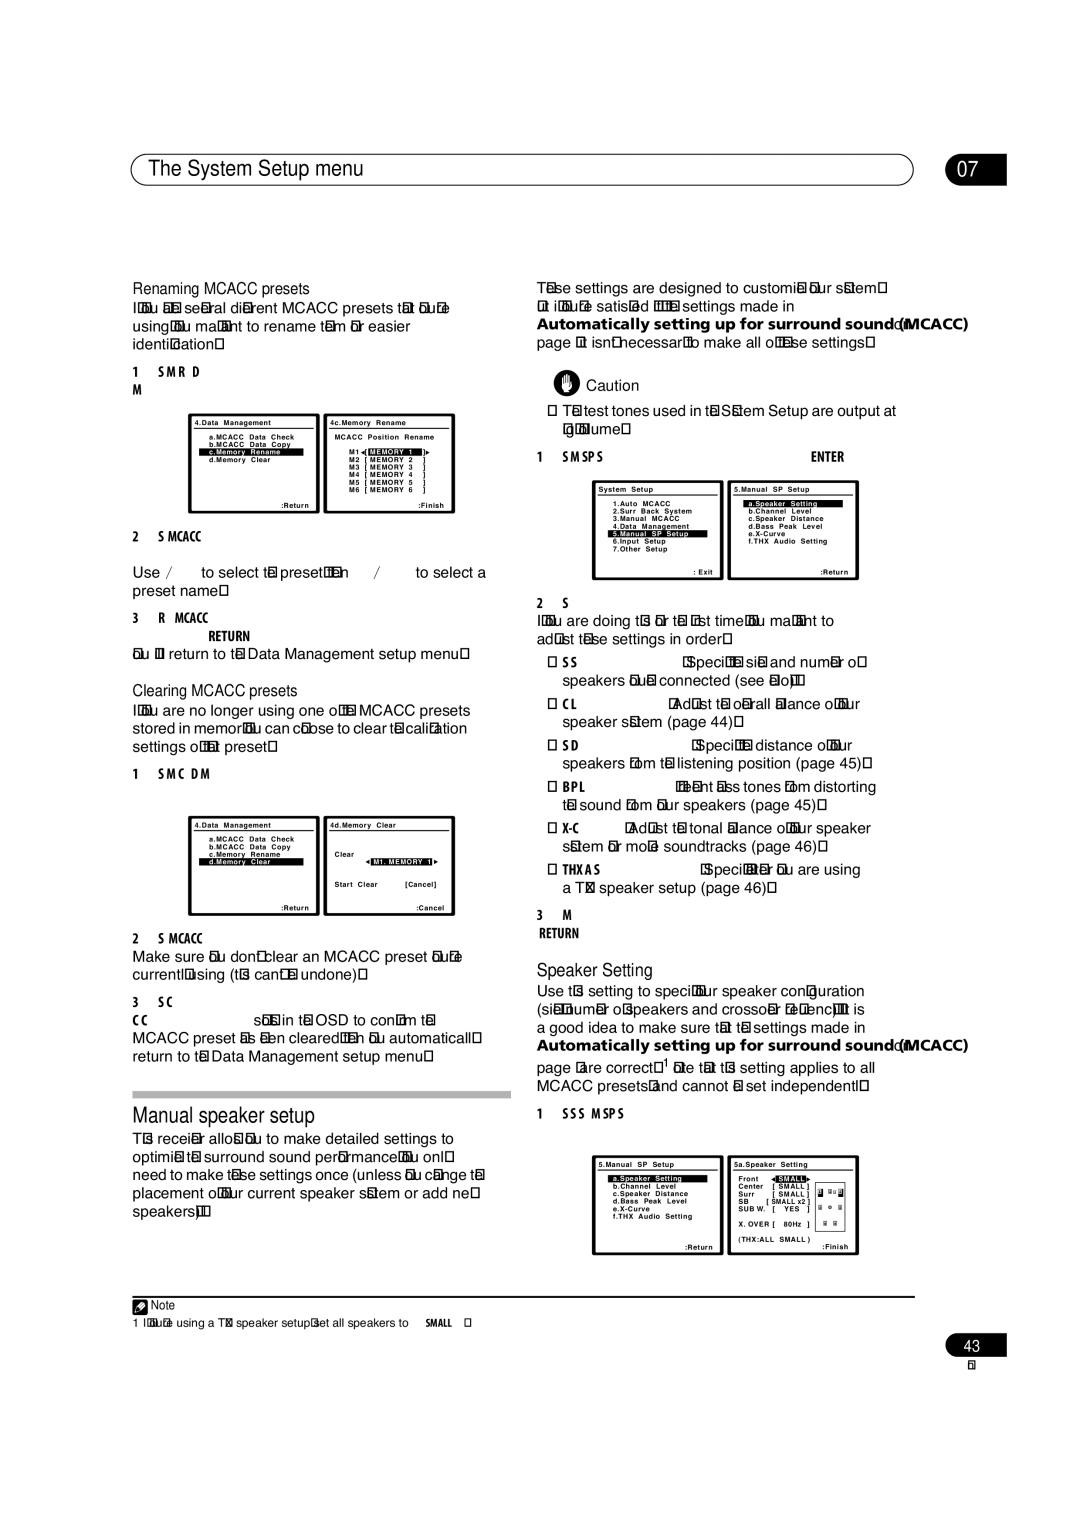
Renaming MCACC presets

If you have several different MCACC presets that you’re using, you may want to rename them for easier identification.

1Select ‘Memory Rename’ from the Data Management setup menu.

4.Data Management


4c.Memory Rename


a.MCACC

Data

Check


MCACC

Position

Rename


b.MCACC

Data

Copy


M1

[


]


c.Memory

Rename


MEMORY

1


d.Memory

Clear


M2

[

MEMORY

2

]


M3

[ MEMORY 3

]


M4

[ MEMORY 4

]


M5

[ MEMORY 5

]


M6

[ MEMORY 6

]


:Return


:Finish

2Select the MCACC preset you want to rename, then select an appropriate preset name.

Use

to select the preset, then

to select a

preset name.


3Repeat for as many MCACC presets as necessary, then press RETURN when you're finished.

You will return to the Data Management setup menu.

Clearing MCACC presets

If you are no longer using one of the MCACC presets stored in memory, you can choose to clear the calibration settings of that preset.

1Select ‘Memory Clear’ from the Data Management setup menu.

4.Data Management


4d.Memory Clear


a.MCACC

Data

Check


b.MCACC

Data

Copy


c.Memory

Rename


Clear


d.Memory

Clear


M1. MEMORY 1


Start Clear

[Cancel]


:Return


:Cancel

2Select the MCACC preset you want to clear. Make sure you don’t clear an MCACC preset you’re currently using (this can’t be undone).

3Select ‘Clear’ to confirm and clear the preset. Clear Complete! shows in the OSD to confirm the MCACC preset has been cleared, then you automatically return to the Data Management setup menu.

These settings are designed to customize your system, but if you’re satisfied with the settings made in Automatically setting up for surround sound (MCACC) on page 7, it isn’t necessary to make all of these settings.

Caution

• The test tones used in the System Setup are output at high volume.

1 Select ‘Manual SP Setup’ then press ENTER.

System Setup


5.Manual SP

Setup


1.Auto

MCACC


a.Speaker

Setting


2.Surr

Back System


b.Channel

Level


3.Manual MCACC


c.Speaker

Distance


4.Data

Management


d.Bass Peak

Level


5.Manual SP Setup


e.X-Curve


6.Input

Setup


f.THX Audio

Setting


7.Other

Setup


: Exit


:Return

2 Select the setting you want to adjust.

If you are doing this for the first time, you may want to adjust these settings in order:

Speaker Setting – Specify the size and number of speakers you’ve connected (see below).

Channel Level – Adjust the overall balance of your speaker system (page 44).

Speaker Distance – Specify the distance of your speakers from the listening position (page 45).

Bass Peak Level – Prevent bass tones from distorting the sound from your speakers (page 45).

X-Curve– Adjust the tonal balance of your speaker system for movie soundtracks (page 46).

THX Audio Setting – Specify whether you are using a THX speaker setup (page 46).

3Make the adjustments necessary for each setting, pressing RETURN to confirm after each screen.

Speaker Setting

Use this setting to specify your speaker configuration (size, number of speakers and crossover frequency). It is a good idea to make sure that the settings made in Automatically setting up for surround sound (MCACC) on

page 7 are correct.1 Note that this setting applies to all MCACC presets, and cannot be set independently.

Manual speaker setup

This receiver allows you to make detailed settings to optimize the surround sound performance. You only need to make these settings once (unless you change the placement of your current speaker system or add new speakers.).

1Select ‘Speaker Setting’ from the Manual SP Setup menu.

5.Manual SP

Setup


5a.Speaker

Setting


Front


a.Speaker

Setting


SMALL


b.Channel

Level


Center

[

SMALL

]


c.Speaker

Distance


Surr

[ SMALL ]


d.Bass Peak

Level


SB

[ SMALL x2 ]


e.X-Curve


SUB W.

[

YES

]


f.THX Audio

Setting


X. OVER [

80Hz

]


(THX:ALL

SMALL )


:Return


:Finish

Note

1 If you’re using a THX speaker setup, set all speakers to SMALL.

43

En

Page 43
Image 43
Pioneer VSX-84TXSi-S, VSX-84TXSI Manual speaker setup, Speaker Setting, Renaming Mcacc presets, Clearing Mcacc presets

VSX-84TXSi-S, VSX-82TXS, VSX-82TXS-S, VSX-84TXSI specifications

The Pioneer VSX-84TXSi, VSX-82TXS, VSX-84TXSi-S, and VSX-82TXS are part of Pioneer's renowned lineup of home theater receivers, notable for their impressive audio capabilities and advanced features. Designed for enthusiasts who appreciate high-quality sound, these receivers stand out in the crowded market of A/V receivers.

The VSX-84TXSi and VSX-84TXSi-S come equipped with a robust 7.1-channel amplifier configuration, delivering a powerful output that ensures dynamic and immersive audio experience. Both models boast Pioneer's sophisticated Class D3 amplification technology, which efficiently provides high power output while minimizing distortion and heat. This feature allows listeners to enjoy their favorite music and movies with clarity and depth.

One standout feature of these receivers is the Advanced MCACC (Multi-Channel Acoustic Calibration System) technology. This automatically adjusts the speaker settings to fit the unique acoustics of the room, ensuring balanced sound across all channels. The calibration process is user-friendly, allowing even novice users to achieve optimal sound performance.

In terms of connectivity, the VSX-84TXSi and VSX-82TXS are equipped with multiple HDMI inputs, supporting the latest audio and video formats, including 4K Ultra HD. They also support Dolby TrueHD and DTS-HD Master Audio, which deliver lossless audio quality for a truly cinematic experience at home.

The VSX-84TXSi and VSX-82TXS models feature a user-friendly interface that includes on-screen displays and intuitive controls. They also offer extensive compatibility with various formats, including MP3, WMA, and AAC. For those who want to stream their music, both models have built-in support for networking capabilities, allowing users to connect to their home network and stream content from devices seamlessly.

The VSX-82TXS, while slightly less powerful than the VSX-84TXSi, offers many features that appeal to casual users and audiophiles alike. It retains the same high-quality audio processing and supports a variety of surround sound formats, making it a versatile choice for different media types.

Overall, the Pioneer VSX-84TXSi, VSX-82TXS, VSX-84TXSi-S, and VSX-82TXS are excellent choices for anyone looking to enhance their home entertainment experience. With a blend of advanced technology, impressive audio performance, and user-friendly features, these receivers continue to be favored options for home theater setups.