Mounting the Clean Screen
16.29
0.42 | 3.92 | 0.42 |
0.55 |
| 0.55 |
| ∅0.22 | ∅0.22 |
2.60 | 3.50 | 12.78 |
0.35 | ∅0.22 ∅0.22 |
0.35 ![]()
0.61 | 0.61 |
5.76 ![]()
![]() 4.75
4.75
4.65
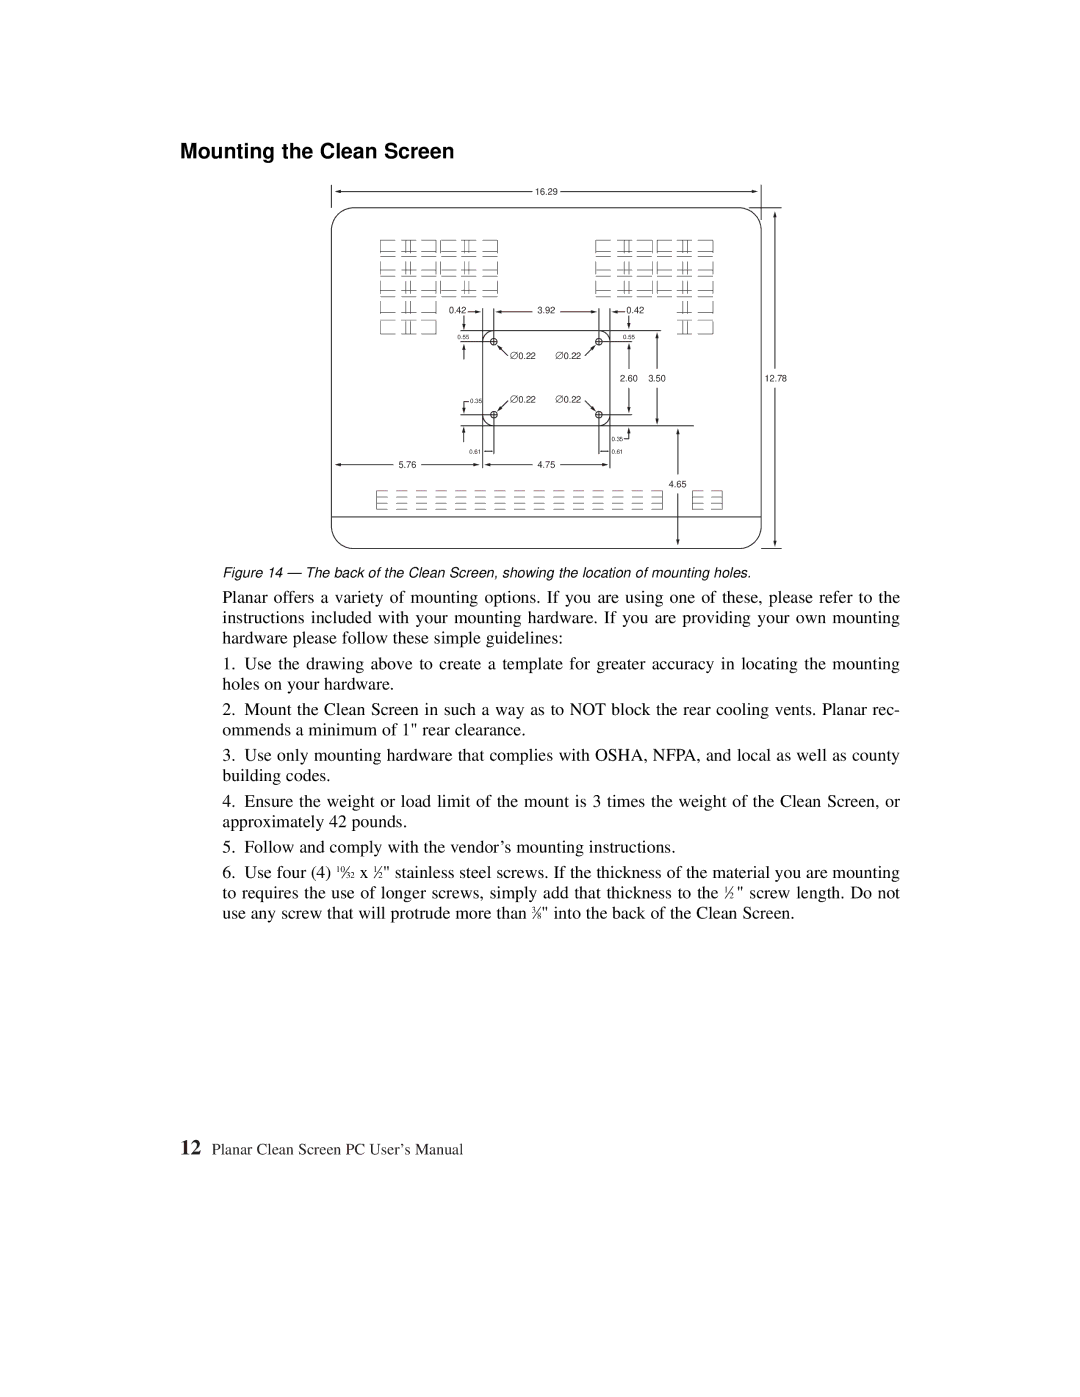
Figure 14 — The back of the Clean Screen, showing the location of mounting holes.
Planar offers a variety of mounting options. If you are using one of these, please refer to the instructions included with your mounting hardware. If you are providing your own mounting hardware please follow these simple guidelines:
1.Use the drawing above to create a template for greater accuracy in locating the mounting holes on your hardware.
2.Mount the Clean Screen in such a way as to NOT block the rear cooling vents. Planar rec- ommends a minimum of 1" rear clearance.
3.Use only mounting hardware that complies with OSHA, NFPA, and local as well as county building codes.
4.Ensure the weight or load limit of the mount is 3 times the weight of the Clean Screen, or approximately 42 pounds.
5.Follow and comply with the vendor’s mounting instructions.
6.Use four (4) 10⁄32 x 1⁄2" stainless steel screws. If the thickness of the material you are mounting to requires the use of longer screws, simply add that thickness to the 1⁄2 " screw length. Do not use any screw that will protrude more than 3⁄8" into the back of the Clean Screen.
12Planar Clean Screen PC User’s Manual