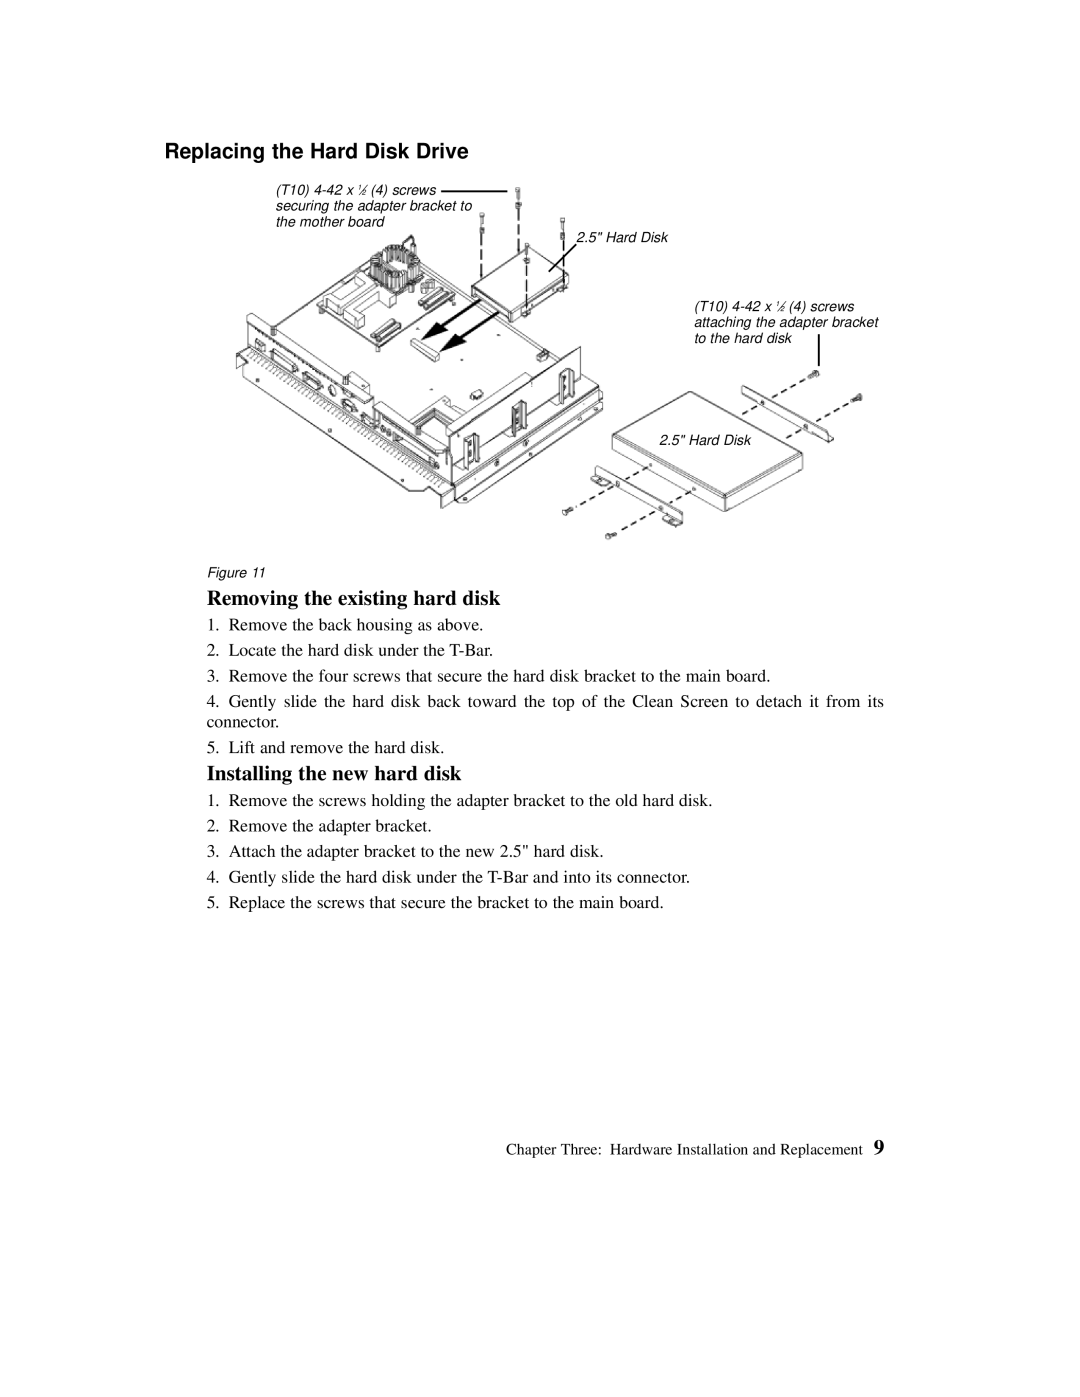
Replacing the Hard Disk Drive
(T10)
Figure 11
Removing the existing hard disk
2.5" Hard Disk
(T10)
2.5" Hard Disk
1.Remove the back housing as above.
2.Locate the hard disk under the
3.Remove the four screws that secure the hard disk bracket to the main board.
4.Gently slide the hard disk back toward the top of the Clean Screen to detach it from its connector.
5.Lift and remove the hard disk.
Installing the new hard disk
1.Remove the screws holding the adapter bracket to the old hard disk.
2.Remove the adapter bracket.
3.Attach the adapter bracket to the new 2.5" hard disk.
4.Gently slide the hard disk under the
5.Replace the screws that secure the bracket to the main board.
Chapter Three: Hardware Installation and Replacement 9