Chapter Four: System Setup
Attach the keyboard and all peripherals before you power up the unit. All connections are made at the bottom of the unit. If you have not yet attached the Clean Screen PC to a standard mount- ing bracket, then lay the unit face down before you attach the keyboard and peripherals. Be sure to use a
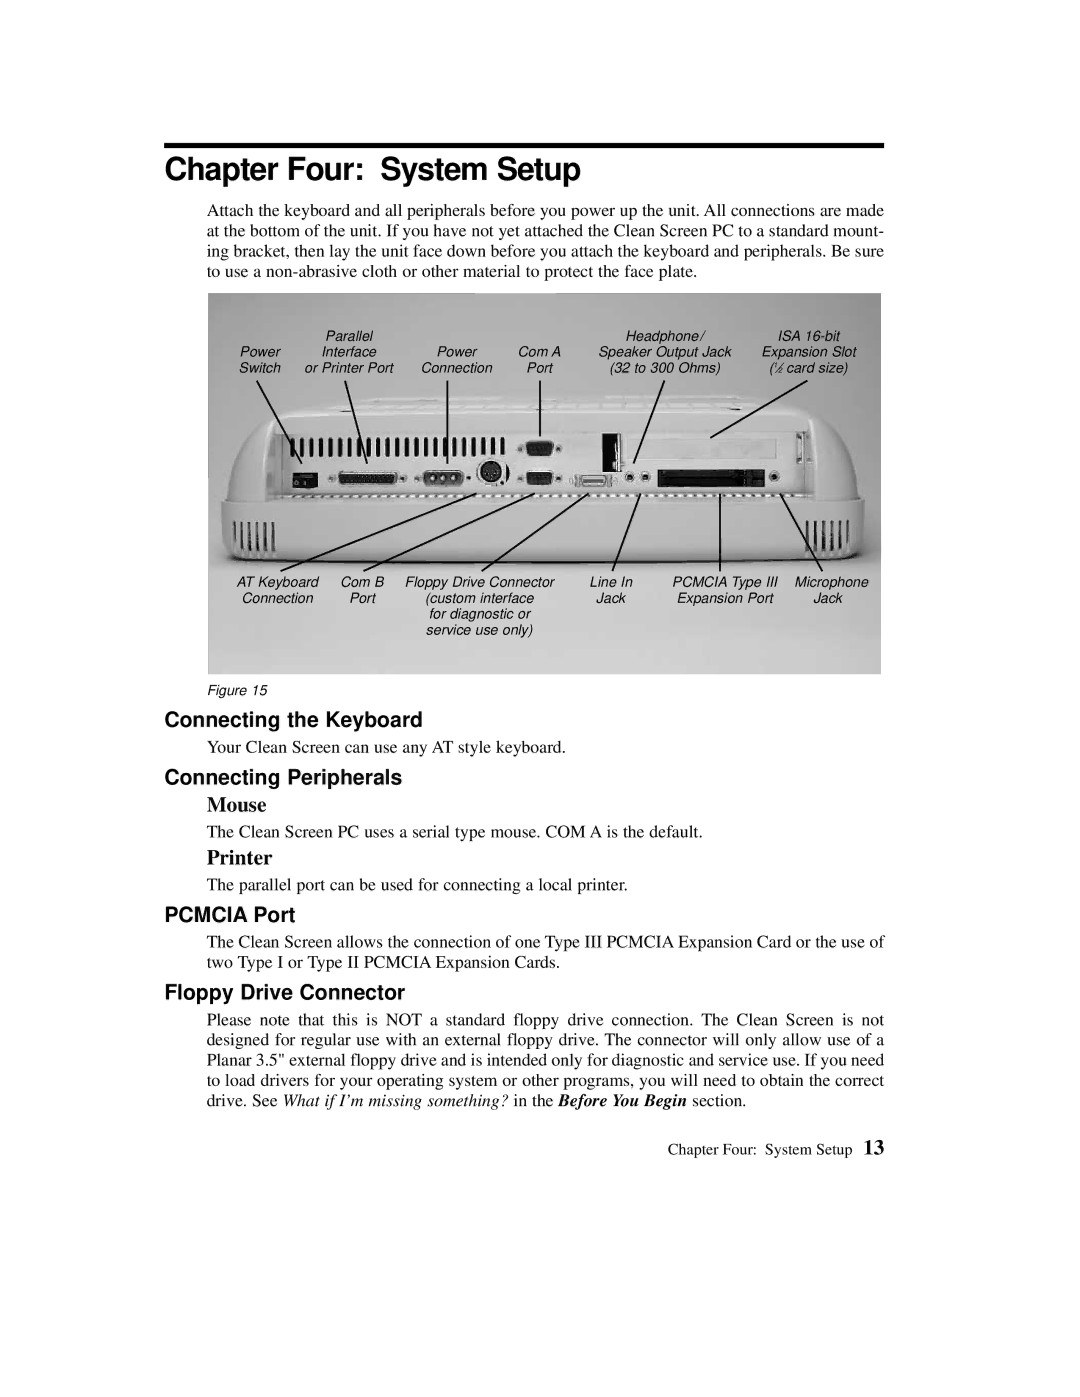
| Parallel |
|
| Headphone/ | ISA |
Power | Interface | Power | Com A | Speaker Output Jack | Expansion Slot |
Switch | or Printer Port | Connection | Port | (32 to 300 Ohms) | (1⁄2 card size) |
AT Keyboard | Com B | Floppy Drive Connector | Line In | PCMCIA Type III | Microphone |
Connection | Port | (custom interface | Jack | Expansion Port | Jack |
|
| for diagnostic or |
|
|
|
|
| service use only) |
|
|
|
Figure 15
Connecting the Keyboard
Your Clean Screen can use any AT style keyboard.
Connecting Peripherals
Mouse
The Clean Screen PC uses a serial type mouse. COM A is the default.
Printer
The parallel port can be used for connecting a local printer.
PCMCIA Port
The Clean Screen allows the connection of one Type III PCMCIA Expansion Card or the use of two Type I or Type II PCMCIA Expansion Cards.
Floppy Drive Connector
Please note that this is NOT a standard floppy drive connection. The Clean Screen is not designed for regular use with an external floppy drive. The connector will only allow use of a Planar 3.5" external floppy drive and is intended only for diagnostic and service use. If you need to load drivers for your operating system or other programs, you will need to obtain the correct drive. See What if I’m missing something? in the Before You Begin section.
Chapter Four: System Setup 13