2.Open the upper and lower doors and remove the blade.
3.Unscrew the hex nut from the lower wheel shaft and remove the lower wheel.
4.Loosen the motor lock handle.
5.Raise the motor lift handle and
6.Remove old belt and install new one, making sure it seats properly in the pulley grooves.
7.Loosen motor lock handle and allow motor to lower.
8.The weight of the motor itself should generally produce the proper tension for the belt. Check the tension by pushing with moderate pressure against the center of the belt (Figure 40). An adequately tensioned belt will deflect about 1/2”. If tension isn’t strong enough, push down on the motor.
9.Tighten motor lock handle, reinstall lower wheel, and install hex nut securely on shaft.
10.
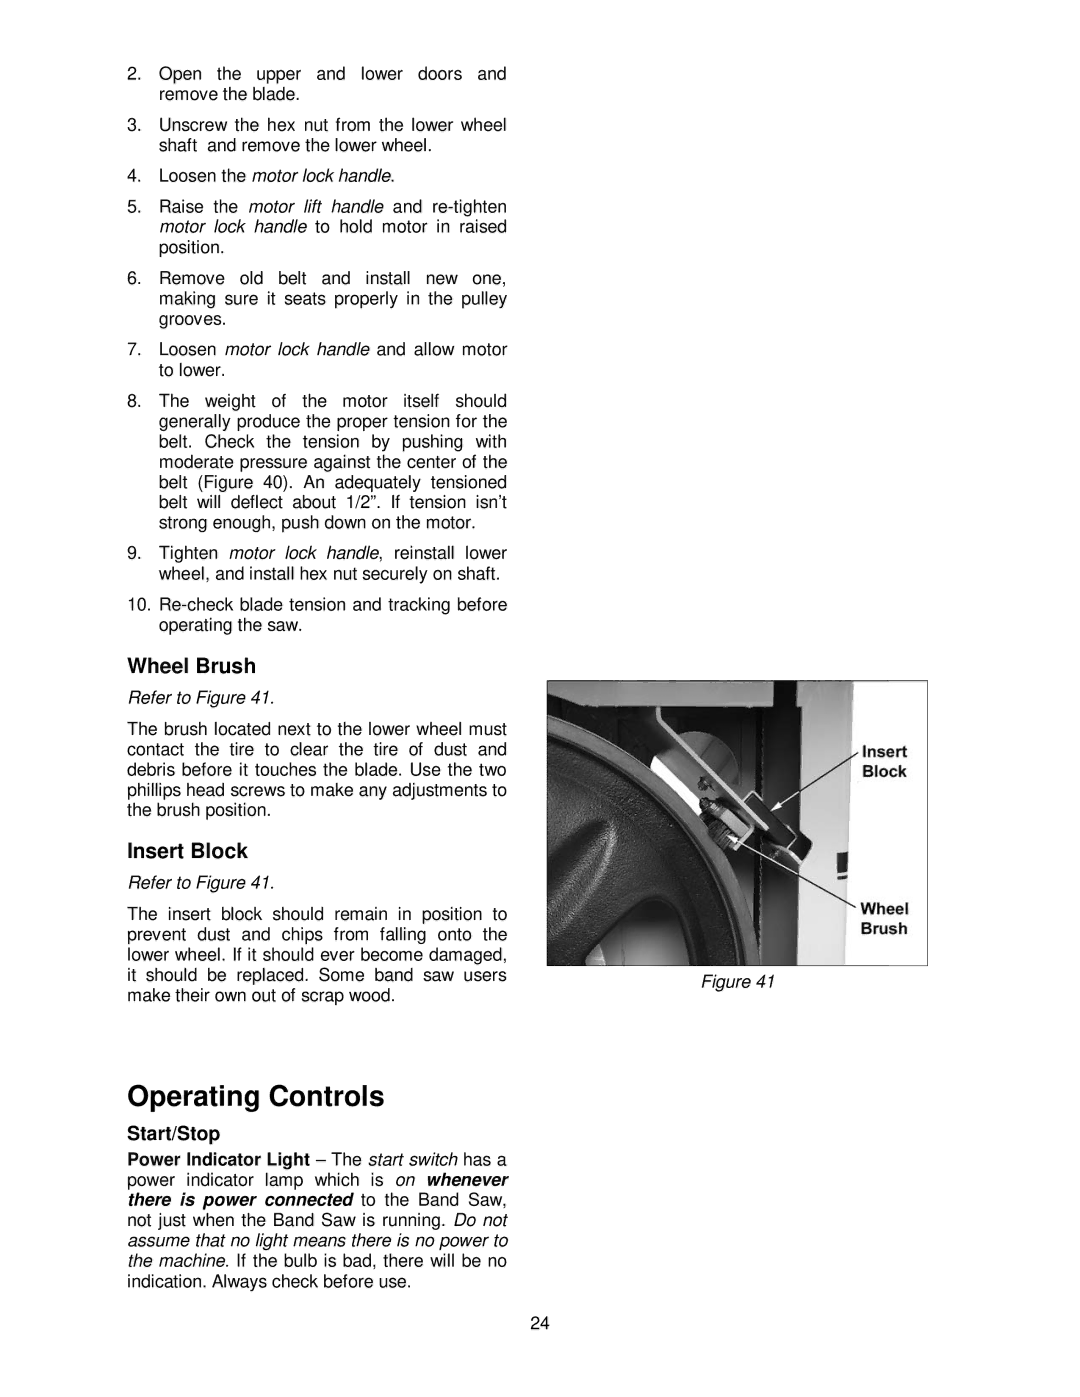
Wheel Brush
Refer to Figure 41.
The brush located next to the lower wheel must contact the tire to clear the tire of dust and debris before it touches the blade. Use the two phillips head screws to make any adjustments to the brush position.
Insert Block
Refer to Figure 41.
The insert block should remain in position to prevent dust and chips from falling onto the lower wheel. If it should ever become damaged,
it should be replaced. Some band saw usersFigure 41 make their own out of scrap wood.
Operating Controls
Start/Stop
Power Indicator Light – The start switch has a power indicator lamp which is on whenever there is power connected to the Band Saw, not just when the Band Saw is running. Do not assume that no light means there is no power to the machine. If the bulb is bad, there will be no indication. Always check before use.
24