C O M M E R C I A L P R O D U C T S D I V I S I O N
KEYS ON THE DISPLAY CONSOLE
The Precor products have an
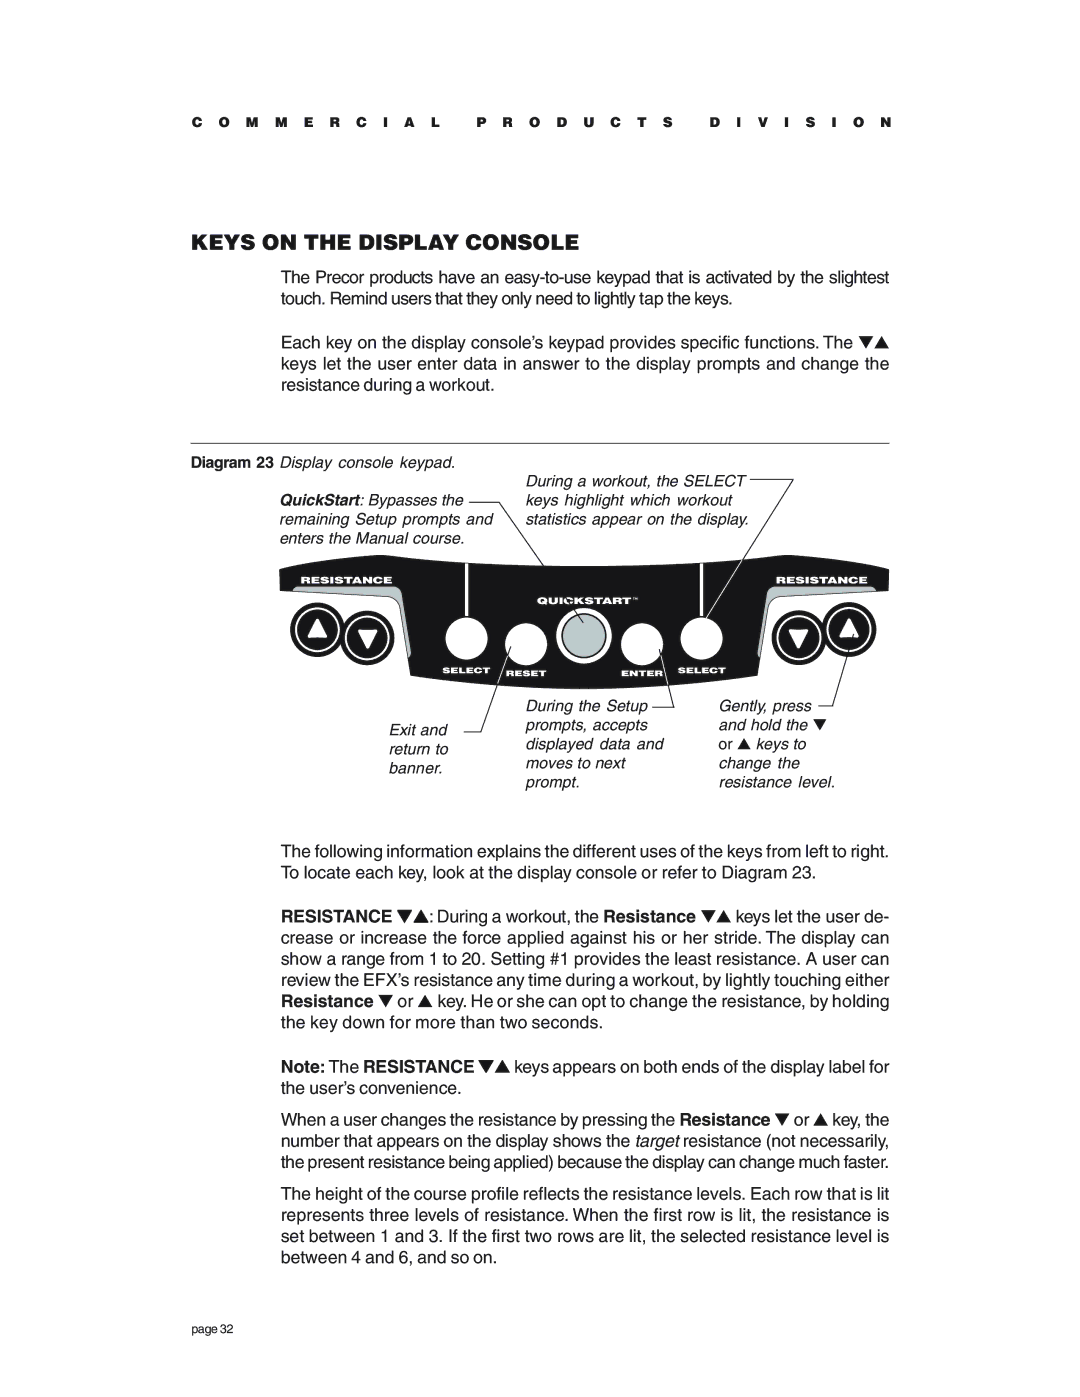
Each key on the display console’s keypad provides specific functions. The ▼▲ keys let the user enter data in answer to the display prompts and change the resistance during a workout.
Diagram 23 Display console keypad.
QuickStart: Bypasses the remaining Setup prompts and enters the Manual course.
During a workout, the SELECT keys highlight which workout statistics appear on the display.
| During the Setup | Gently, press | |
Exit and | prompts, accepts | and hold the ▼ | |
displayed data and | or ▲ keys to | ||
return to | |||
moves to next | change the | ||
banner. | |||
prompt. | resistance level. | ||
|
The following information explains the different uses of the keys from left to right. To locate each key, look at the display console or refer to Diagram 23.
RESISTANCE ▼▲: During a workout, the Resistance ▼▲ keys let the user de- crease or increase the force applied against his or her stride. The display can show a range from 1 to 20. Setting #1 provides the least resistance. A user can review the EFX’s resistance any time during a workout, by lightly touching either Resistance ▼ or ▲ key. He or she can opt to change the resistance, by holding the key down for more than two seconds.
Note: The RESISTANCE ▼▲ keys appears on both ends of the display label for the user’s convenience.
When a user changes the resistance by pressing the Resistance ▼ or ▲ key, the number that appears on the display shows the target resistance (not necessarily, the present resistance being applied) because the display can change much faster.
The height of the course profile reflects the resistance levels. Each row that is lit represents three levels of resistance. When the first row is lit, the resistance is set between 1 and 3. If the first two rows are lit, the selected resistance level is between 4 and 6, and so on.
page 32
