Data Cartridge Inspection Procedure
7Open the data cartridge door by pressing on the tab in the door pivot notch as shown in figure 17. Use care that you do not touch the tape leader.
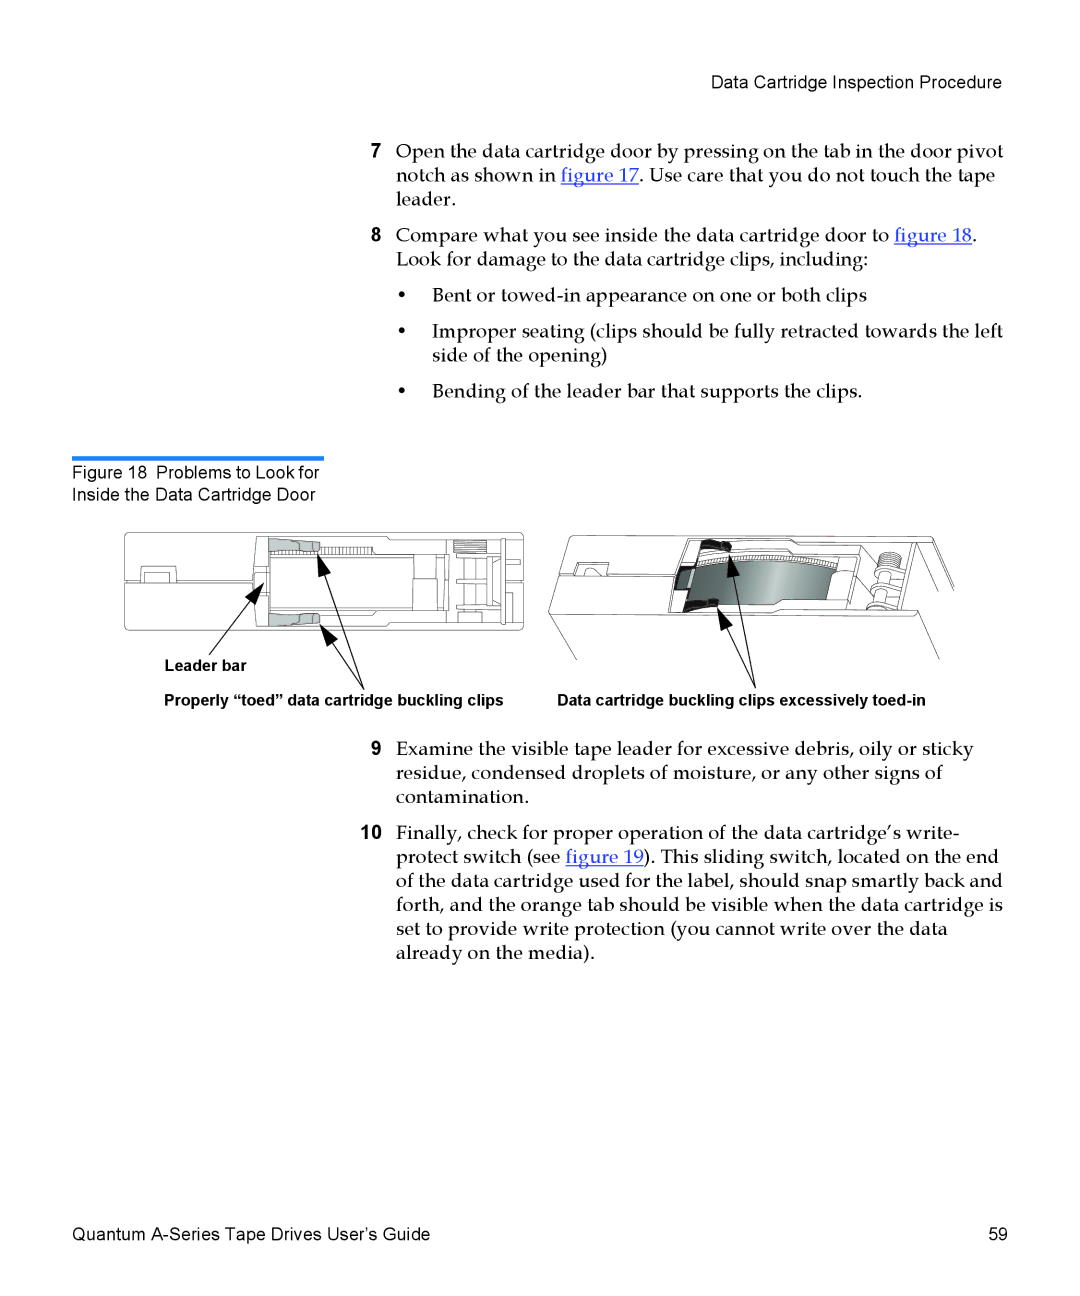
8Compare what you see inside the data cartridge door to figure 18. Look for damage to the data cartridge clips, including:
•Bent or
•Improper seating (clips should be fully retracted towards the left side of the opening)
•Bending of the leader bar that supports the clips.
Figure 18 Problems to Look for
Inside the Data Cartridge Door
Leader bar
Properly “toed” data cartridge buckling clips | Data cartridge buckling clips excessively |
9Examine the visible tape leader for excessive debris, oily or sticky residue, condensed droplets of moisture, or any other signs of contamination.
10Finally, check for proper operation of the data cartridge’s write- protect switch (see figure 19). This sliding switch, located on the end of the data cartridge used for the label, should snap smartly back and forth, and the orange tab should be visible when the data cartridge is set to provide write protection (you cannot write over the data already on the media).
Quantum | 59 |
