|
|
|
|
|
| 18 |
|
|
|
| 17 16 15 14 13 | ||
|
|
|
|
|
|
|
|
|
|
| SLOW | Up | AVC 776 |
|
|
|
|
|
|
|
|
|
|
|
| ||
|
|
|
|
|
|
|
|
|
|
|
|
| Digital Multiplex Recorder |
|
| 1 | 2 | 3 | 4 | 5 | 6 | 7 | 8 | 9 |
|
|
|
|
|
|
|
|
|
|
|
|
|
|
| Left | Right |
|
|
|
|
|
|
|
|
|
|
| REC |
|
|
|
| MENU | ENTER |
| SELECT | ZOOM |
|
|
|
|
| Down | POWER |
1 | 2 | 3 | 4 |
| 5 | 6 |
| 7 | 8 | 9 | 10 | 11 | 12 |
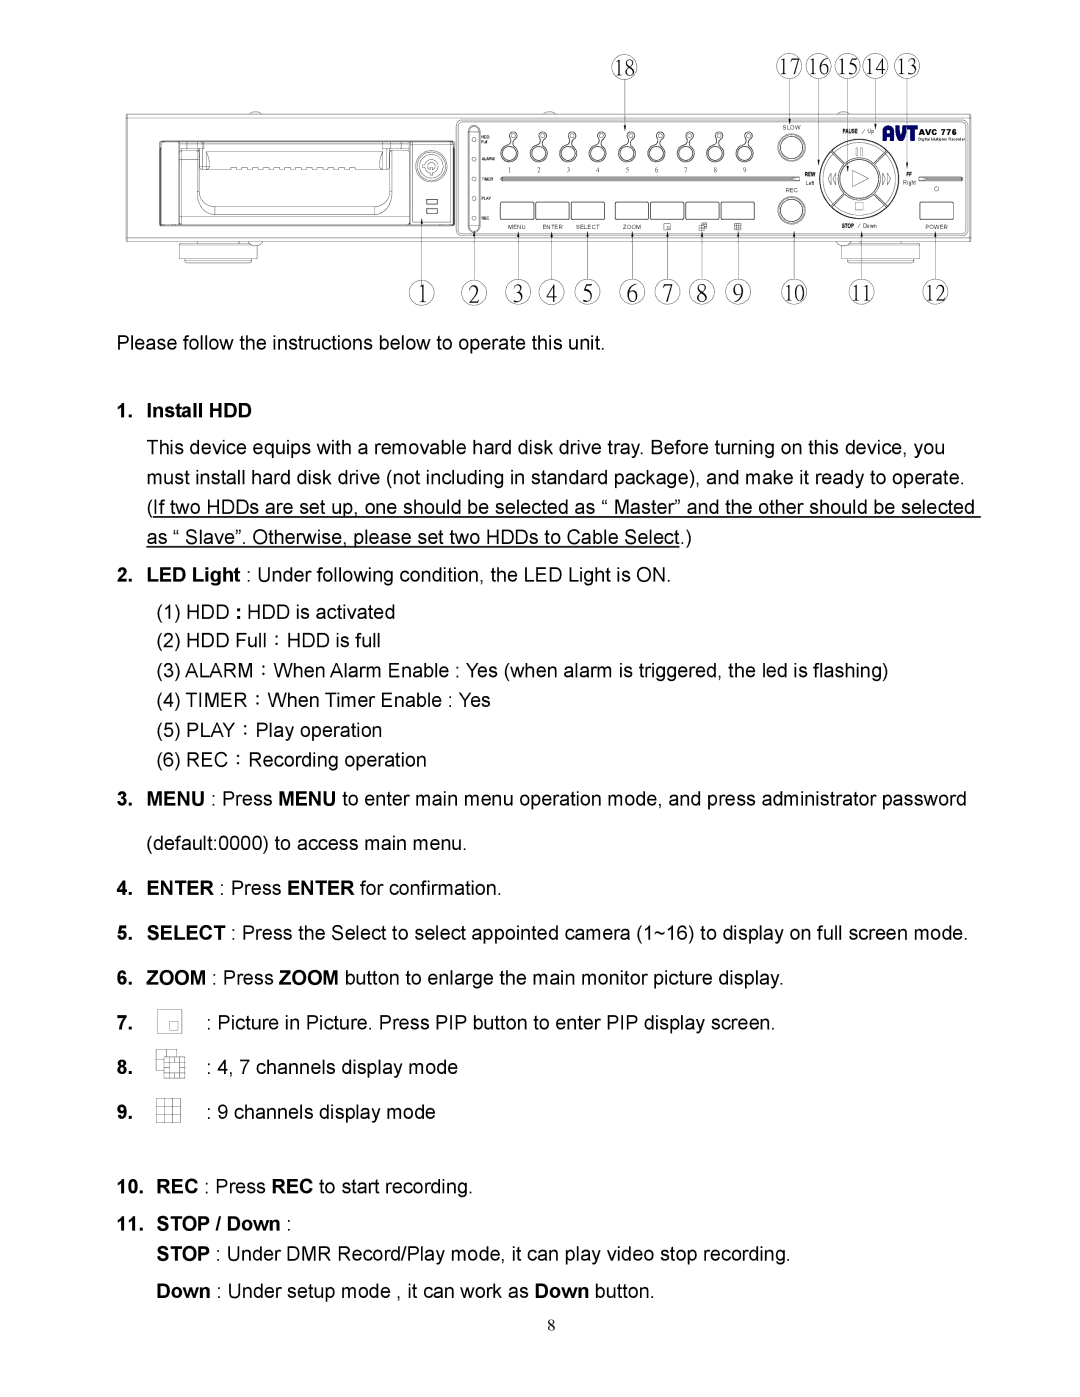
Please follow the instructions below to operate this unit.
1.Install HDD
This device equips with a removable hard disk drive tray. Before turning on this device, you must install hard disk drive (not including in standard package), and make it ready to operate. (If two HDDs are set up, one should be selected as “ Master” and the other should be selected as “ Slave”. Otherwise, please set two HDDs to Cable Select.)
2.LED Light : Under following condition, the LED Light is ON.
(1)HDD : HDD is activated
(2)HDD Full:HDD is full
(3)ALARM:When Alarm Enable : Yes (when alarm is triggered, the led is flashing)
(4)TIMER:When Timer Enable : Yes
(5)PLAY:Play operation
(6)REC:Recording operation
3.MENU : Press MENU to enter main menu operation mode, and press administrator password (default:0000) to access main menu.
4.ENTER : Press ENTER for confirmation.
5.SELECT : Press the Select to select appointed camera (1~16) to display on full screen mode.
6.ZOOM : Press ZOOM button to enlarge the main monitor picture display.
7.
: Picture in Picture. Press PIP button to enter PIP display screen.
8.
: 4, 7 channels display mode
9.
: 9 channels display mode
10.REC : Press REC to start recording.
11.STOP / Down :
STOP : Under DMR Record/Play mode, it can play video stop recording.
Down : Under setup mode , it can work as Down button.
8