
F39-LPG, F39-NG specifications
The Regency F39-LPG and F39-NG are contemporary gas fireplaces that have garnered attention for their stylish design and advanced technology. These models cater to homeowners seeking an efficient and visually appealing heating solution. Designed with both function and aesthetics in mind, the F39 series stands out for its elegant linear design, making it suitable for a variety of interior styles.One of the distinguishing features of the F39 series is its commitment to energy efficiency. Both the F39-LPG, which operates on liquid propane, and the F39-NG, which utilizes natural gas, have been engineered to deliver optimal heat output while consuming minimal fuel. This efficiency not only reduces energy costs but also minimizes environmental impact, aligning with modern sustainable living practices.
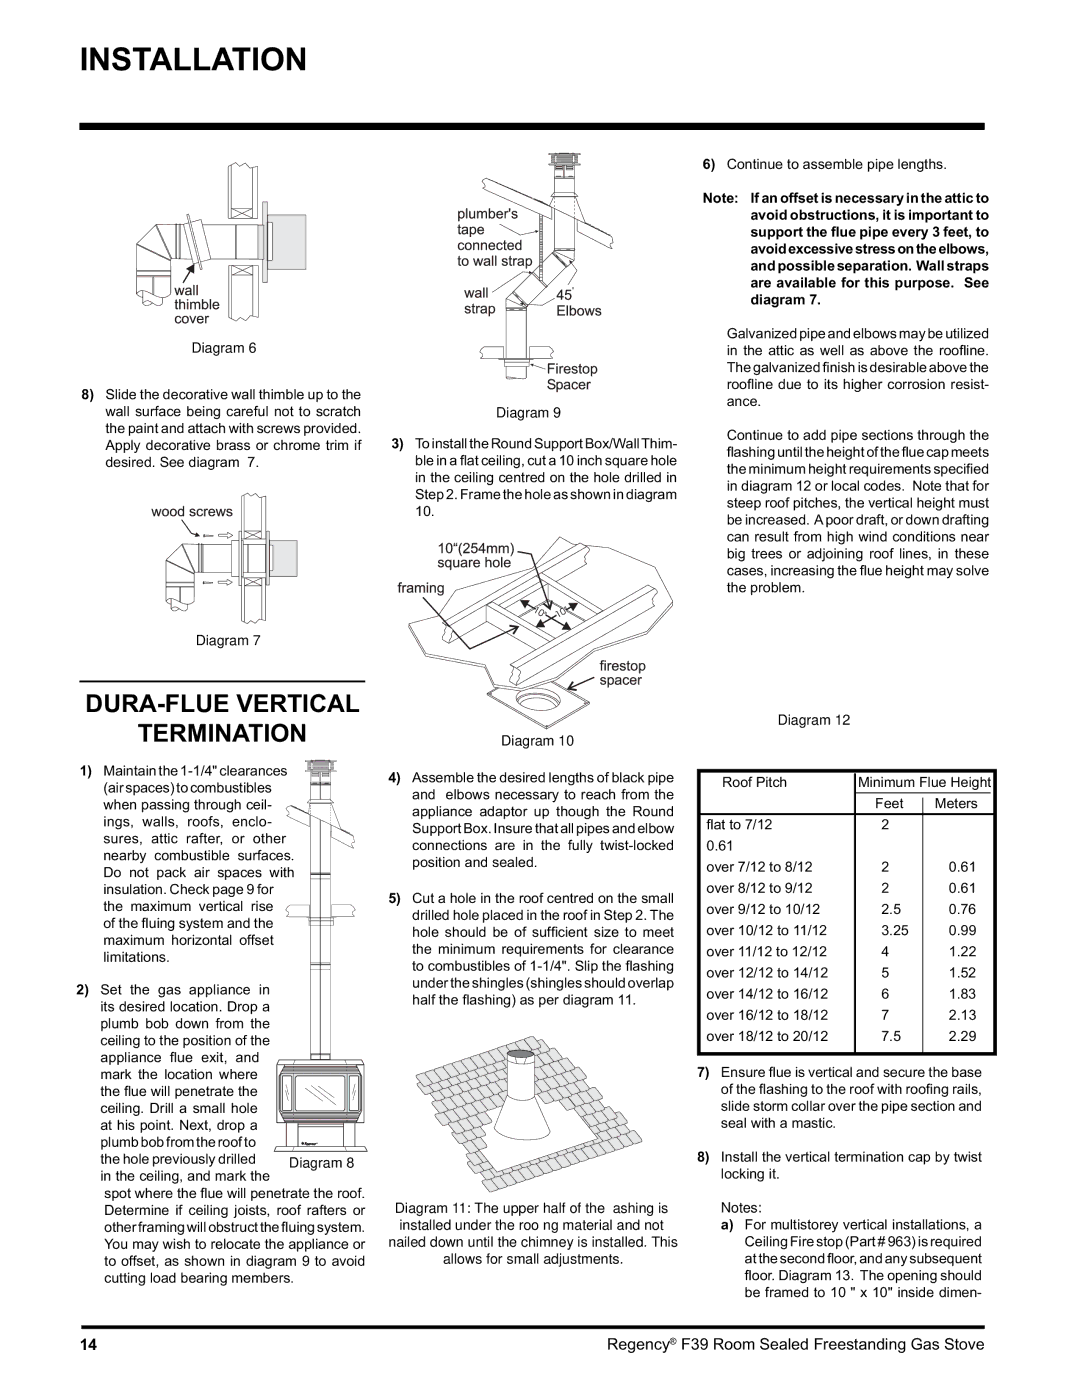
The F39 series boasts advanced venting technology, allowing for versatile installation options. This feature enables homeowners to select the perfect location for their fireplace without compromising aesthetic appeal or functionality. The unit can be vented either vertically or horizontally, providing flexibility in design while ensuring safe and effective operation.
In terms of control, the Regency F39 models come equipped with a user-friendly remote control option. This allows for convenient operation from across the room, making it easy to adjust flame height and heat settings to create the perfect ambiance. Moreover, the models can also be connected to smart home systems, enabling homeowners to integrate their fireplace into a broader heating management system.
Aesthetically, the F39 series offers customizable options, including various media and decorative elements. Homeowners can choose from traditional logs, contemporary glass, or pebbles, allowing each unit to reflect their personal style and complement their home’s decor. The large glass viewing area enhances the visual experience, showcasing the beautiful flame patterns that add warmth and character to any room.
Durability is also a significant aspect of the design, with high-quality materials that ensure longevity and performance. The F39-LPG and F39-NG are constructed to withstand the rigors of everyday use while maintaining their sleek appearance.
In summary, the Regency F39-LPG and F39-NG fireplaces represent a blend of efficiency, technology, and elegance. With their advanced features, customizable aesthetics, and environmentally friendly operation, these models are ideal for those looking to enhance their living spaces with both warmth and style. Whether for a modern home or a more traditional setting, the F39 series is designed to meet diverse heating needs while providing a stunning focal point in any room.