INSTALLATION
REGENCY LOUVER INSTALLATION
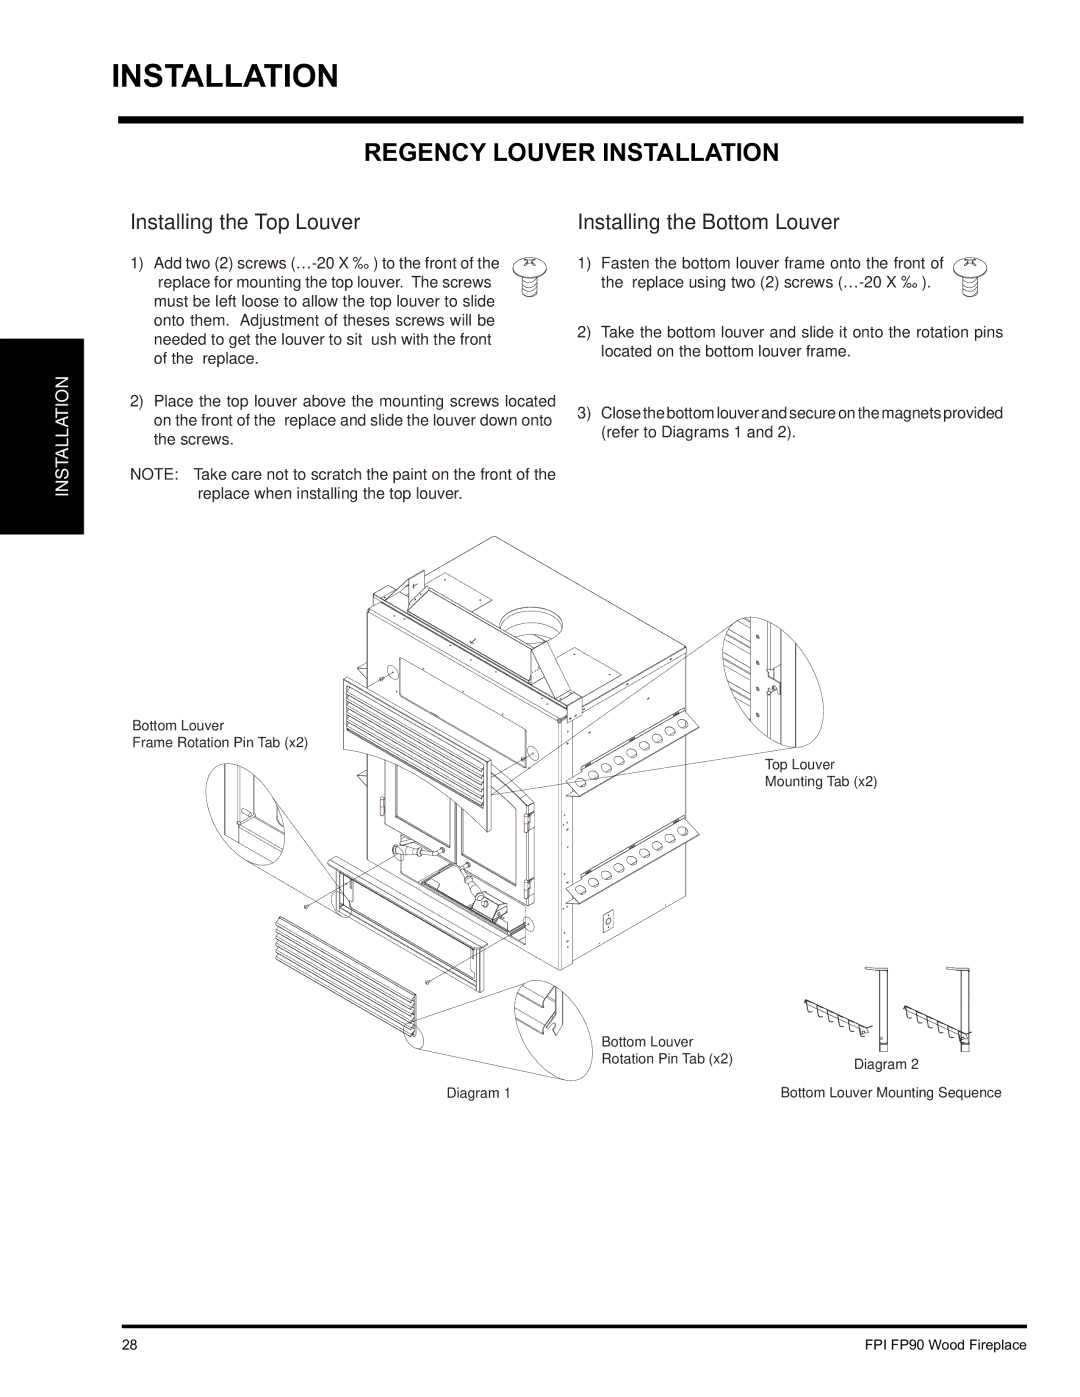
Installing the Top Louver | Installing the Bottom Louver |
INSTALLATION
1) Add two (2) screws
fi replace for mounting the top louver. The screws must be left loose to allow the top louver to slide onto them. Adjustment of theses screws will be needed to get the louver to sit fl ush with the front of the fi replace.
2)Place the top louver above the mounting screws located on the front of the fi replace and slide the louver down onto the screws.
NOTE: Take care not to scratch the paint on the front of the fi replace when installing the top louver.
1) Fasten the bottom louver frame onto the front of the fi replace using two (2) screws
2)Take the bottom louver and slide it onto the rotation pins located on the bottom louver frame.
3)Close the bottom louver and secure on the magnets provided (refer to Diagrams 1 and 2).
Bottom Louver
Frame Rotation Pin Tab (x2)
Top Louver
Mounting Tab (x2)
| Bottom Louver |
|
| Rotation Pin Tab (x2) | Diagram 2 |
|
| |
Diagram 1 |
| Bottom Louver Mounting Sequence |
28 | FPI FP90 Wood Fireplace |