INSTALLATION
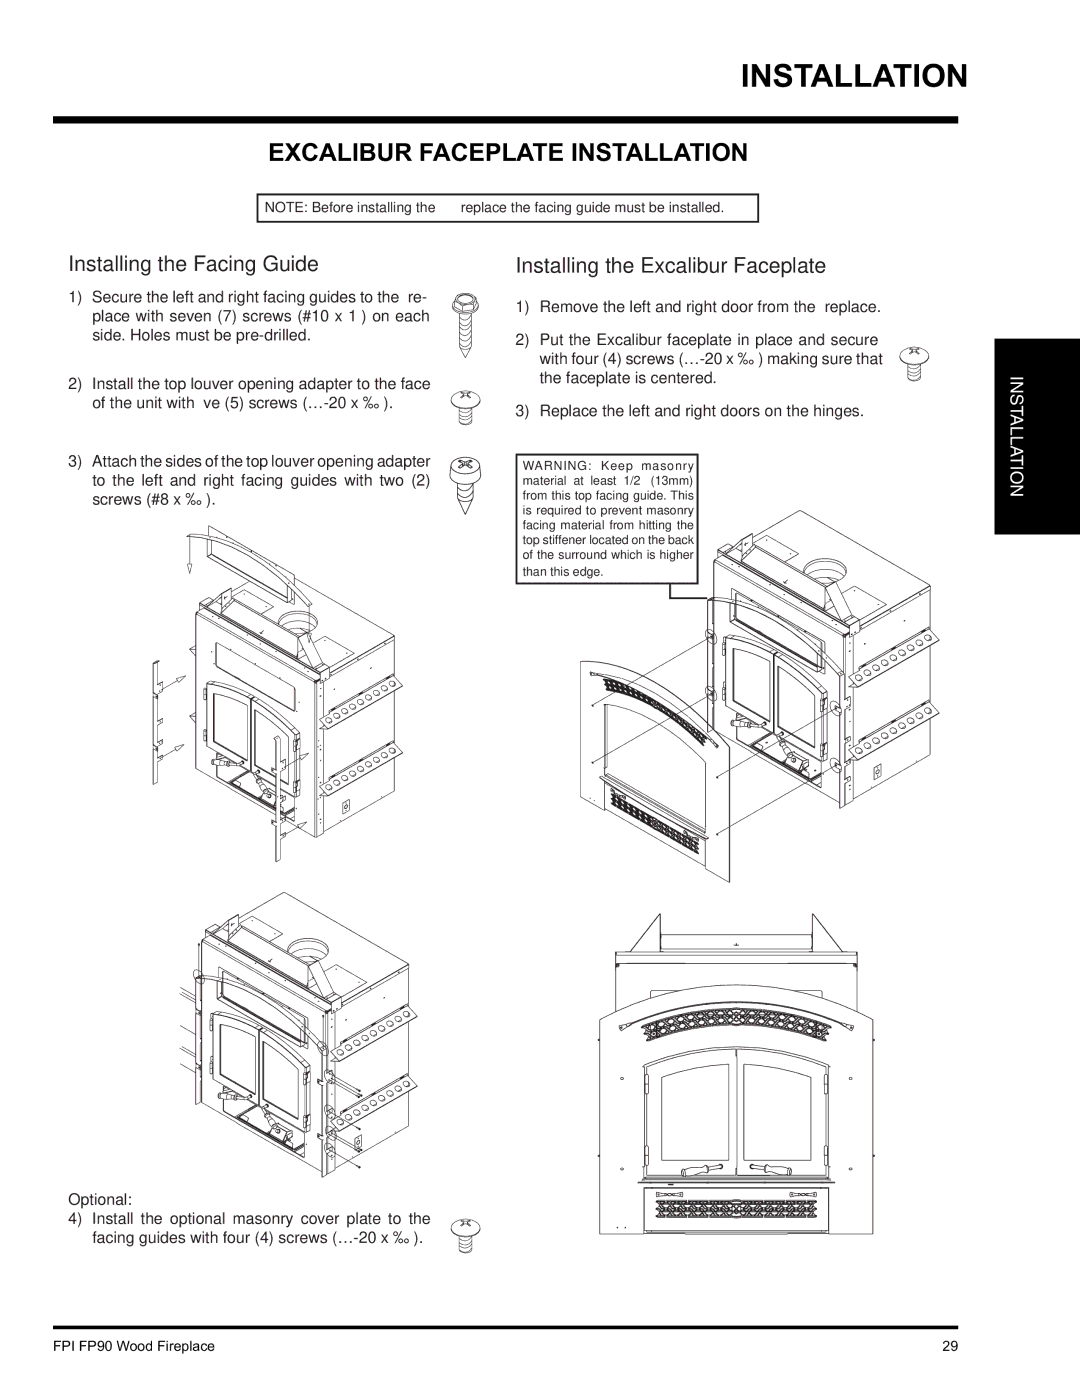
EXCALIBUR FACEPLATE INSTALLATION
NOTE: Before installing the fireplace the facing guide must be installed.
Installing the Facing Guide
1)Secure the left and right facing guides to the fi re- place with seven (7) screws (#10 x 1”) on each side. Holes must be
2)Install the top louver opening adapter to the face of the unit with fi ve (5) screws
3)Attach the sides of the top louver opening adapter to the left and right facing guides with two (2) screws (#8 x ½”).
Installing the Excalibur Faceplate
1)Remove the left and right door from the fi replace.
2)Put the Excalibur faceplate in place and secure with four (4) screws
3)Replace the left and right doors on the hinges.
WARNING: Keep masonry material at least 1/2” (13mm) from this top facing guide. This is required to prevent masonry facing material from hitting the top stiffener located on the back of the surround which is higher than this edge.
INSTALLATION
Optional:
4)Install the optional masonry cover plate to the facing guides with four (4) screws
FPI FP90 Wood Fireplace | 29 |
