Alignment (continued)
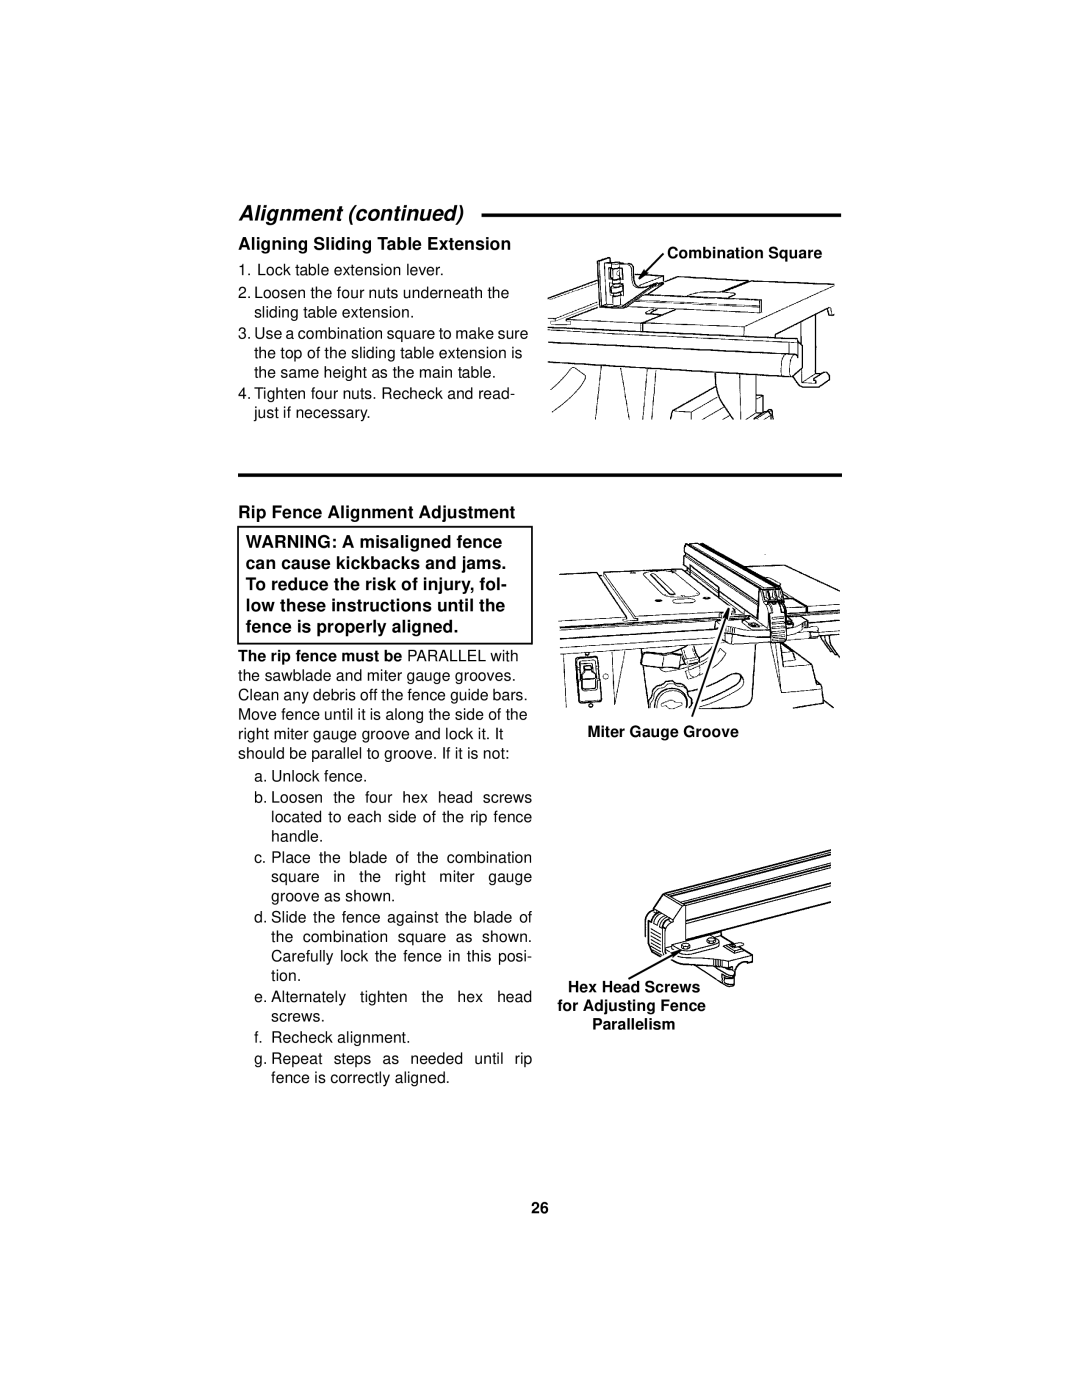
Aligning Sliding Table Extension
1. Lock table extension lever.
Combination Square
2.Loosen the four nuts underneath the sliding table extension.
3.Use a combination square to make sure the top of the sliding table extension is the same height as the main table.
4.Tighten four nuts. Recheck and read- just if necessary.
Rip Fence Alignment Adjustment
WARNING: A misaligned fence can cause kickbacks and jams. To reduce the risk of injury, fol- low these instructions until the fence is properly aligned.
The rip fence must be PARALLEL with the sawblade and miter gauge grooves. Clean any debris off the fence guide bars. Move fence until it is along the side of the right miter gauge groove and lock it. It should be parallel to groove. If it is not:
a. Unlock fence.
b. Loosen the four hex head screws located to each side of the rip fence handle.
c. Place the blade of the combination square in the right miter gauge groove as shown.
d. Slide the fence against the blade of the combination square as shown. Carefully lock the fence in this posi- tion.
e. Alternately tighten the hex head screws.
f.Recheck alignment.
g.Repeat steps as needed until rip fence is correctly aligned.
Miter Gauge Groove
Hex Head Screws for Adjusting Fence Parallelism
26