Maintaining Your Table Saw
Maintenance
WARNING: For your own safety, turn switch “OFF” and remove plug from power source outlet before maintaining or lubricating your saw.
•Do not allow sawdust to accumulate inside the saw. Frequently blow out any dust that may accumulate inside the saw cabinet and the motor.
•Clean your cutting tools with a gum and pitch remover.
•The cord and the tool should be wiped with a dry clean cloth to prevent deteri- oration from oil and grease.
•A coat of furniture paste wax applied to the table will help to keep the surface clean and allow workpieces to slide more freely.
•If the power cord is worn, cut, or dam- aged in any way, have it replaced immediately.
Anti-Kickback Pawls
Make sure the teeth of the
pawls are always sharp. To sharpen:
1.Remove blade guard.
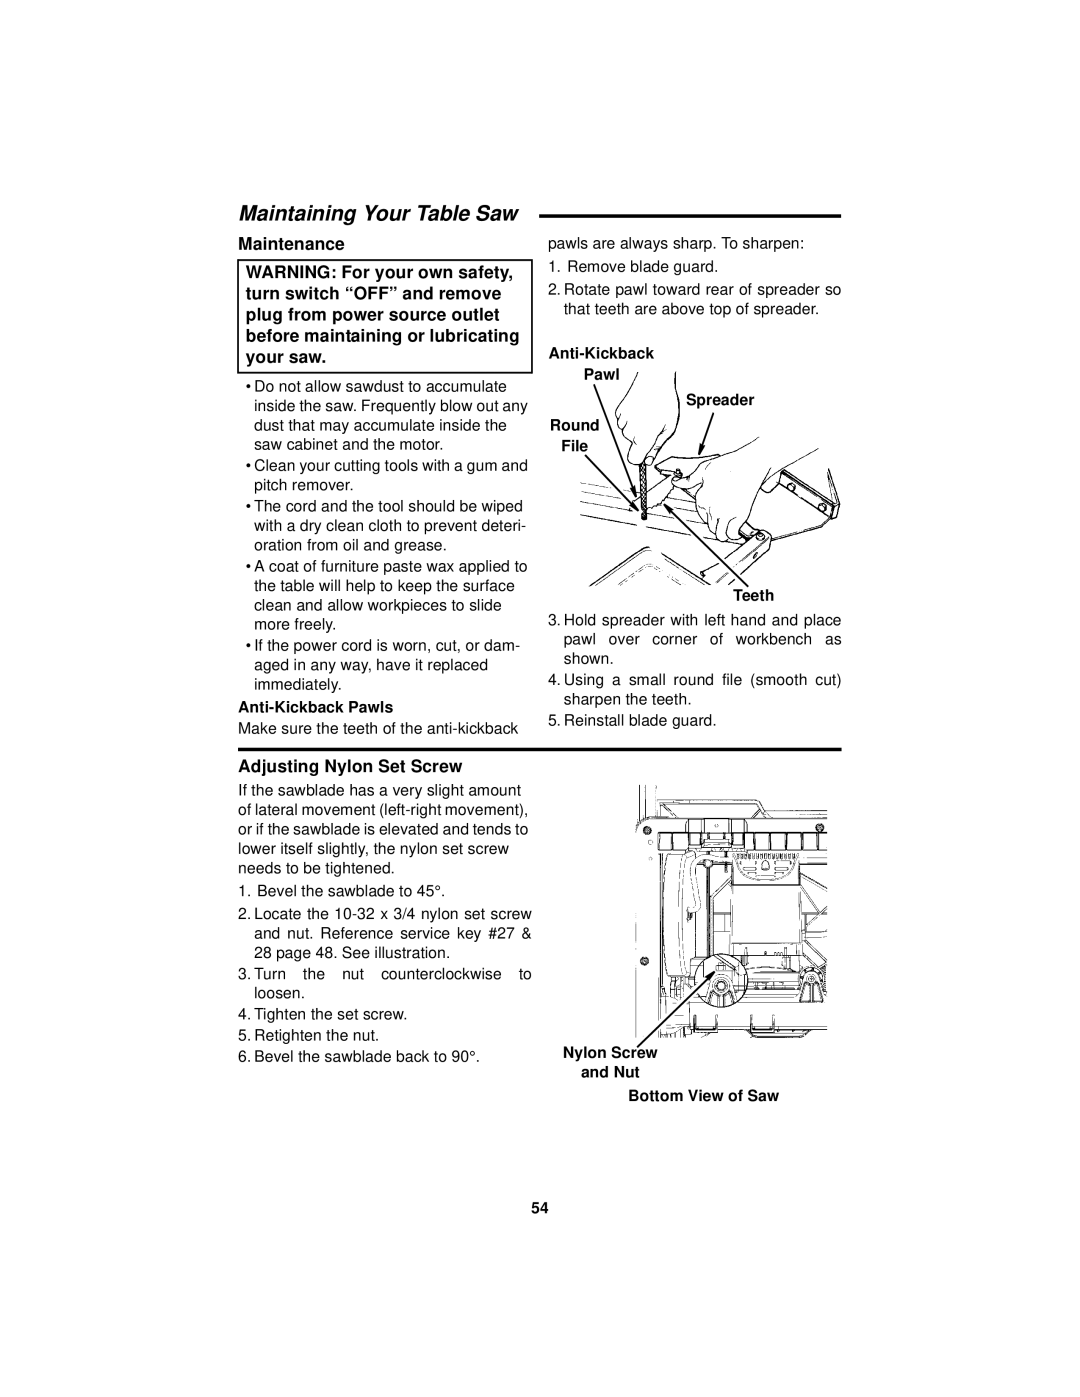
2.Rotate pawl toward rear of spreader so that teeth are above top of spreader.
Anti-Kickback
Pawl
Spreader
Round
File
Teeth
3.Hold spreader with left hand and place pawl over corner of workbench as shown.
4.Using a small round file (smooth cut) sharpen the teeth.
5.Reinstall blade guard.
Adjusting Nylon Set Screw
If the sawblade has a very slight amount of lateral movement
1.Bevel the sawblade to 45°.
2.Locate the
3. Turn the nut counterclockwise | to |
loosen. |
|
4. Tighten the set screw. |
|
5. Retighten the nut. | Nylon Screw |
6. Bevel the sawblade back to 90°. | |
| and Nut |
| Bottom View of Saw |
54
