Molding
Molding is cutting a shape on the edge or face of the workpiece. With a molding head and a selection of different knife shapes it is possible for almost any kind of molding (base, cove, bead, etc.) to be produced.
There are a wide variety of molding heads available as well as many different shapes of knives. Be sure and consult the specific instructions included with your molding head.
WARNING: For your own safety; always read, understand, and fol- low all directions in the instruc- tional booklet furnished with the molding head.
The slot provided for the sawblade in the regular table insert is too small for the molding head to pass through. Therefore, a special dado/molding insert must be purchased.
WARNING: For your own safety, always use molding insert listed under recommended accesso- ries.
When using the molding head it will be necessary to remove the blade guard and spreader. Use caution. Use miter gauge, fence, featherboards, push sticks or fence facing board, etc., as required.
WARNING: For your own safety, always replace the blade, table insert, guard and spreader when you are finished molding.
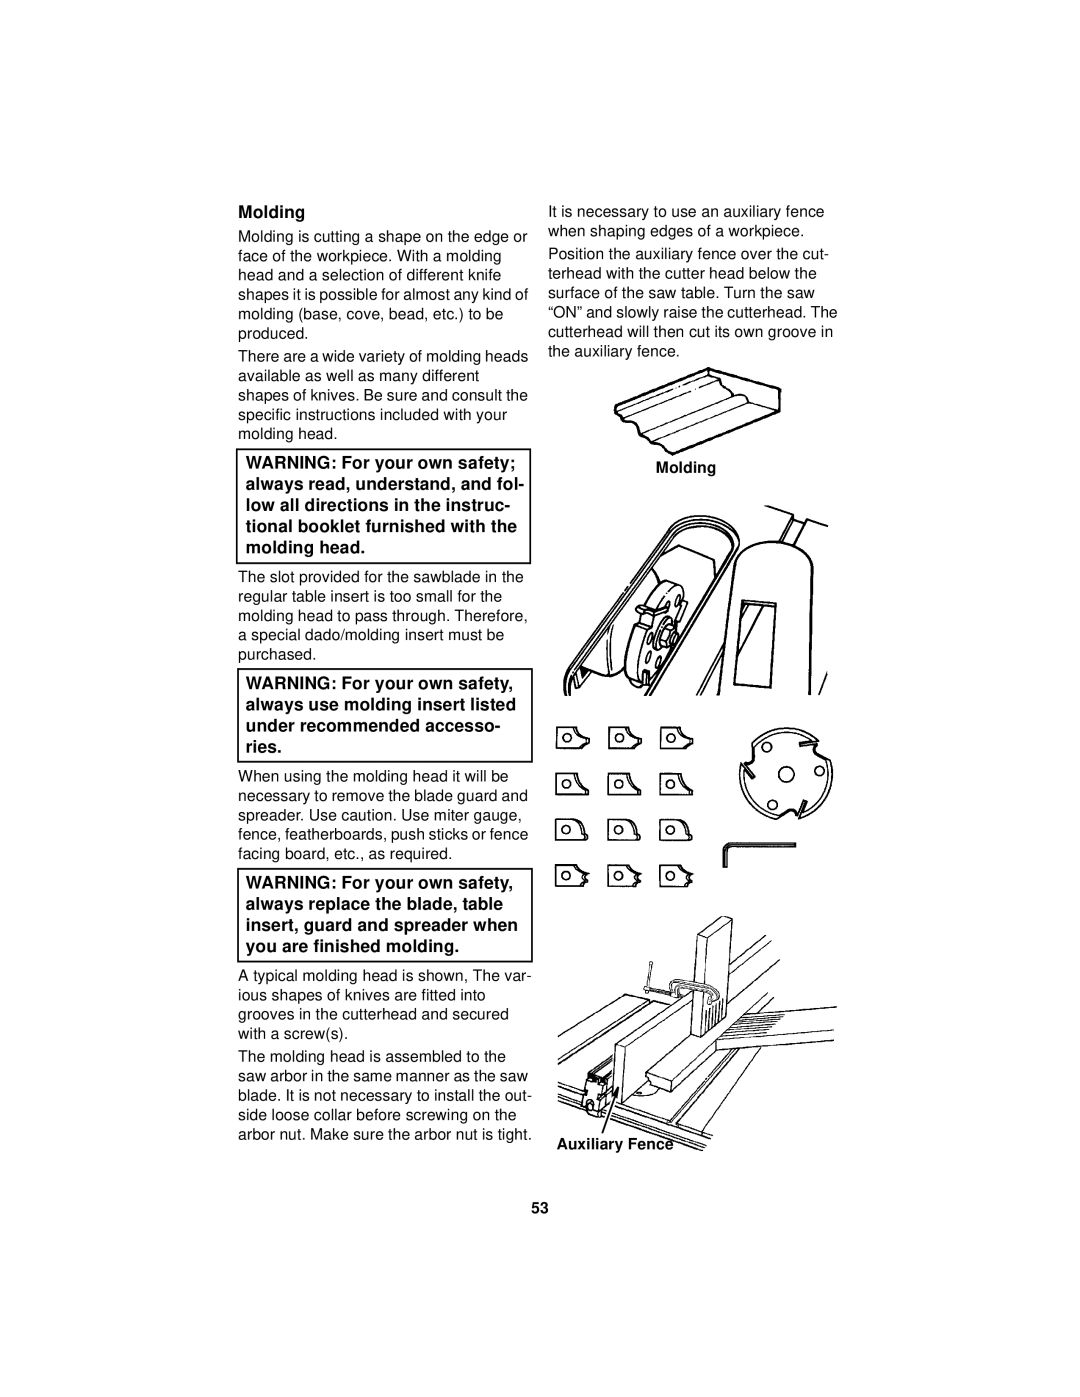
A typical molding head is shown, The var- ious shapes of knives are fitted into grooves in the cutterhead and secured with a screw(s).
The molding head is assembled to the saw arbor in the same manner as the saw blade. It is not necessary to install the out- side loose collar before screwing on the arbor nut. Make sure the arbor nut is tight.
It is necessary to use an auxiliary fence when shaping edges of a workpiece.
Position the auxiliary fence over the cut- terhead with the cutter head below the surface of the saw table. Turn the saw “ON” and slowly raise the cutterhead. The cutterhead will then cut its own groove in the auxiliary fence.
Molding
Auxiliary Fence
53