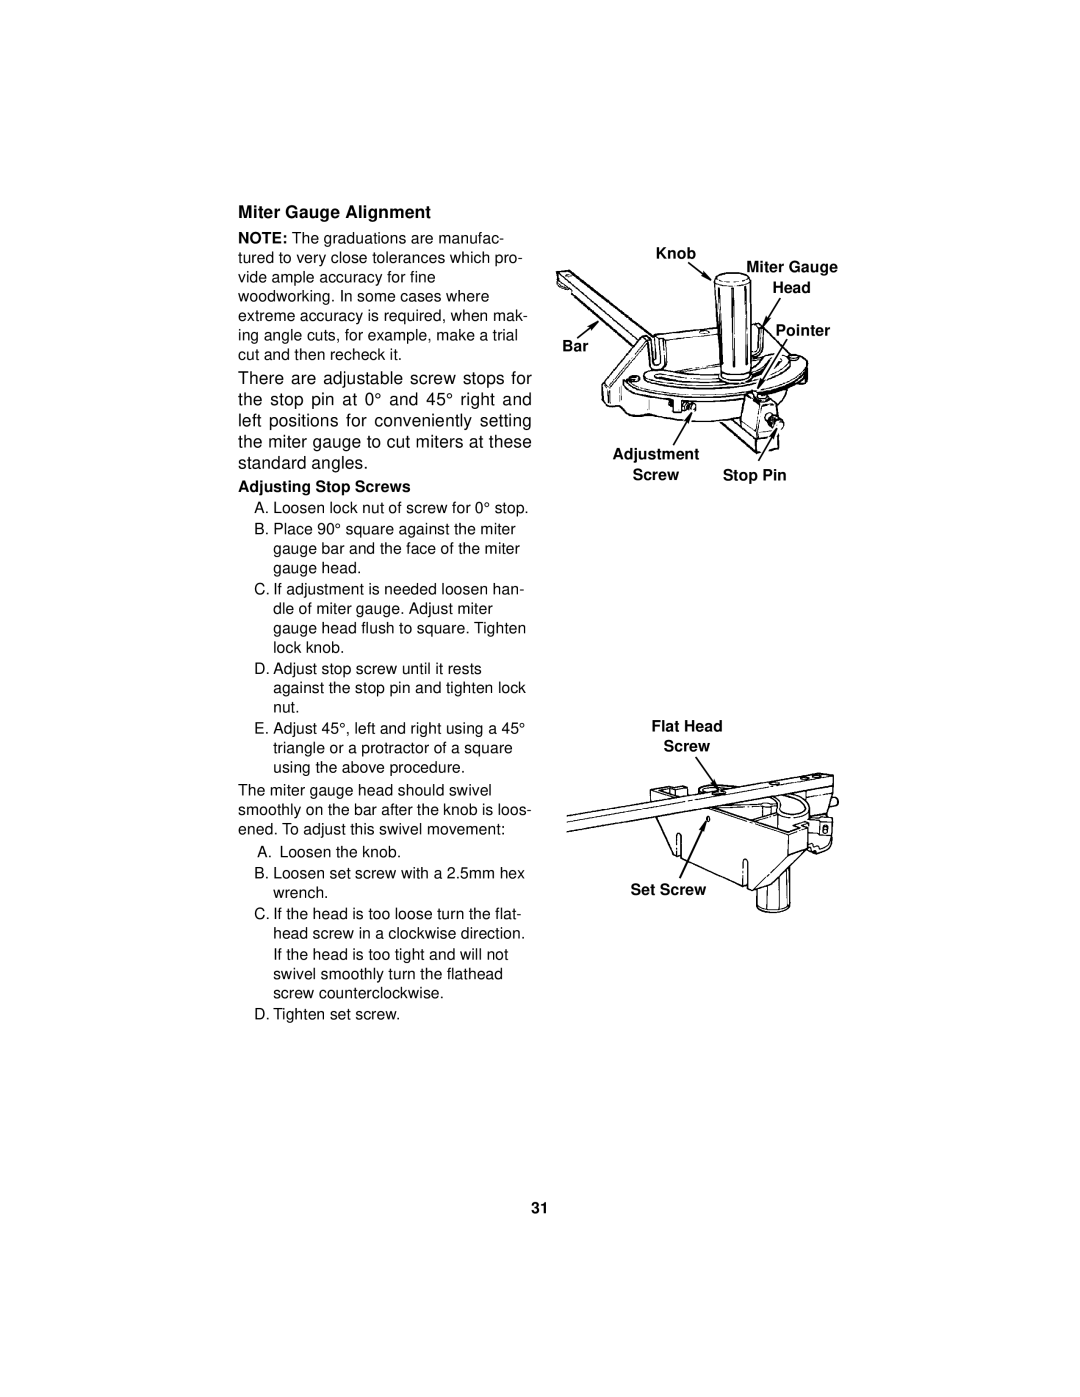
Miter Gauge Alignment
NOTE: The graduations are manufac- | Knob | |
tured to very close tolerances which pro- | ||
vide ample accuracy for fine |
| |
woodworking. In some cases where |
| |
extreme accuracy is required, when mak- |
| |
ing angle cuts, for example, make a trial | Bar | |
cut and then recheck it. | ||
|
Miter Gauge
Head
Pointer
There are adjustable screw stops for the stop pin at 0° and 45° right and left positions for conveniently setting the miter gauge to cut miters at these standard angles.
Adjusting Stop Screws
A. Loosen lock nut of screw for 0° stop. B. Place 90° square against the miter gauge bar and the face of the miter
gauge head.
C. If adjustment is needed loosen han- dle of miter gauge. Adjust miter gauge head flush to square. Tighten lock knob.
D. Adjust stop screw until it rests against the stop pin and tighten lock nut.
E. Adjust 45°, left and right using a 45° triangle or a protractor of a square using the above procedure.
The miter gauge head should swivel smoothly on the bar after the knob is loos- ened. To adjust this swivel movement:
A.Loosen the knob.
B.Loosen set screw with a 2.5mm hex wrench.
C.If the head is too loose turn the flat- head screw in a clockwise direction. If the head is too tight and will not swivel smoothly turn the flathead screw counterclockwise.
D.Tighten set screw.
Adjustment |
|
Screw | Stop Pin |
Flat Head
Screw
Set Screw
31