Rip Fence Lock Lever Adjustment
The rip fence lock lever, when locked down, should hold the rip fence securely. The lever should not be difficult to push down and lock.
To assure proper fence lock adjust- ment:
a. Raise lock lever and push fence head toward rear of saw.
b. Hold fence head down onto front guide bar while lifting rear of fence up and down.
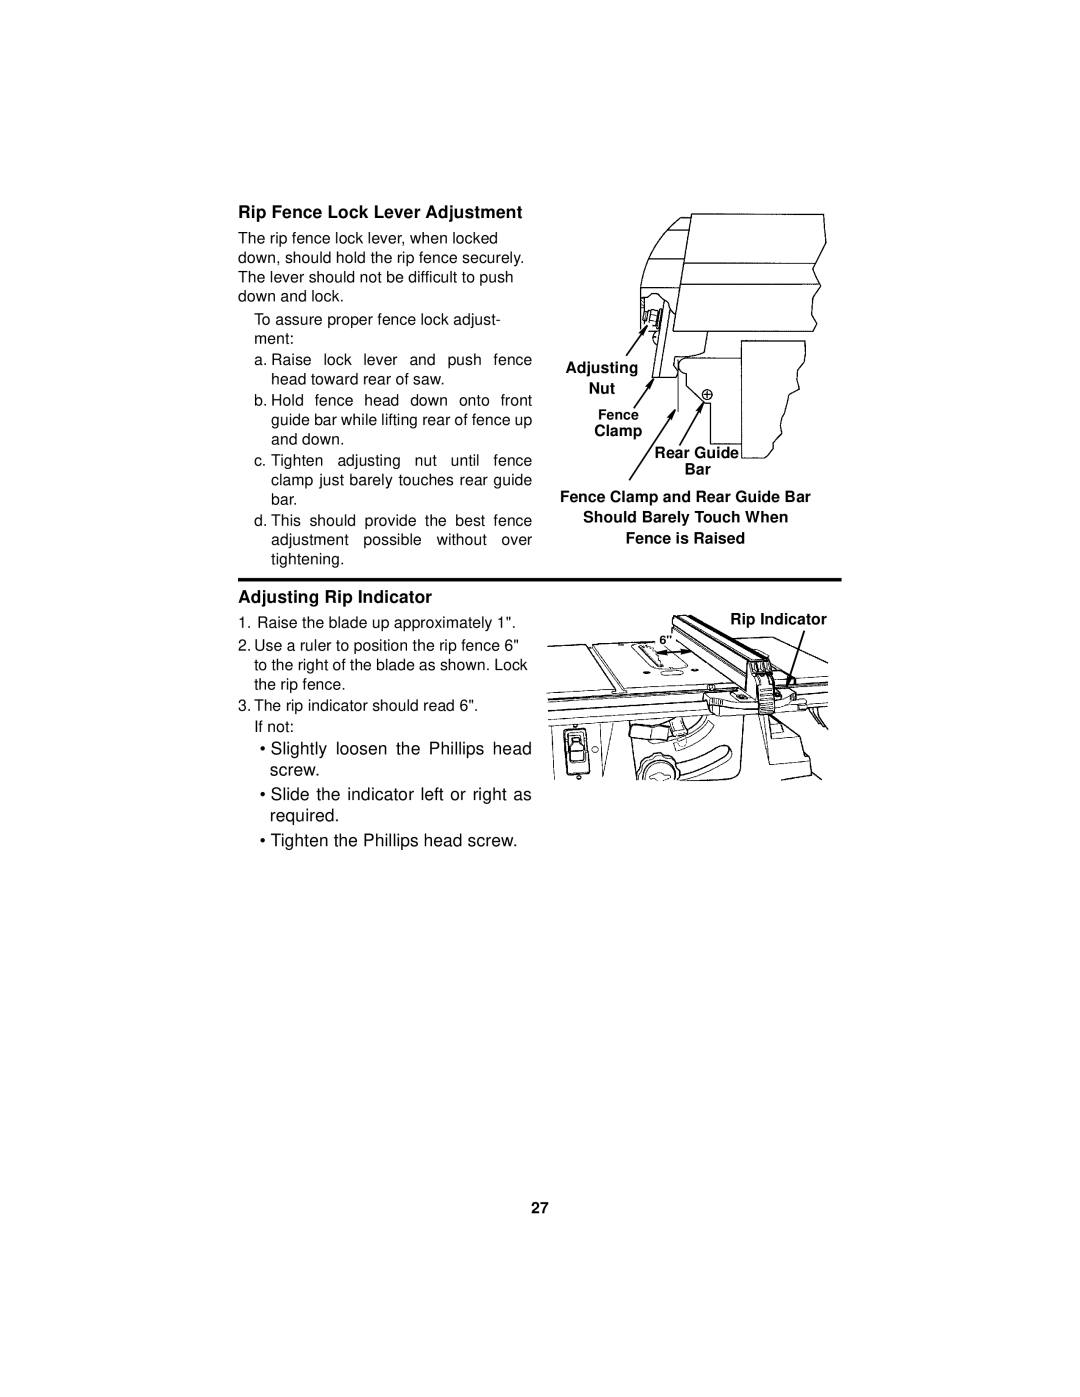
c. Tighten adjusting nut until fence clamp just barely touches rear guide bar.
d. This should provide the best fence adjustment possible without over tightening.
Adjusting
Nut
Fence
Clamp
Rear Guide
Bar
Fence Clamp and Rear Guide Bar
Should Barely Touch When
Fence is Raised
Adjusting Rip Indicator
1.Raise the blade up approximately 1".
2.Use a ruler to position the rip fence 6" to the right of the blade as shown. Lock the rip fence.
3.The rip indicator should read 6". If not:
•Slightly loosen the Phillips head screw.
•Slide the indicator left or right as required.
•Tighten the Phillips head screw.
Rip Indicator
6"
27