Alignment (continued)
Removing and Installing Sawblade
WARNING: To reduce the risk of injury from accidental start, turn switch “OFF” and remove plug from power source outlet before removing or installing sawblade.
a. Raise blade guard, remove insert, elevate blade to its highest point.
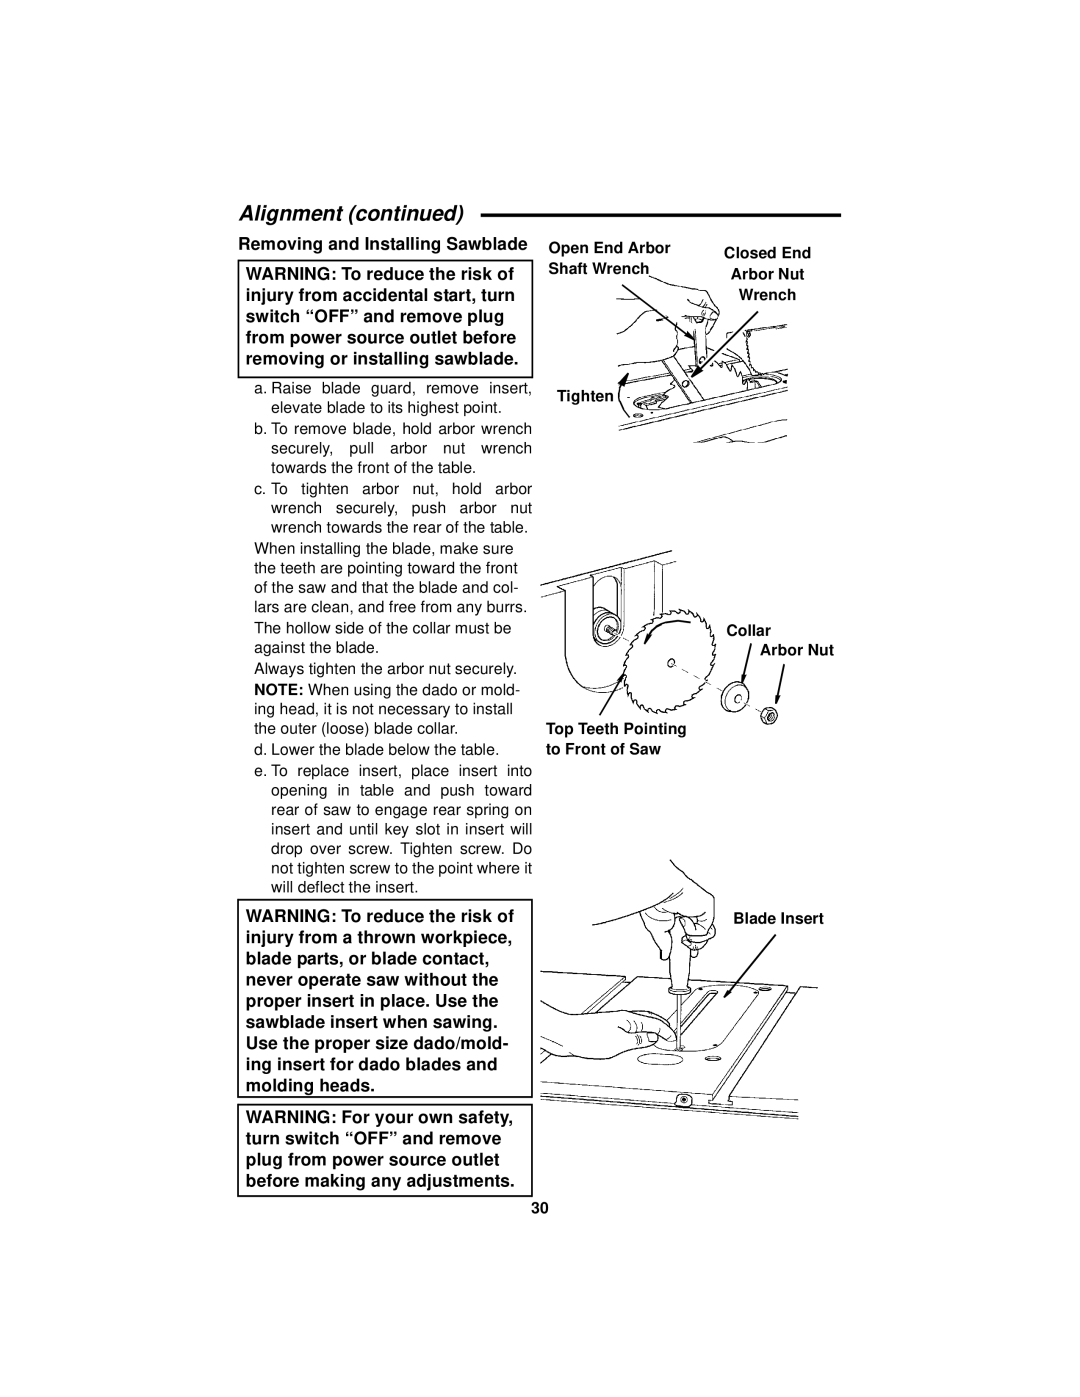
b. To remove blade, hold arbor wrench securely, pull arbor nut wrench towards the front of the table.
c. To tighten arbor nut, hold arbor wrench securely, push arbor nut wrench towards the rear of the table.
When installing the blade, make sure the teeth are pointing toward the front of the saw and that the blade and col- lars are clean, and free from any burrs. The hollow side of the collar must be against the blade.
Always tighten the arbor nut securely. NOTE: When using the dado or mold- ing head, it is not necessary to install the outer (loose) blade collar.
d. Lower the blade below the table.
e. To replace insert, place insert into opening in table and push toward rear of saw to engage rear spring on insert and until key slot in insert will drop over screw. Tighten screw. Do not tighten screw to the point where it will deflect the insert.
WARNING: To reduce the risk of injury from a thrown workpiece, blade parts, or blade contact, never operate saw without the proper insert in place. Use the sawblade insert when sawing. Use the proper size dado/mold- ing insert for dado blades and molding heads.
WARNING: For your own safety, turn switch “OFF” and remove plug from power source outlet before making any adjustments.
Open End Arbor Shaft Wrench
Tighten ![]()
Top Teeth Pointing to Front of Saw
Closed End
Arbor Nut
Wrench
Collar
Arbor Nut
Blade Insert
30