Installation
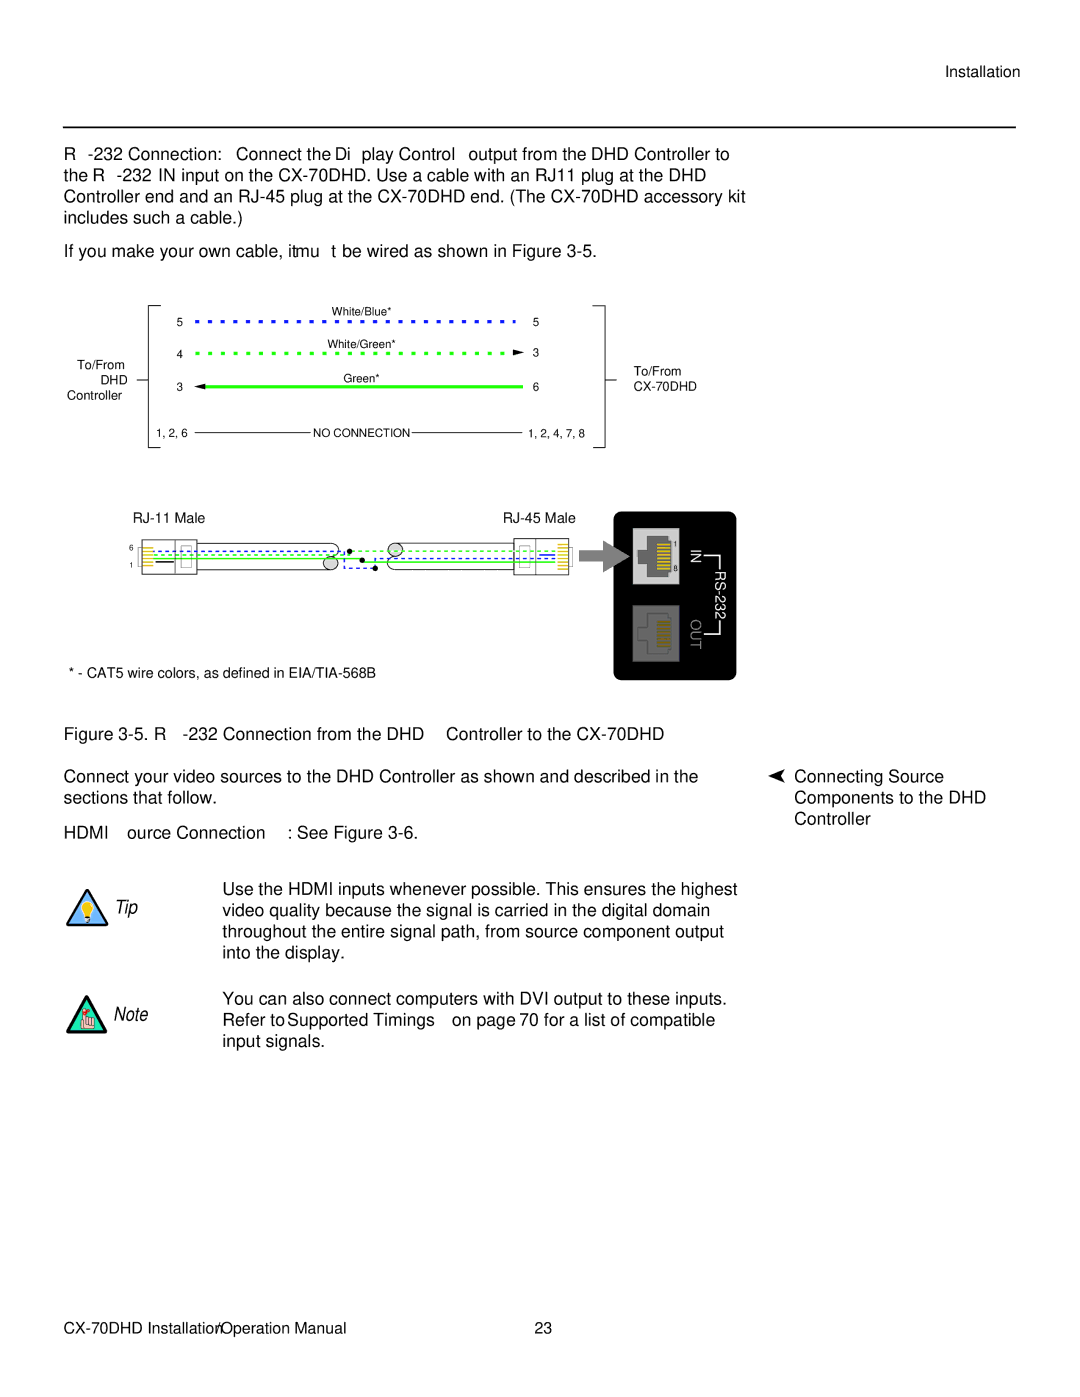
If you make your own cable, it must be wired as shown in Figure
To/From
DHD
Controller
White/Blue*
5 ![]() 5
5
White/Green*
4 ![]() 3
3
| Green* |
| To/From | |
|
| |||
3 |
| 6 |
| |
|
| |||
1, 2, 6 |
| NO CONNECTION |
| 1, 2, 4, 7, 8 |
|
|
6
1
* - CAT5 wire colors, as defined in
1
8
IN OUT
Figure |
|
Connect your video sources to the DHD Controller as shown and described in the | Connecting Source |
sections that follow. | Components to the DHD |
HDMI Source Connections: See Figure | Controller |
|
Use the HDMI inputs whenever possible. This ensures the highest
Tip video quality because the signal is carried in the digital domain throughout the entire signal path, from source component output into the display.
You can also connect computers with DVI output to these inputs.
Note Refer to Supported Timings on page 70 for a list of compatible input signals.
23 |