3. Installation
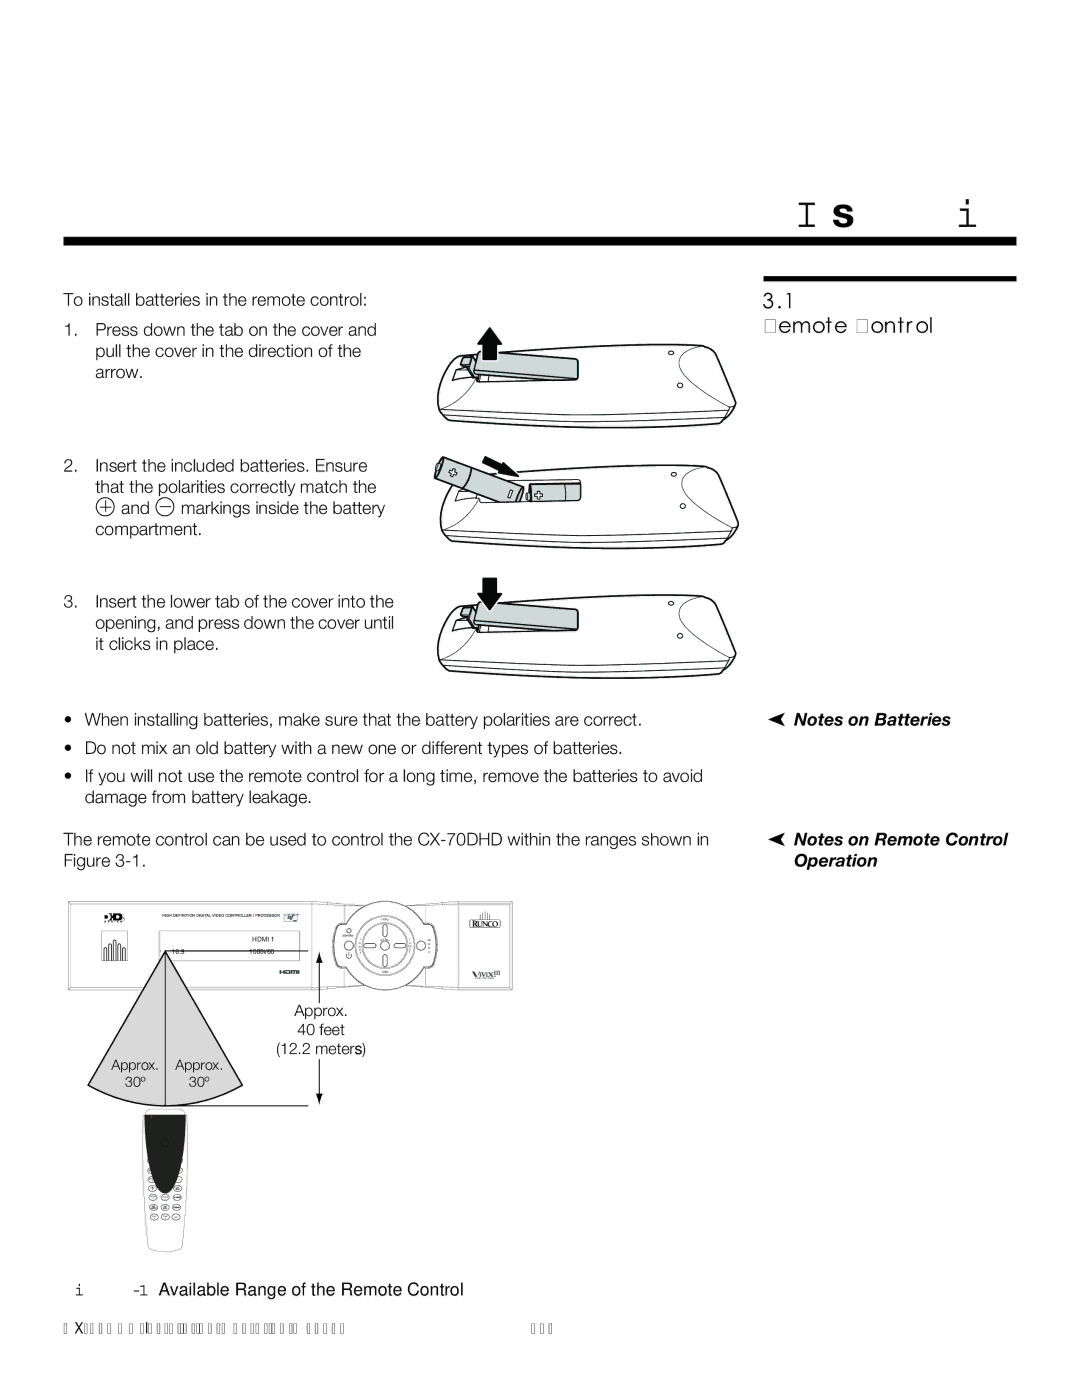
To install batteries in the remote control:
1. Press down the tab on the cover and pull the cover in the direction of the arrow.
2. Insert the included batteries. Ensure that the polarities correctly match the ![]() and
and ![]() markings inside the battery compartment.
markings inside the battery compartment.
3. Insert the lower tab of the cover into the opening, and press down the cover until it clicks in place.
•When installing batteries, make sure that the battery polarities are correct.
•Do not mix an old battery with a new one or different types of batteries.
•If you will not use the remote control for a long time, remove the batteries to avoid damage from battery leakage.
The remote control can be used to control the
3.1
Remote Control
![]() Notes on Batteries
Notes on Batteries
![]() Notes on Remote Control Operation
Notes on Remote Control Operation
3 |
|
|
|
| ra tio |
|
|
| HDMI 1 | standby | enter |
|
|
| ni | ||
|
|
|
| p |
|
|
| 16:9 | 1080i/60 | u |
|
|
| t |
| ||
|
|
|
|
| r atio |
|
|
|
| Approx. |
|
|
|
|
| 40 feet |
|
Approx. |
| Approx. | (12.2 meters) |
| |
|
|
|
| ||
30º |
| 30º |
|
|
|
EXIT |
|
|
|
|
|
|
| 16 : 9 |
|
|
|
|
| 4 : 3 |
|
|
|
HDMI | HDMI |
|
|
|
|
1 | 2 |
|
|
|
|
CUST | CUST | SVC |
|
|
|
1 | 2 |
|
|
| |
i n p u t
m
e n u
Figure 3-1. Available Range of the Remote Control
15 |