Runco CX-65HD, CX-OPAL47, CX-47HD operation manual Typical Test Pattern for Adjusting Sharpness

Models: CX-47HD CX-OPAL47 CX-65HD

1 76
Download 76 pages 11.23 Kb
Page 46
Image 46

Operation

Like the brightness and contrast controls, the color and tint controls

Note are interactive. A change to one may require a subtle change to the other in order to achieve the optimum setting.

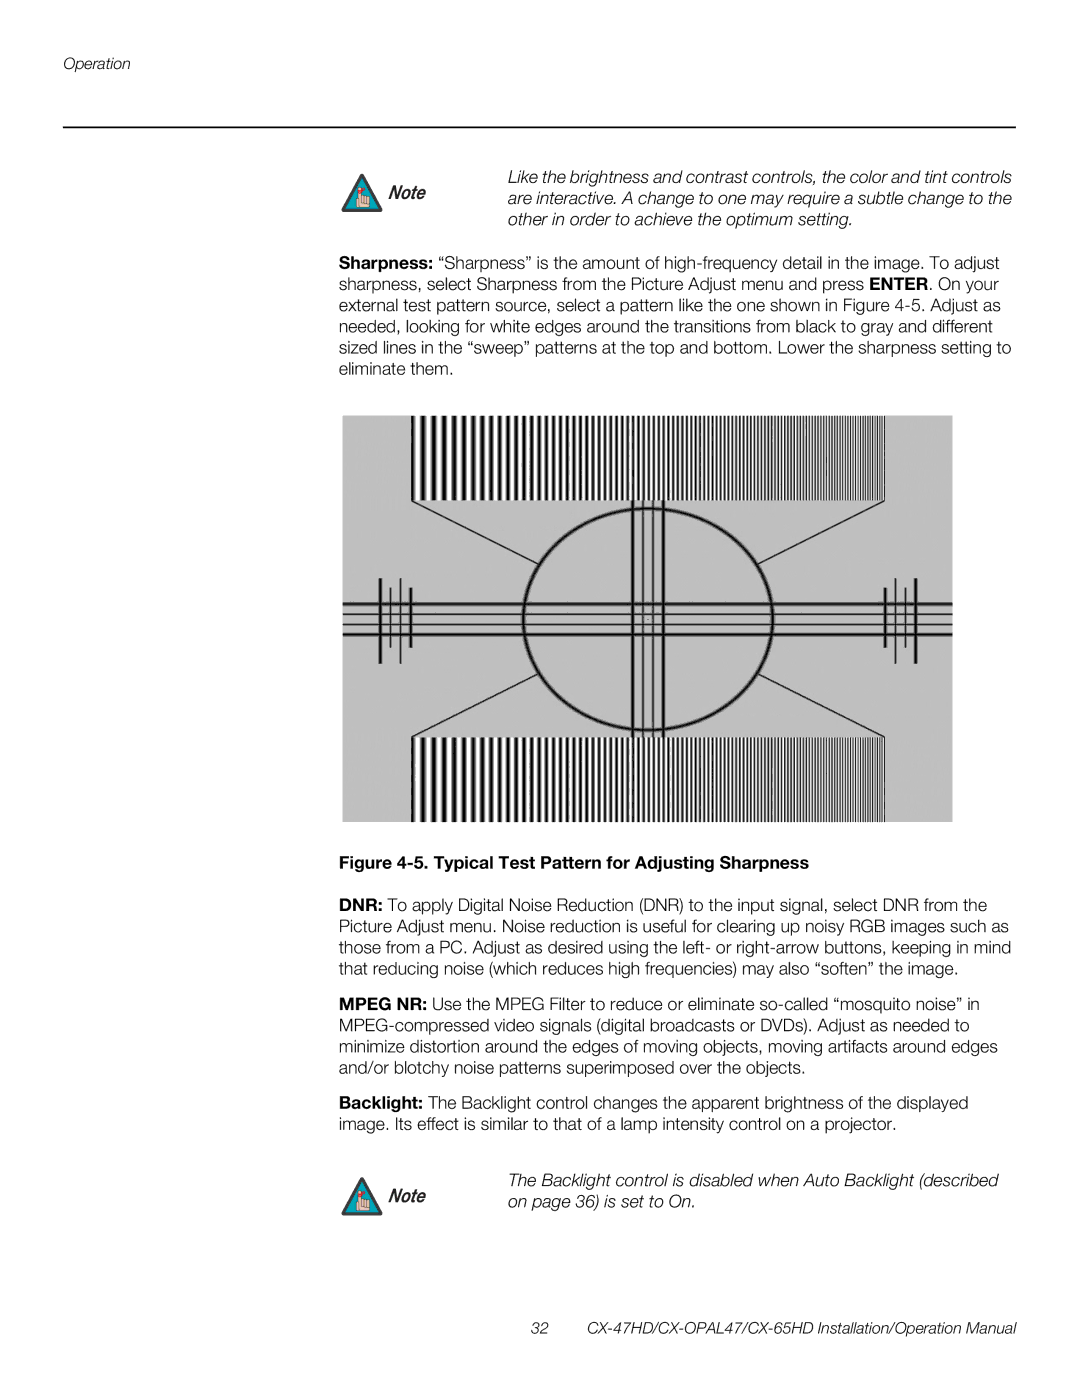
Sharpness: “Sharpness” is the amount of high-frequency detail in the image. To adjust sharpness, select Sharpness from the Picture Adjust menu and press ENTER. On your external test pattern source, select a pattern like the one shown in Figure 4-5.Adjust as needed, looking for white edges around the transitions from black to gray and different sized lines in the “sweep” patterns at the top and bottom. Lower the sharpness setting to eliminate them.

Figure 4-5. Typical Test Pattern for Adjusting Sharpness

DNR: To apply Digital Noise Reduction (DNR) to the input signal, select DNR from the Picture Adjust menu. Noise reduction is useful for clearing up noisy RGB images such as those from a PC. Adjust as desired using the left- or right-arrow buttons, keeping in mind that reducing noise (which reduces high frequencies) may also “soften” the image.

MPEG NR: Use the MPEG Filter to reduce or eliminate so-called “mosquito noise” in MPEG-compressed video signals (digital broadcasts or DVDs). Adjust as needed to minimize distortion around the edges of moving objects, moving artifacts around edges and/or blotchy noise patterns superimposed over the objects.

Backlight: The Backlight control changes the apparent brightness of the displayed image. Its effect is similar to that of a lamp intensity control on a projector.

Note

The Backlight control is disabled when Auto Backlight (described

on page 36) is set to On.

32 CX-47HD/CX-OPAL47/CX-65HD Installation/Operation Manual

Page 46
Image 46
Runco CX-65HD, CX-OPAL47, CX-47HD operation manual Typical Test Pattern for Adjusting Sharpness