Installation
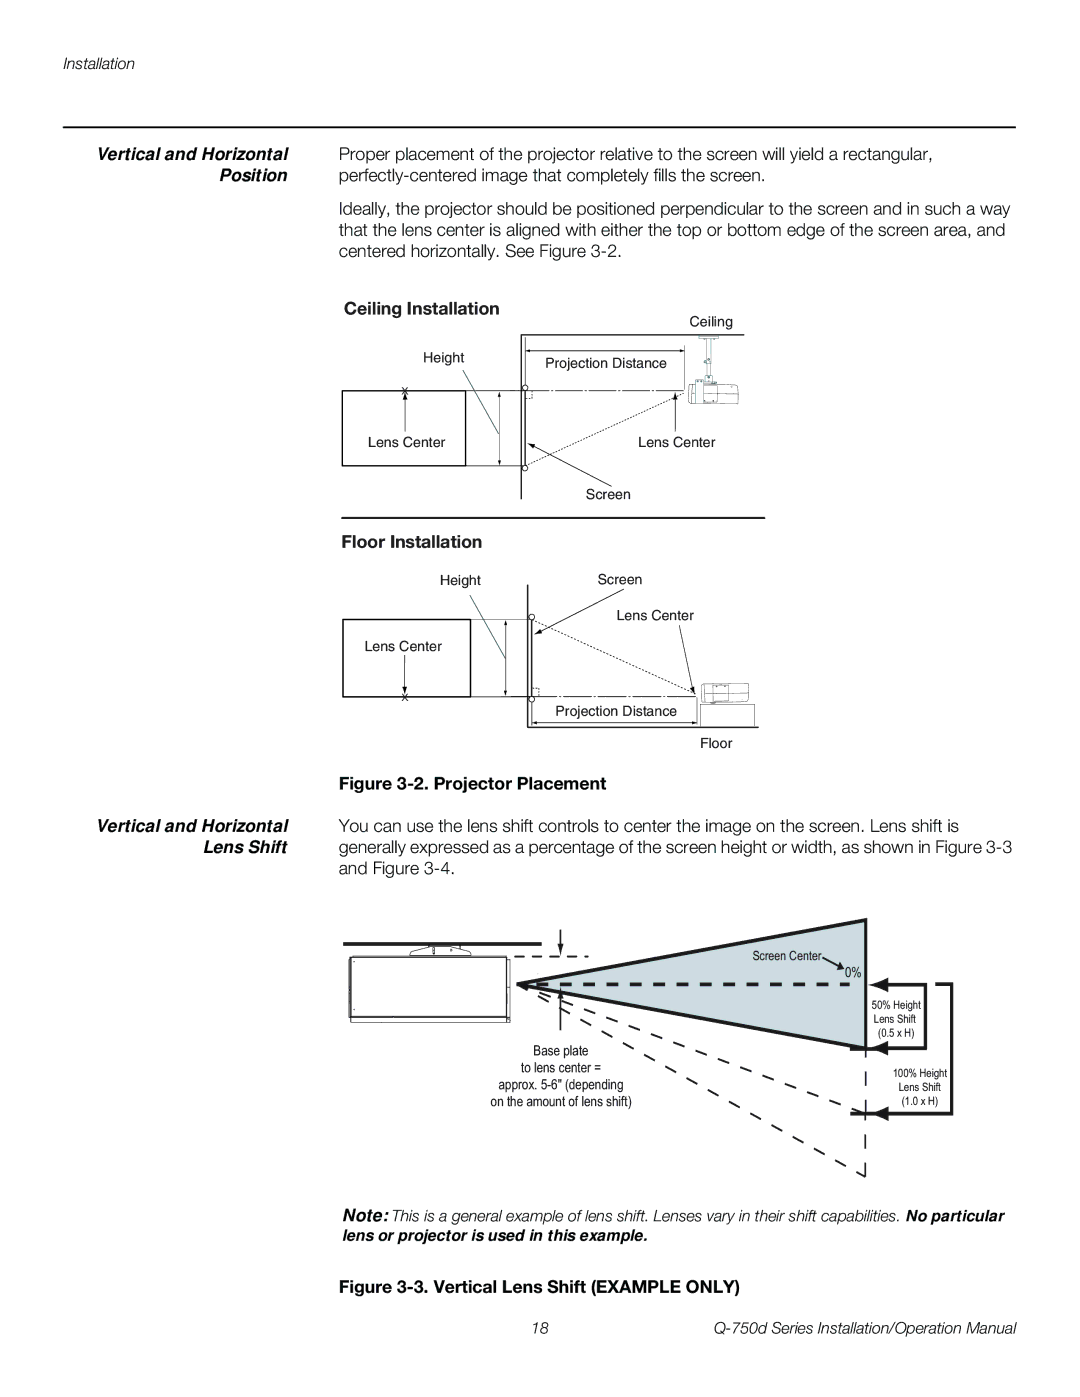
Vertical and Horizontal | ➤ | Proper placement of the projector relative to the screen will yield a rectangular, |
Position |
| |
|
| Ideally, the projector should be positioned perpendicular to the screen and in such a way |
|
| that the lens center is aligned with either the top or bottom edge of the screen area, and |
|
| centered horizontally. See Figure |
Ceiling Installation
| Ceiling |
Height | Projection Distance |
| |
x |
|
Lens Center
Lens Center
Screen
Floor Installation
Height
Lens Center |
x |
Screen
Lens Center
Projection Distance
Floor
|
| Figure |
Vertical and Horizontal | ➤ | You can use the lens shift controls to center the image on the screen. Lens shift is |
Lens Shift |
| generally expressed as a percentage of the screen height or width, as shown in Figure |
|
| and Figure |
Screen Center
0%
50% Height
Lens Shift
(0.5 x H)
Base plate
to lens center =
approx.
on the amount of lens shift)
100% Height
Lens Shift
(1.0 x H)
Note: This is a general example of lens shift. Lenses vary in their shift capabilities. No particular
lens or projector is used in this example.
Figure 3-3. Vertical Lens Shift (EXAMPLE ONLY)
18 |