2. Controls and Functions
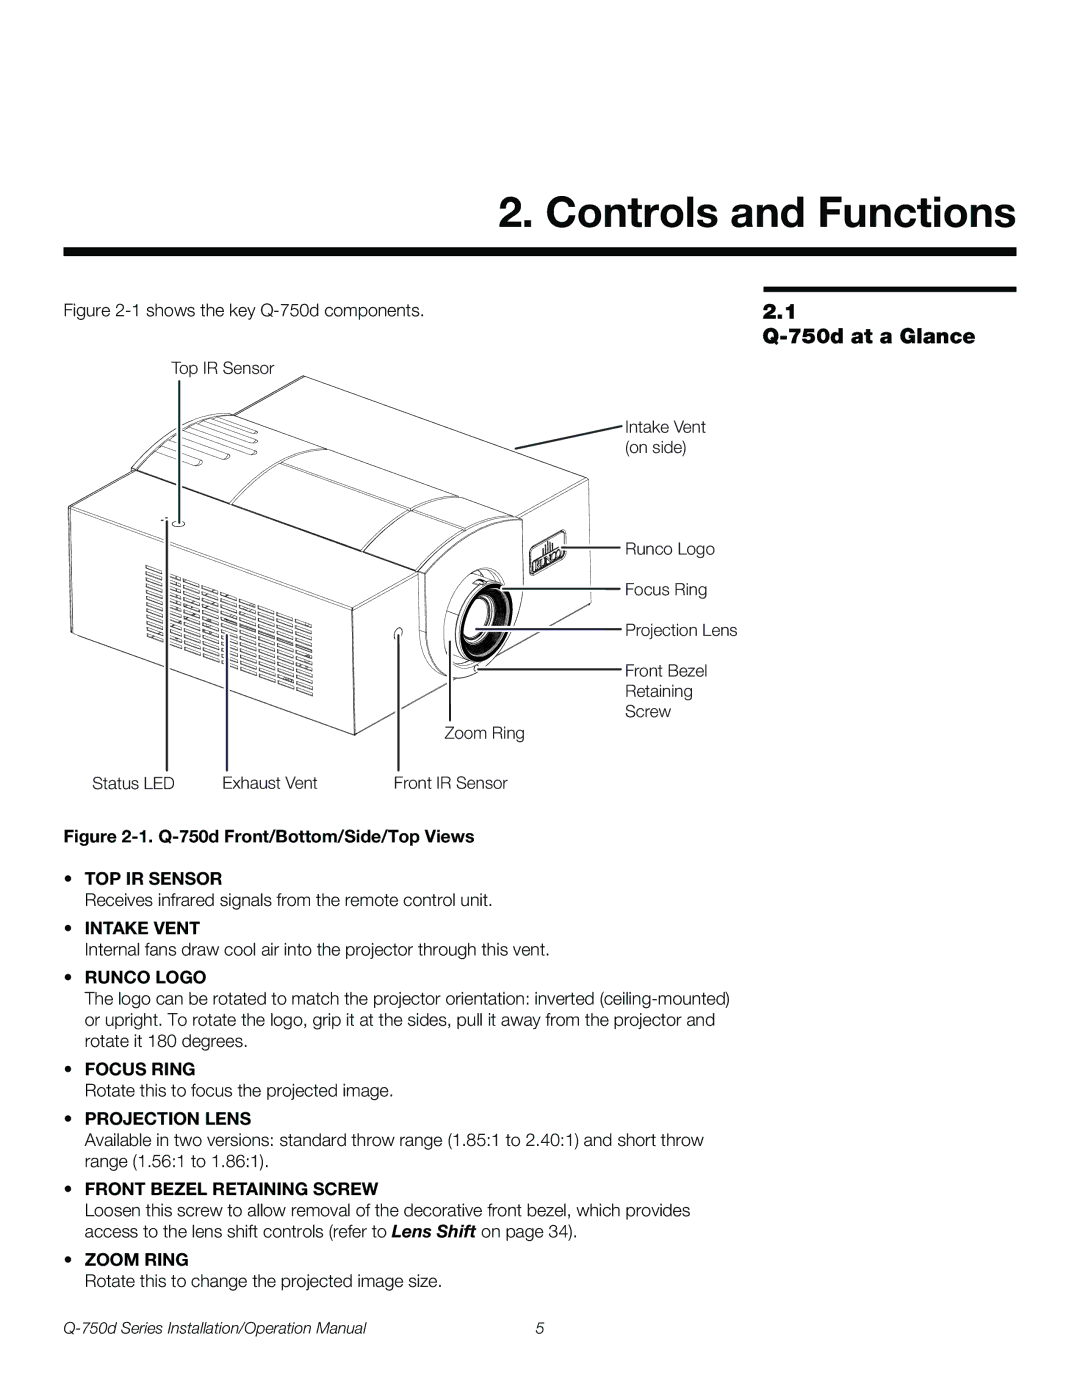
Figure 2-1 shows the key Q-750d components.
Top IR Sensor
Intake Vent (on side)
![]()
![]()
![]() Runco Logo
Runco Logo
![]() Focus Ring
Focus Ring
![]() Projection Lens
Projection Lens
![]() Front Bezel
Front Bezel
Retaining
Screw
Zoom Ring
Status LED | Exhaust Vent | Front IR Sensor |
Figure 2-1. Q-750d Front/Bottom/Side/Top Views
•TOP IR SENSOR
Receives infrared signals from the remote control unit.
•INTAKE VENT
Internal fans draw cool air into the projector through this vent.
•RUNCO LOGO
The logo can be rotated to match the projector orientation: inverted
•FOCUS RING
Rotate this to focus the projected image.
•PROJECTION LENS
Available in two versions: standard throw range (1.85:1 to 2.40:1) and short throw range (1.56:1 to 1.86:1).
•FRONT BEZEL RETAINING SCREW
Loosen this screw to allow removal of the decorative front bezel, which provides access to the lens shift controls (refer to Lens Shift on page 34).
•ZOOM RING
Rotate this to change the projected image size.
2.1
Q-750d at a Glance
5 |