3Pull the paper tray out of the printer and remove the packing tape and the packing material inside of the tray.
Installing the Toner Cartridge
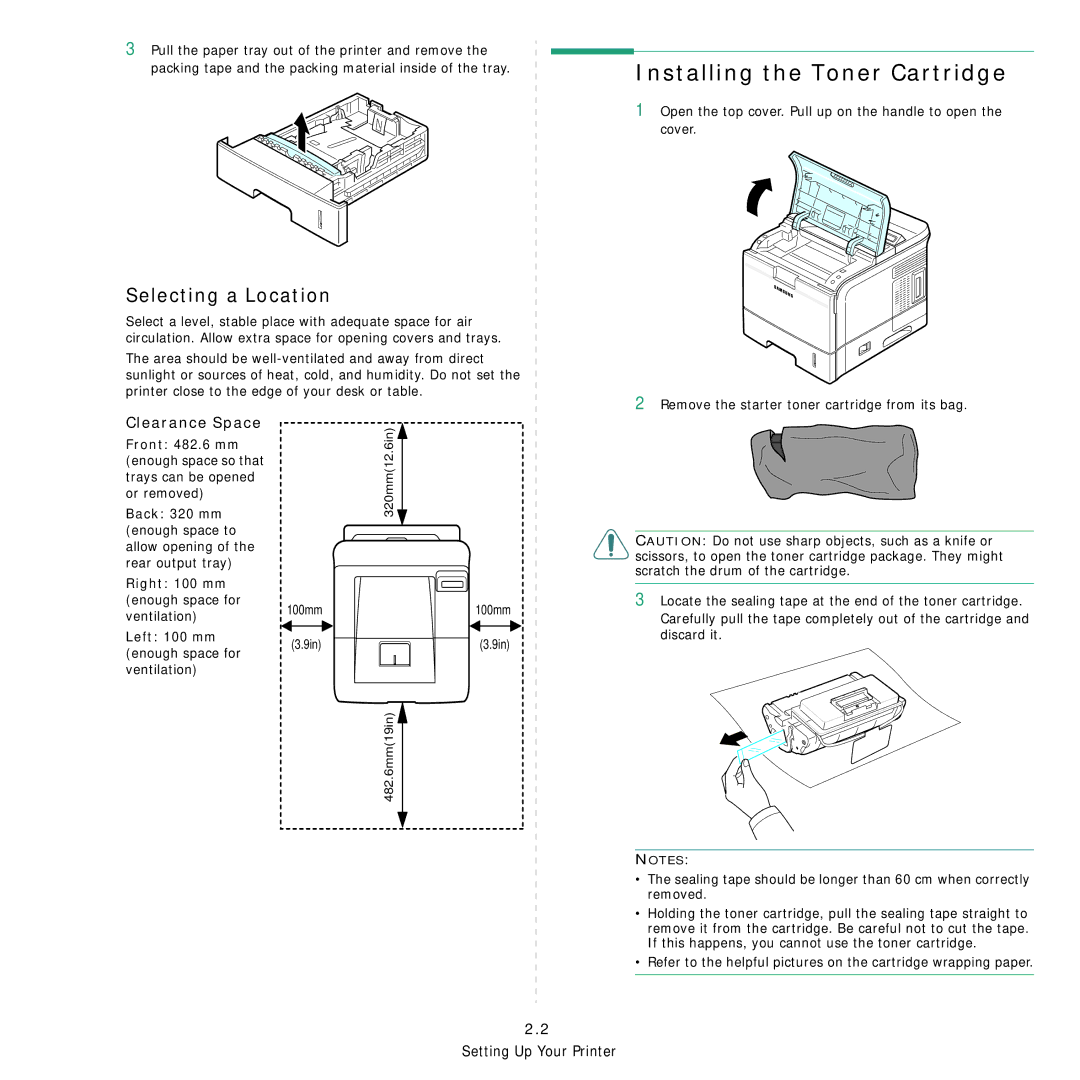
1 Open the top cover. Pull up on the handle to open the cover.
Selecting a Location
Select a level, stable place with adequate space for air circulation. Allow extra space for opening covers and trays.
The area should be
printer close to the edge of your desk or table.
2 Remove the starter toner cartridge from its bag.
Clearance Space
Front: 482.6 mm (enough space so that trays can be opened or removed)
Back: 320 mm (enough space to allow opening of the rear output tray)
Right: 100 mm (enough space for ventilation)
Left: 100 mm (enough space for ventilation)
320mm(12.6in)
100mm100mm
(3.9in) | (3.9in) |
482.6mm(19in)
CAUTION: Do not use sharp objects, such as a knife or scissors, to open the toner cartridge package. They might scratch the drum of the cartridge.
3 Locate the sealing tape at the end of the toner cartridge.
Carefully pull the tape completely out of the cartridge and discard it.
NOTES:
•The sealing tape should be longer than 60 cm when correctly removed.
•Holding the toner cartridge, pull the sealing tape straight to remove it from the cartridge. Be careful not to cut the tape. If this happens, you cannot use the toner cartridge.
•Refer to the helpful pictures on the cartridge wrapping paper.