Installation Procedures
1.Open the front panel, and remove the flare nut.
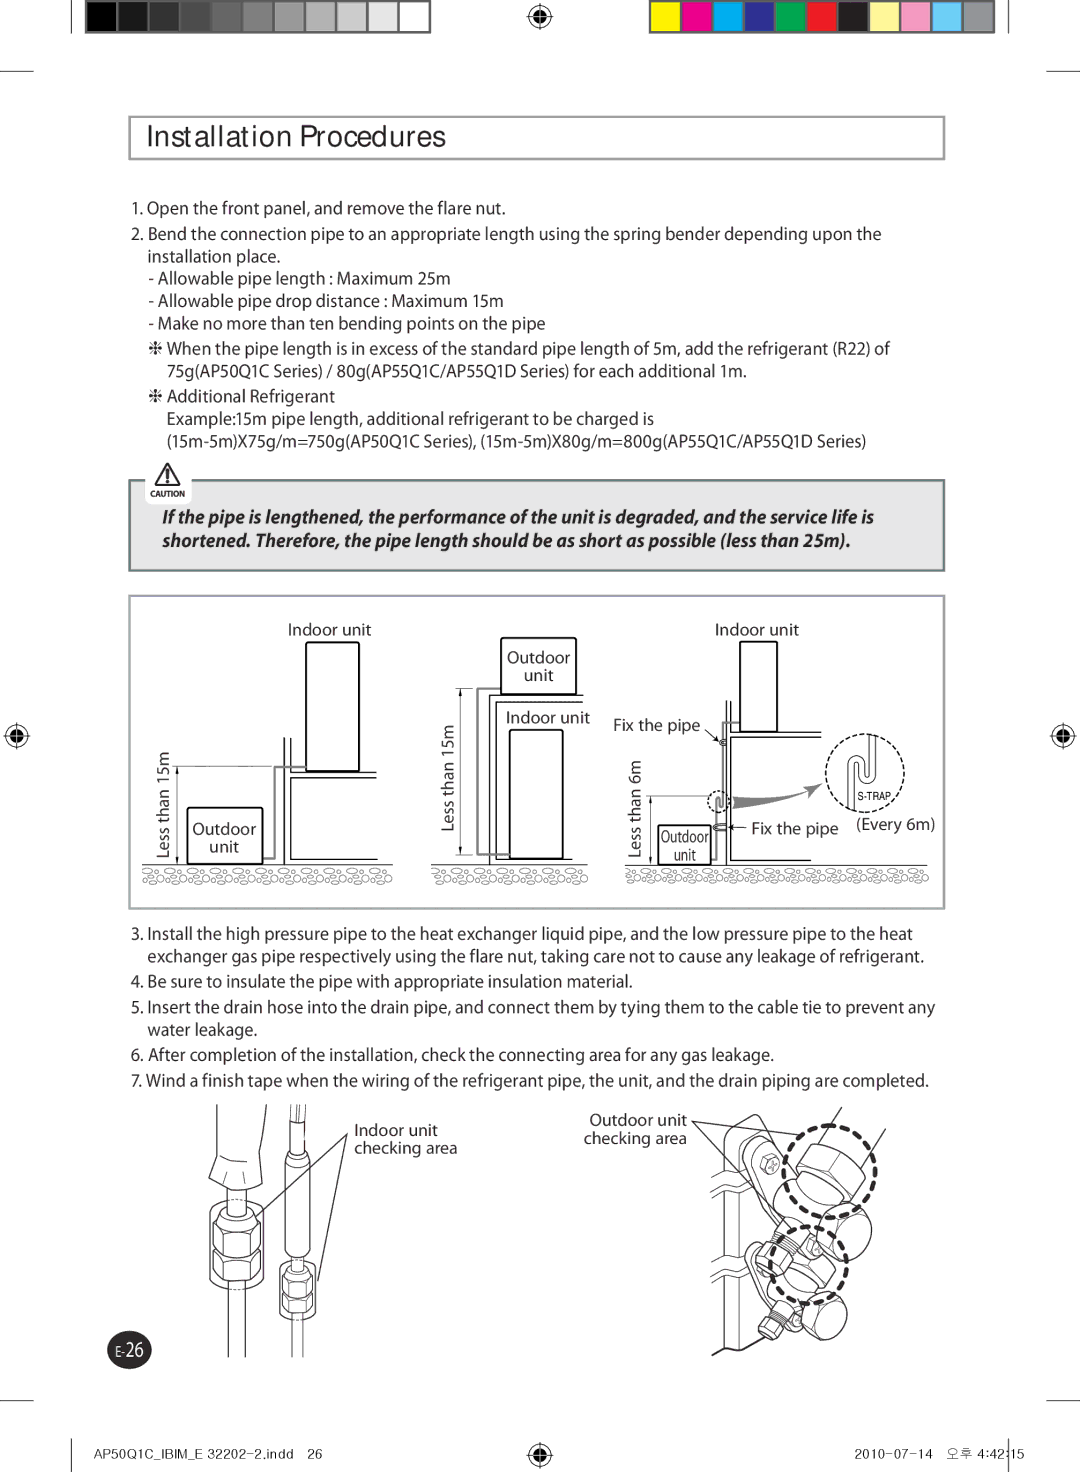
2.Bend the connection pipe to an appropriate length using the spring bender depending upon the installation place.
-Allowable pipe length : Maximum 25m
-Allowable pipe drop distance : Maximum 15m
-Make no more than ten bending points on the pipe
When the pipe length is in excess of the standard pipe length of 5m, add the refrigerant (R22) of 75g(AP50Q1C Series) / 80g(AP55Q1C/AP55Q1D Series) for each additional 1m.
Additional Refrigerant
Example:15m pipe length, additional refrigerant to be charged is
If the pipe is lengthened, the performance of the unit is degraded, and the service life is shortened. Therefore, the pipe length should be as short as possible (less than 25m).
Indoor unit
than15m | Outdoor | |
Less | ||
unit |
|
|
| Indoor unit |
|
| Outdoor |
|
|
|
| unit |
|
|
|
15m | Indoor unit | Fix the pipe |
|
|
|
|
| ||
| thanLess6m |
|
| |
Lessthan |
|
| ||
|
|
|
| |
|
| Outdoor | Fix the pipe | (Every 6m) |
|
|
|
| |
|
| unit |
|
|
3.Install the high pressure pipe to the heat exchanger liquid pipe, and the low pressure pipe to the heat exchanger gas pipe respectively using the flare nut, taking care not to cause any leakage of refrigerant.
4.Be sure to insulate the pipe with appropriate insulation material.
5.Insert the drain hose into the drain pipe, and connect them by tying them to the cable tie to prevent any water leakage.
6.After completion of the installation, check the connecting area for any gas leakage.
7.Wind a finish tape when the wiring of the refrigerant pipe, the unit, and the drain piping are completed.
Indoor unit | Outdoor unit | |
checking area | ||
checking area | ||
|
AP50Q1C_IBIM_E