

 System Setup
On-Screen Menu Navigation
ystem Setup
| Timer Record | |
No Disc |
|
|
Timer Rec. | Timer Record | ► |
Setup | Scheduled Record List | ► |
![]()
![]() MOVE
MOVE ![]() ENTER
ENTER ![]() RETURN
RETURN ![]() EXIT
EXIT
| Title List | |
|
| |
Title List | Title List | ► |
Playlist |
|
|
Disc Manager |
|
|
Timer Rec. |
|
|
Setup |
|
|
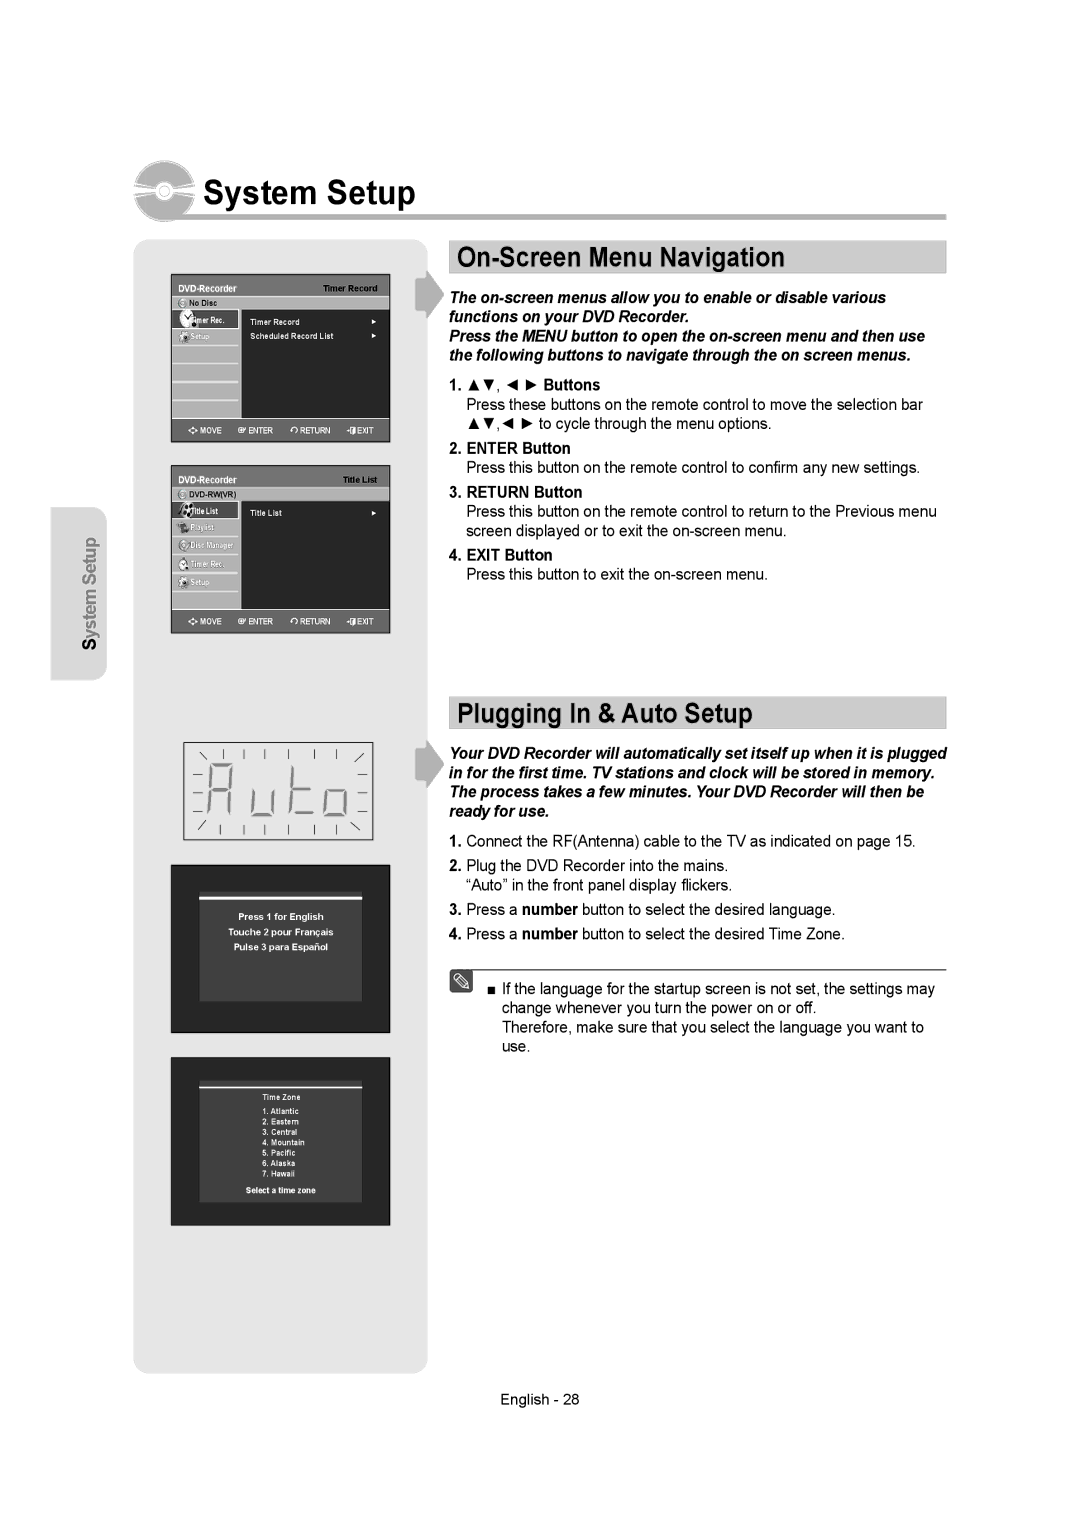
The
Press the MENU button to open the
1.▲▼, ◄ ► Buttons
Press these buttons on the remote control to move the selection bar ▲▼,◄ ► to cycle through the menu options.
2.ENTER Button
Press this button on the remote control to confirm any new settings.
3.RETURN Button
Press this button on the remote control to return to the Previous menu screen displayed or to exit the
4.EXIT Button
Press this button to exit the on-screen menu.
S
![]()
![]() MOVE
MOVE ![]() ENTER
ENTER ![]() RETURN
RETURN ![]() EXIT
EXIT
Press 1 for English
Touche 2 pour Français
Pulse 3 para Español
Time Zone
1.Atlantic
2.Eastern
3.Central
4.Mountain
5.Pacific
6.Alaska
7.Hawaii
Select a time zone
Plugging In & Auto Setup
Your DVD Recorder will automatically set itself up when it is plugged in for the first time. TV stations and clock will be stored in memory. The process takes a few minutes. Your DVD Recorder will then be ready for use.
1.Connect the RF(Antenna) cable to the TV as indicated on page 15.
2.Plug the DVD Recorder into the mains. “Auto” in the front panel display flickers.
3.Press a number button to select the desired language.
4.Press a number button to select the desired Time Zone.
■ If the language for the startup screen is not set, the settings may change whenever you turn the power on or off.
Therefore, make sure that you select the language you want to use.
