Description
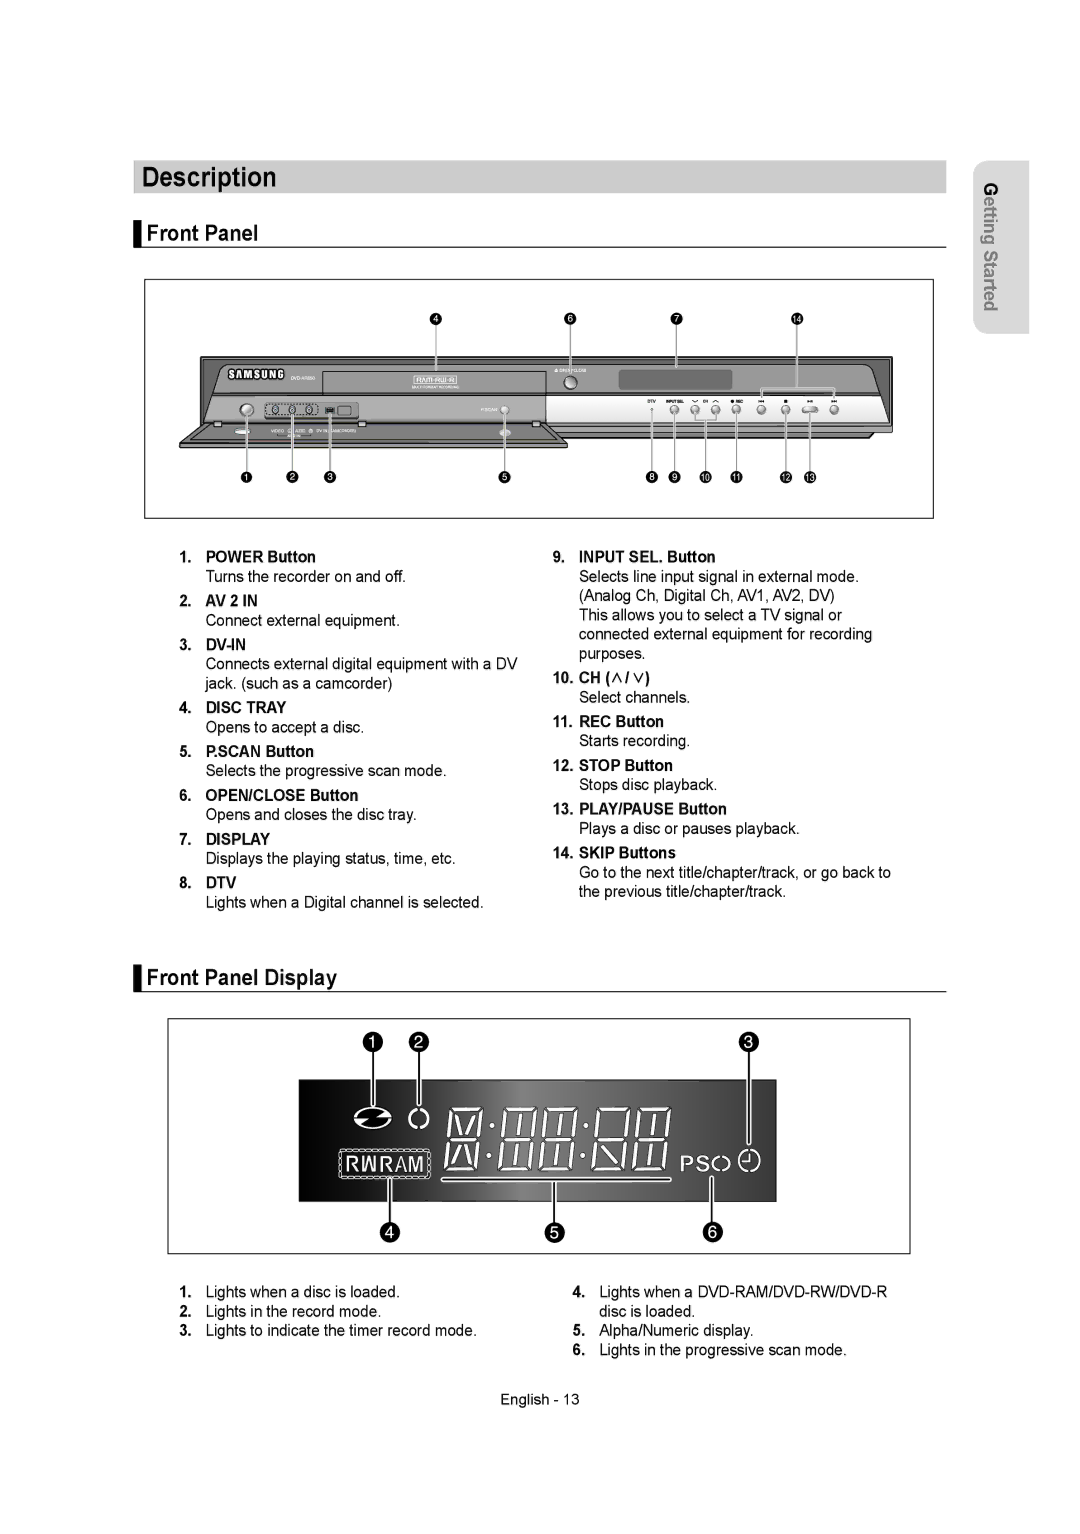
▌Front Panel
Getting Started
1.POWER Button
Turns the recorder on and off.
2.AV 2 IN
Connect external equipment.
3.
Connects external digital equipment with a DV jack. (such as a camcorder)
4.DISC TRAY
Opens to accept a disc.
5.P.SCAN Button
Selects the progressive scan mode.
6.OPEN/CLOSE Button
Opens and closes the disc tray.
7.DISPLAY
Displays the playing status, time, etc.
8.DTV
Lights when a Digital channel is selected.
▌Front Panel Display
9.INPUT SEL. Button
Selects line input signal in external mode. (Analog Ch, Digital Ch, AV1, AV2, DV) This allows you to select a TV signal or connected external equipment for recording purposes.
10.CH (![]() /
/ ![]() ) Select channels.
) Select channels.
11.REC Button Starts recording.
12.STOP Button Stops disc playback.
13.PLAY/PAUSE Button
Plays a disc or pauses playback.
14.SKIP Buttons
Go to the next title/chapter/track, or go back to the previous title/chapter/track.
1.Lights when a disc is loaded.
2.Lights in the record mode.
3.Lights to indicate the timer record mode.
4.Lights when a
5.Alpha/Numeric display.
6.Lights in the progressive scan mode.
English - 13