S e t t i n g U p B a s i c I n f o r m a t i o n
Setting Date and Time
Your fax machine has a timer function which makes it possible to send documents at a later time. In order to accomplish this, the date and time settings must be programmed. Note that the time must be entered in
To set or change the date and time, press [FUNCTION], then [5]. Follow the steps at right.
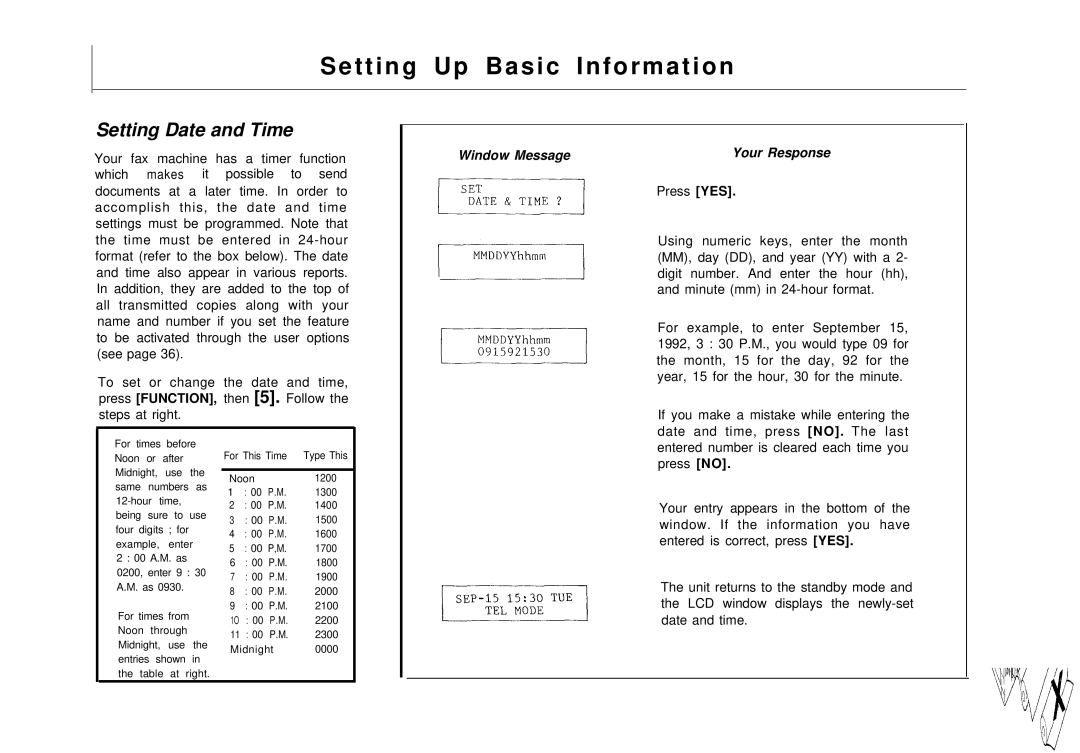
Window Message | Your Response |
Press [YES].
Using numeric keys, enter the month (MM), day (DD), and year (YY) with a 2- digit number. And enter the hour (hh), and minute (mm) in
For example, to enter September 15, 1992, 3 : 30 P.M., you would type 09 for the month, 15 for the day, 92 for the year, 15 for the hour, 30 for the minute.
If you make a mistake while entering the date and time, press [NO]. The last
For times before Noon or after Midnight, use the same numbers as
2 : 00 A.M. as
0200, enter 9 : 30 A.M. as 0930.
For times from Noon through Midnight, use the entries shown in the table at right.
For This Time | Type This | ||
|
|
| |
Noon |
| 1200 | |
1 | : 00 | P.M. | 1300 |
2 | : 00 | P.M. | 1400 |
3 | : 00 | P.M. | 1500 |
4 | : 00 | P.M. | 1600 |
5 | : 00 P,M. | 1700 | |
6 | : 00 | P.M. | 1800 |
7 | : 00 | P.M. | 1900 |
8 | : 00 | P.M. | 2000 |
9 | : 00 | P.M. | 2100 |
1O | : 00 | P.M. | 2200 |
11 | : 00 | P.M. | 2300 |
Midnight | 0000 | ||
entered number is cleared each time you press [NO].
Your entry appears in the bottom of the window. If the information you have entered is correct, press [YES].
The unit returns to the standby mode and the LCD window displays the