DNIeTM (Digital Natural Image engine)
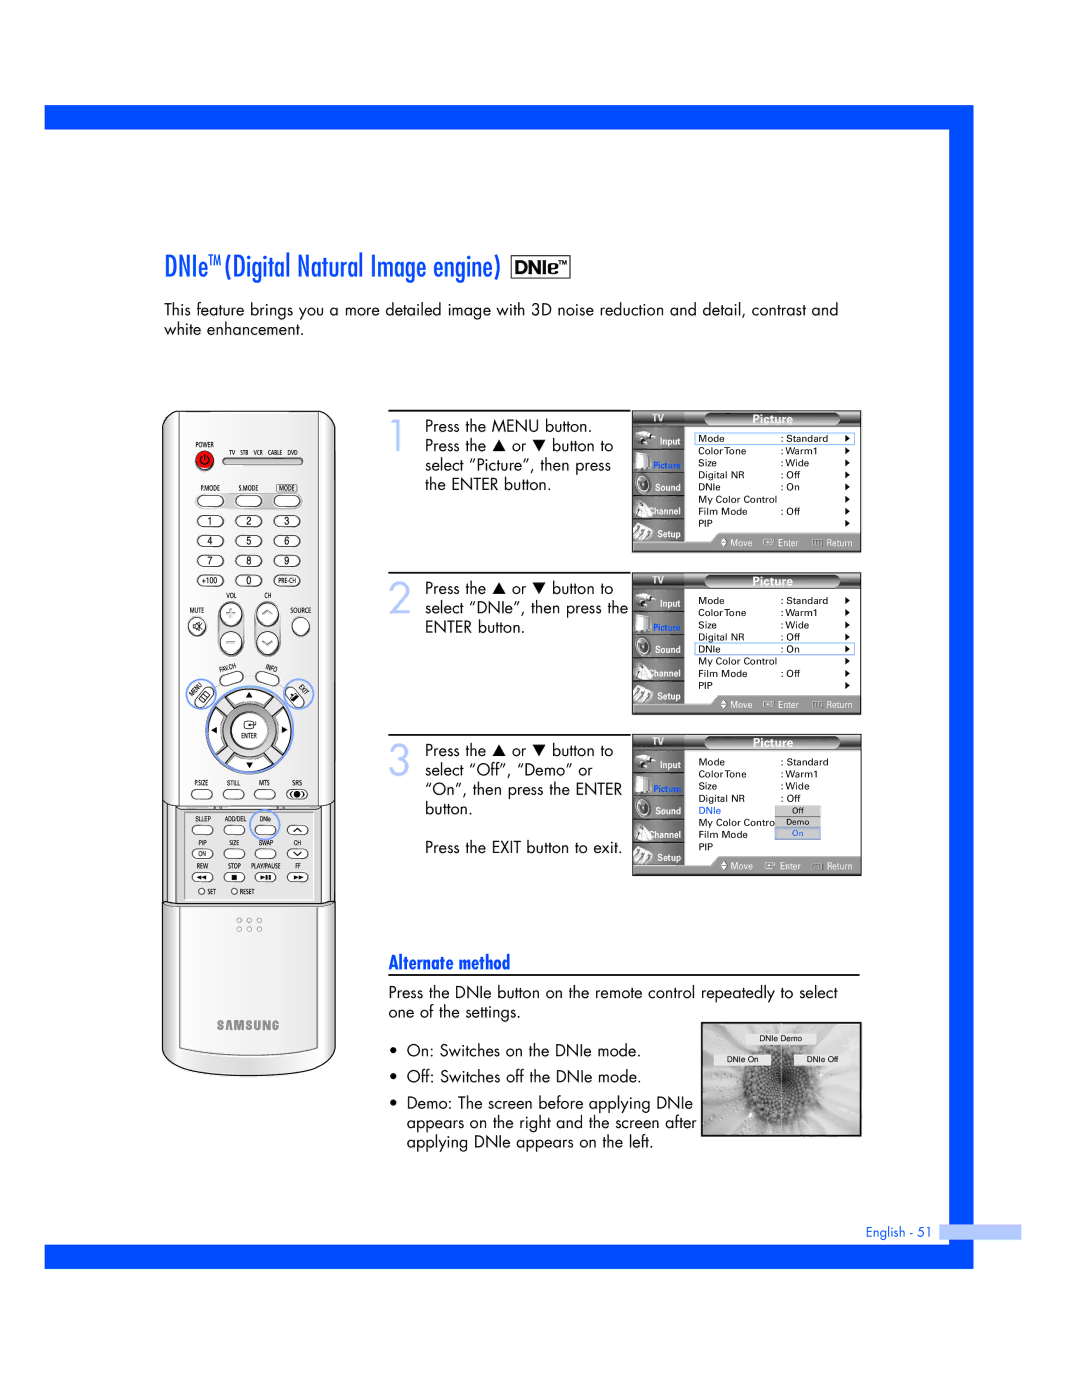
This feature brings you a more detailed image with 3D noise reduction and detail, contrast and white enhancement.
1 Press the MENU button. Press the … or † button to select “Picture”, then press the ENTER button.
Input
Picture
Sound
Channel
Setup
Picture
Mode | : Standard √ | |
Color Tone | : Warm1 | √ |
Size | : Wide | √ |
Digital NR | : Off | √ |
DNIe | : On | √ |
My Color Control |
| √ |
Film Mode | : Off | √ |
PIP |
| √ |
Move | Enter | Return |
2 Press the … or † button to select “DNIe”, then press the ENTER button.
Input
Picture
Sound
Channel
Setup
Picture
Mode | : Standard √ | |
Color Tone | : Warm1 | √ |
Size | : Wide | √ |
Digital NR | : Off | √ |
DNIe | : On | √ |
My Color Control |
| √ |
Film Mode | : Off | √ |
PIP |
| √ |
Move | Enter | Return |
3 Press the … or † button to select “Off”, “Demo” or “On”, then press the ENTER button.
Press the EXIT button to exit.
| Picture | |
Input | Mode | : Standard |
| Color Tone | : Warm1 |
Picture | Size | : Wide |
| Digital NR | : Off |
Sound | DNIe | Off |
| My Color Control | Demo |
Channel | Film Mode | On |
Setup | PIP |
|
|
| |
![]() Move
Move ![]() Enter
Enter ![]() Return
Return
Alternate method
Press the DNIe button on the remote control repeatedly to select one of the settings.
•On: Switches on the DNIe mode.
•Off: Switches off the DNIe mode.
•Demo: The screen before applying DNIe appears on the right and the screen after applying DNIe appears on the left.
DNIe Demo
DNIe On | DNIe Off |
English - 51
