Custom Installation
You can choose individual components to install and set a specific IP address.
1Make sure that the printer is connected to your network and powered on. For details about connecting to the network, see the supplied printer’s User’s Guide.
2Insert the supplied
If you use Windows Vista, Windows 7 and Windows Server 2008 R2, when you are asked to allow the installation, click continue.
The
If the installation window does not appear, click Start and then Run. Type X:\Setup.exe, replacing “X” with the letter which represents your drive and click OK.
If you use Windows Vista, Windows 7 and Windows Server 2008 R2, click Start → All Programs → Accessories → Run, and type X:\Setup.exe.
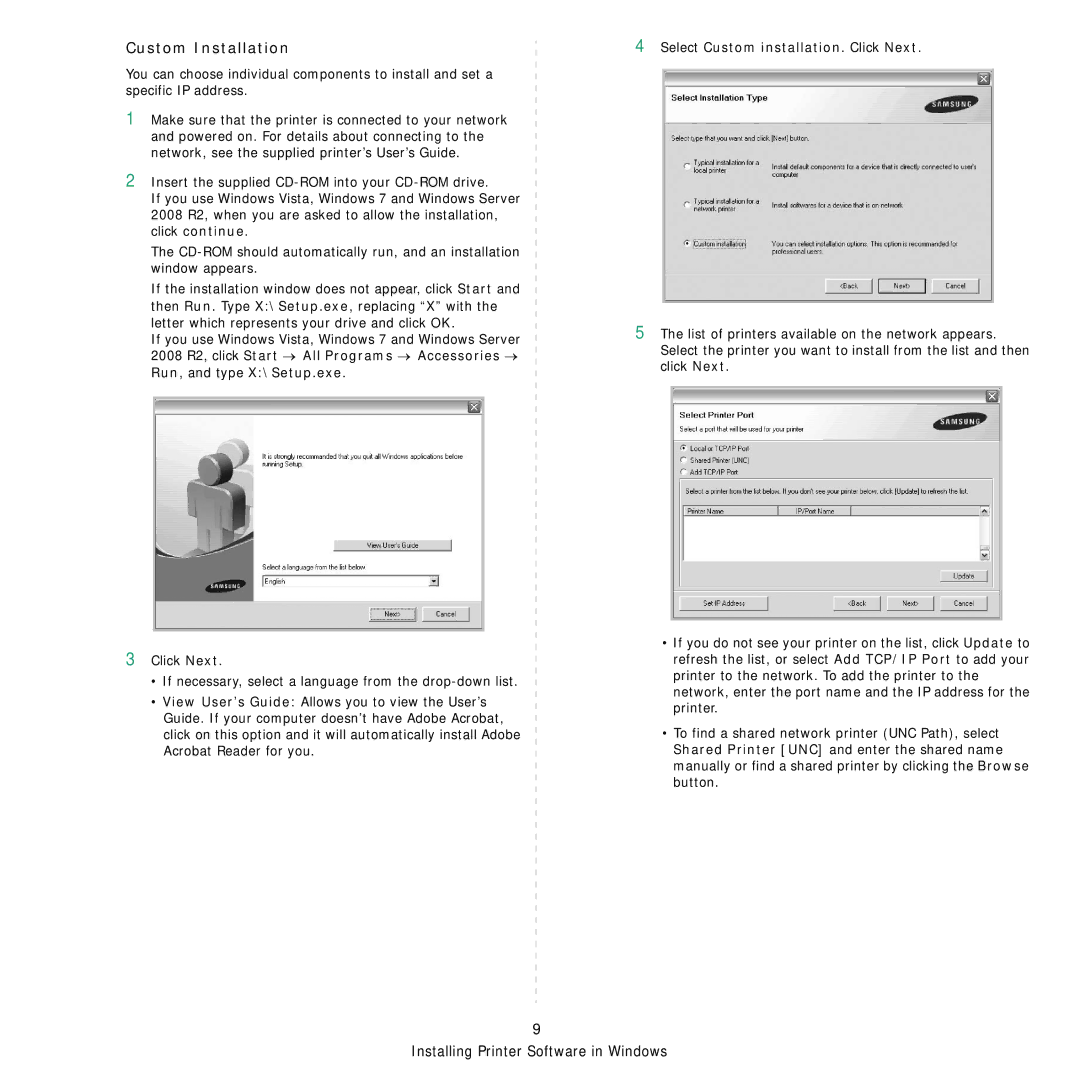
4Select Custom installation. Click Next.
5The list of printers available on the network appears. Select the printer you want to install from the list and then click Next.
3Click Next.
•If necessary, select a language from the
•View User’s Guide: Allows you to view the User’s Guide. If your computer doesn’t have Adobe Acrobat, click on this option and it will automatically install Adobe Acrobat Reader for you.
•If you do not see your printer on the list, click Update to refresh the list, or select Add TCP/IP Port to add your printer to the network. To add the printer to the network, enter the port name and the IP address for the printer.
•To find a shared network printer (UNC Path), select Shared Printer [UNC] and enter the shared name manually or find a shared printer by clicking the Browse button.
9