00-M30UKCover 5/22/00 408 PM
Safety Precautions
Introduction
Printing Multipage on a Single
Print Media
10-2
10-1
10-5
10-10
Overview
Introduction
You can easily scan documents and photographs
About This Guide
USB Port Manual Feeder
Printer Components
Memo
Setting Up Your Printer
User’s Guide CD-ROMs SmarThru 2 Guide
Power Cord Parallel Cable
Parallel cable connection
Onnecting Printer Cable
USB cable connection
Connecting the Printer Cable
Loading Paper into the Input Tray
Insert cartridges
Press Enter/Select
Press Enter/Select Left CARTRIDGE? appears
Right CARTRIDGE? appears
Display
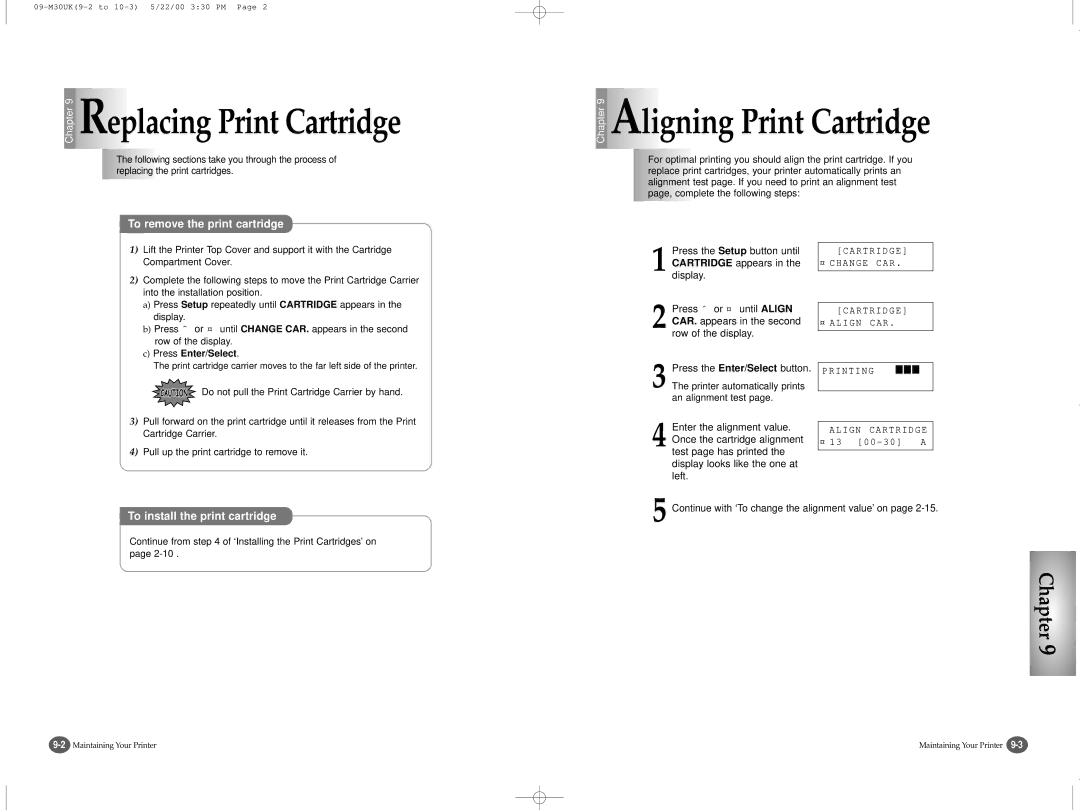
To change the alignment value
Cartridge type Part number
Has printed, the display looks
Like this
Printer software printer driver
SmarThru 2 program
Samsung SmarThru 2 provides you with
Software Requirements
Hardware Requirements
Typical recommended
Type the mail server address and then click the Next button
When you have completed, click Finish
To uninstall the SmarThru 2 program, proceed as follows
To uninstall the printer driver, proceed as follows
Congratulations
Follow the instructions on the screen
Click Copy all disk images
Use them instead of the CD-ROM to install the software
Installing Software from Diskette
Using the Control Panel
Button Function
Printer. Look for the following buttons and their functions
Print Media
Status Message
Attendance Message
When you choose print media, consider the following
Media Dimension
Smoothness and colour of the paper
Not supported paper types
For best print quality, use inkjet paper
Use only undamaged paper
Printing Tasks
Default printer, follow the procedures as described below
Setting Your Default Printer
Click Printer and select Set as Default
Following procedure describes the general steps required
Using the Options Tab
Using the Status Tab
Starting the SCX-1000 Series Control Program
Select Start Programs Samsung SCX-1000 Series
1Selectbar. Start Settings Printers from the Windows task
Using the Cartridges Tab
This tab allows you to choose cartridge options
Each property that the printer provides
Document/Quality Tab
Paper Tab
Advanced Tab
Making a Copy
Halftone
Image
To cancel a copy in progress press the Stop/Restore button
To select the new setting
Press ˆ or ¤ until the desired
Number appears on
To change Copy Resolution
To change Copy Contrast
To change Copy Size
Either Enter/Select or
Stop/Restore
Press the Special Copy
SCX-1000S only
Smart Media Function
Inserting and Removing Cards
Press Enter/Select when SDC50002.JPG appears
Selecting the file stored on the Smart Media Card
Card care and Storage
Press ˆ or ¤ to select the print mode
You can print images captured on digital cameras
Images and make copies without a direct link to a PC
To delete a image file from the Smart Media card
Changing Printer Setting
Paper Type appears
Maintaining Your Printer
To remove the print cartridge
To install the print cartridge
Alignment test page. If you need to print an alignment test
Page, complete the following steps
To clean the Scanner Bed
To clean the printheads
Clean the printheads
To wipe the printheads
Remove the print cartridge from the printer
Not satisfactory
If you need help, see ‘To Remove the Print Cartridge’ on
Printer prints the Help list
To restore factory defaults
Troubleshooting
Paper jams while printing
Paper jams while the printer is feeding
Pull the Input Tray completely out of the printer
Lift the Output Tray
Tips for Avoiding Paper Jams
Smart Media messages
Stop/Restore button
Press the Enter/Select
Selecting the Default Printer
Change the Print Quality to High or Normal
Computer to ECP mode through Bios setting. It
Mode because a lot of memory is required to
How to set BIOS, refer to the document of your
When the current job is completed, try again
Accuracy. Do not forget to set the switch back to
Brightness or too low resolution. Adjust
Printer in draft mode
AnyPage Lite does not offer the scan feature
Pecifications
Specification
Printer
Stafford Park 12, Telford Shropshire TF3 3BJ
Replacing the Fitted Plug
Index
Twain UI