Part Names and Functions
Top Controls and Indicators
q |
| w |
| e |
|
|
| r |
| t | |||||||||||||||
|
|
|
|
|
|
|
|
|
|
|
|
|
|
|
|
|
|
|
|
|
|
|
|
|
|
|
|
|
|
|
|
|
|
|
|
|
|
|
|
|
|
|
|
|
|
|
|
|
|
|
|
|
|
|
|
|
|
|
|
|
|
|
|
|
|
|
|
|
|
|
|
|
|
|
|
|
|
|
|
|
|
|
|
|
|
|
|
|
|
|
|
|
|
|
|
|
|
|
|
|
|
|
|
|
|
|
|
|
|
|
|
|
|
|
|
|
|
|
|
|
|
|
|
|
|
|
|
|
|
|
|
|
|
|
|
|
|
|
|
|
|
|
|
|
|
|
|
|
|
|
|
|
|
|
|
|
|
|
|
|
|
|
|
|
|
|
|
|
|
|
|
|
|
|
|
|
|
|
|
|
|
|
|
|
|
|
|
|
|
|
|
|
|
|
|
|
|
|
|
|
|
|
|
|
|
|
|
|
|
|
|
|
|
|
|
|
|
|
|
|
|
|
|
|
|
|
|
|
|
|
|
|
|
y |
| u |
| i |
| o |
| ! | 0 | ! | 1 |
|
|
|
|
|
|
|
|
|
|
|
|
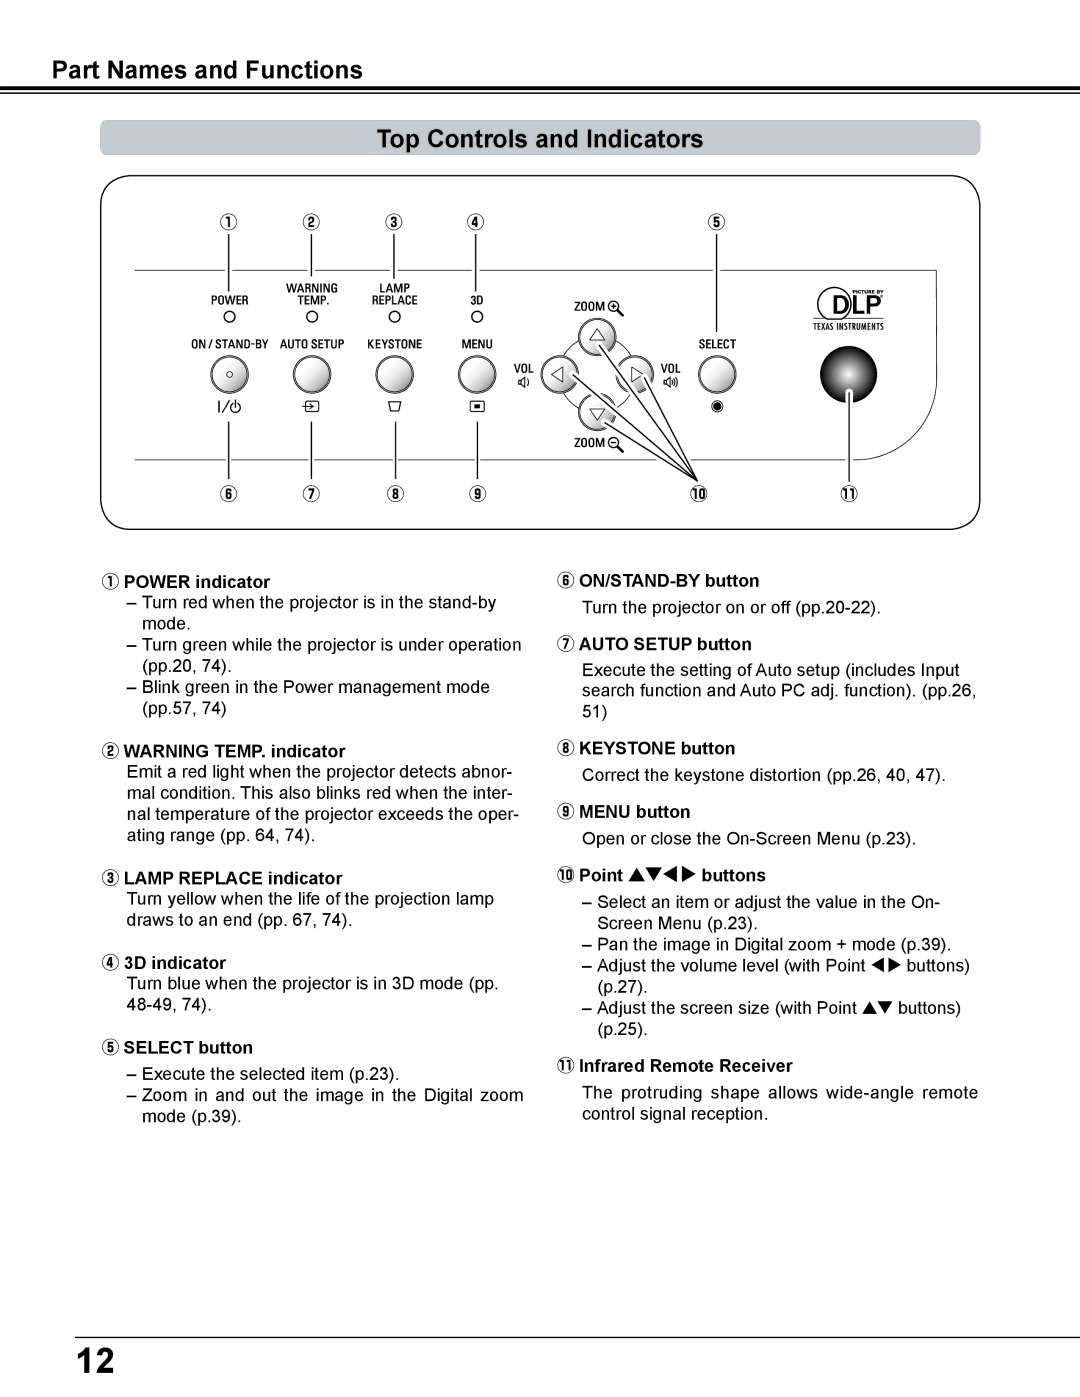
qPOWER indicator
–Turn red when the projector is in the
–Turn green while the projector is under operation (pp.20, 74).
–Blink green in the Power management mode (pp.57, 74)
wWARNING TEMP.. indicator
Emit a red light when the projector detects abnor- mal condition. This also blinks red when the inter- nal temperature of the projector exceeds the oper- ating range (pp. 64, 74).
eLAMP REPLACE indicator
Turn yellow when the life of the projection lamp draws to an end (pp. 67, 74).
r3D indicator
Turn blue when the projector is in 3D mode (pp.
tSELECT button
–Execute the selected item (p.23).
–Zoom in and out the image in the Digital zoom mode (p.39).
y
Turn the projector on or off
uAUTO SETUP button
Execute the setting of Auto setup (includes Input search function and Auto PC adj. function). (pp.26, 51)
iKEYSTONE button
Correct the keystone distortion (pp.26, 40, 47).
oMENU button
Open or close the
!0Point ed7 8 buttons
–Select an item or adjust the value in the On- Screen Menu (p.23).
–Pan the image in Digital zoom + mode (p.39).
–Adjust the volume level (with Point 7 8 buttons) (p.27).
–Adjust the screen size (with Point ed buttons) (p.25).
!1Infrared Remote Receiver
The protruding shape allows
12