Maintenance and Cleaning
Replacing the Filter
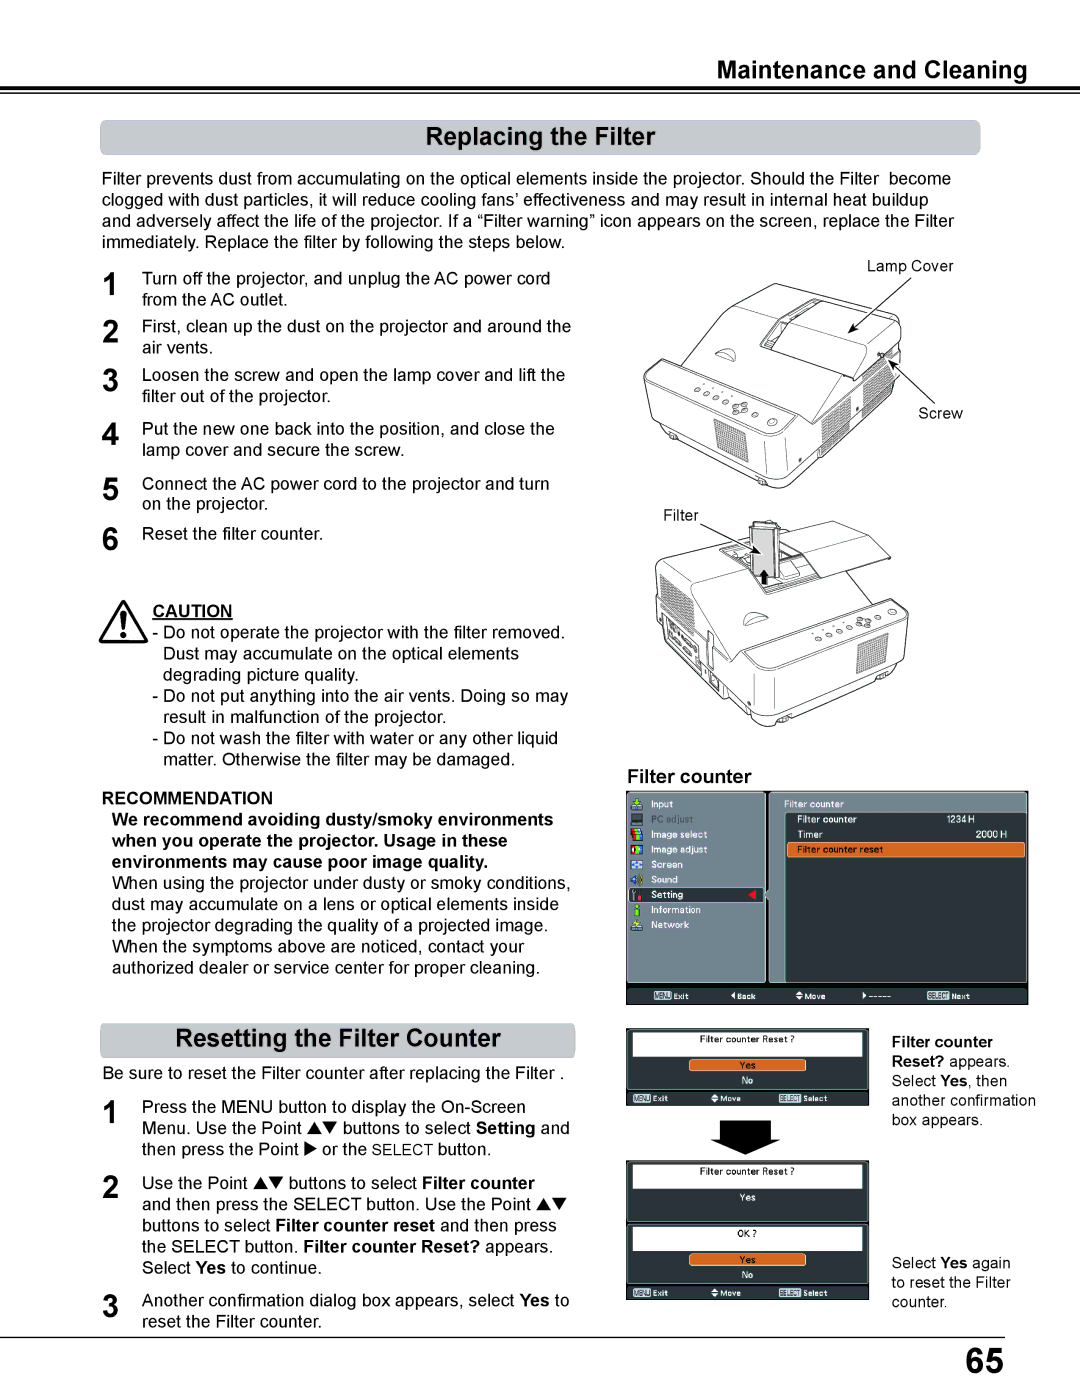
Filter prevents dust from accumulating on the optical elements inside the projector. Should the Filter become clogged with dust particles, it will reduce cooling fans’ effectiveness and may result in internal heat buildup and adversely affect the life of the projector. If a “Filter warning” icon appears on the screen, replace the Filter immediately. Replace the filter by following the steps below.
1 | Turn off the projector, and unplug the AC power cord |
| from the AC outlet. |
2 | First, clean up the dust on the projector and around the |
| air vents. |
3 | Loosen the screw and open the lamp cover and lift the |
| filter out of the projector. |
4 | Put the new one back into the position, and close the |
| lamp cover and secure the screw. |
5 | Connect the AC power cord to the projector and turn |
| on the projector. |
6 | Reset the filter counter. |
CAUTION
- Do not operate the projector with the filter removed. Dust may accumulate on the optical elements degrading picture quality.
-Do not put anything into the air vents. Doing so may result in malfunction of the projector.
-Do not wash the filter with water or any other liquid matter. Otherwise the filter may be damaged.
RECOMMENDATION
We recommend avoiding dusty/smoky environments when you operate the projector.. Usage in these environments may cause poor image quality..
When using the projector under dusty or smoky conditions, dust may accumulate on a lens or optical elements inside the projector degrading the quality of a projected image. When the symptoms above are noticed, contact your authorized dealer or service center for proper cleaning.
Filter
Filter counter
Lamp Cover
Screw
Resetting the Filter Counter
Be sure to reset the Filter counter after replacing the Filter .
1 | Press the MENU button to display the |
| Menu. Use the Point ed buttons to select Setting and |
| then press the Point 8 or the SELECT button. |
2 | Use the Point ed buttons to select Filter counter |
| and then press the SELECT button. Use the Point ed |
| buttons to select Filter counter reset and then press |
| the SELECT button. Filter counter Reset? appears. |
| Select Yes to continue. |
3 | Another confirmation dialog box appears, select Yes to |
| reset the Filter counter. |
Filter counter Reset? appears. Select Yes, then another confirmation box appears.
Select Yes again to reset the Filter counter.
65
