Unit 3: Installation
PRINTER INSTALLATION
This chapter provides guidance on how to station, connect, and load the printer once unpacked. Following printer setup, proceed to the next chapter for information on interface selection.
SITE LOCATION
•Station the printer on a solid flat surface.
•Station it away from hazardous materials or dusty environments.
•Station it within operational distance of the host computer, within interface cable specifications
MEDIA SELECTION
The size and type of the labels or tags to be printed should have been taken into consideration before printer purchase. Ideally, the media width will be equal to, or just narrower than, the print head. Using media that does not cover the print head will allow the platen roller to tread on it and wear it out. The media edge will also wear a groove in the platen roller affecting print quality.
MEDIA LOADING: ROLLED PAPER
There are two general label types that may be loaded and used; rolled and
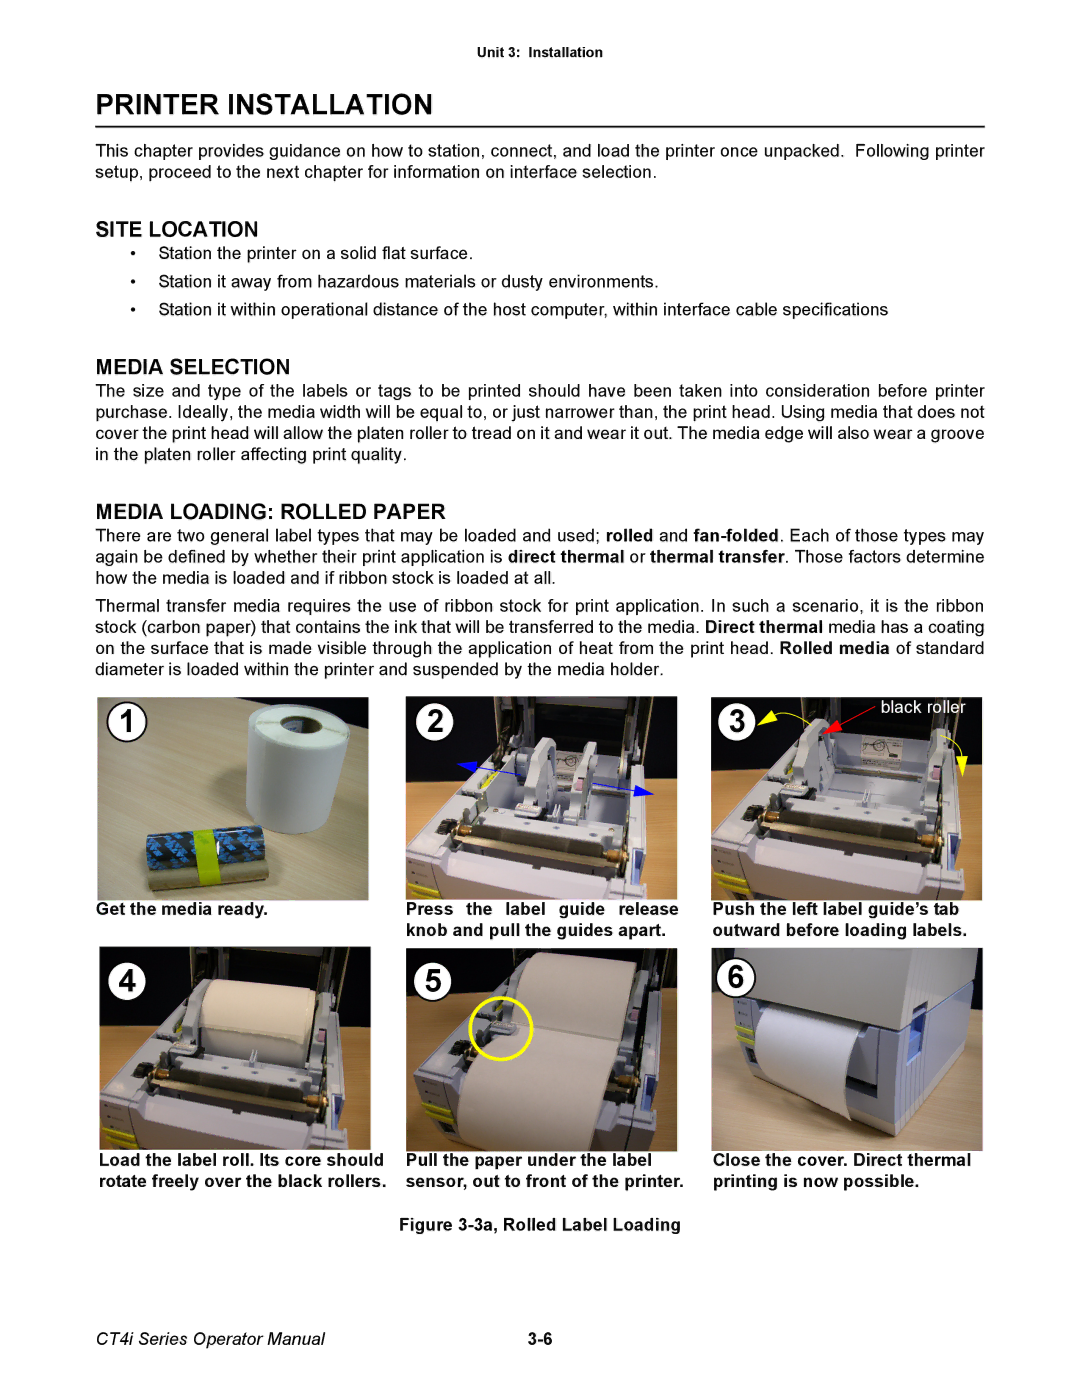
Thermal transfer media requires the use of ribbon stock for print application. In such a scenario, it is the ribbon stock (carbon paper) that contains the ink that will be transferred to the media. Direct thermal media has a coating on the surface that is made visible through the application of heat from the print head. Rolled media of standard diameter is loaded within the printer and suspended by the media holder.
1 | 2 | 3 | black roller |
|
Get the media ready. | Press the label guide release |
| knob and pull the guides apart. |
Push the left label guide’s tab outward before loading labels.
4 | 5 | 6 |
Load the label roll. Its core should rotate freely over the black rollers.
Pull the paper under the label sensor, out to front of the printer.
Close the cover. Direct thermal printing is now possible.
Figure 3-3a, Rolled Label Loading
CT4i Series Operator Manual |