Unit 3: Installation
RIBBON LOADING
This chapter provides guidance on how to station, connect, and load the printer once unpacked. Following printer setup, proceed to the next chapter for information on interface selection.
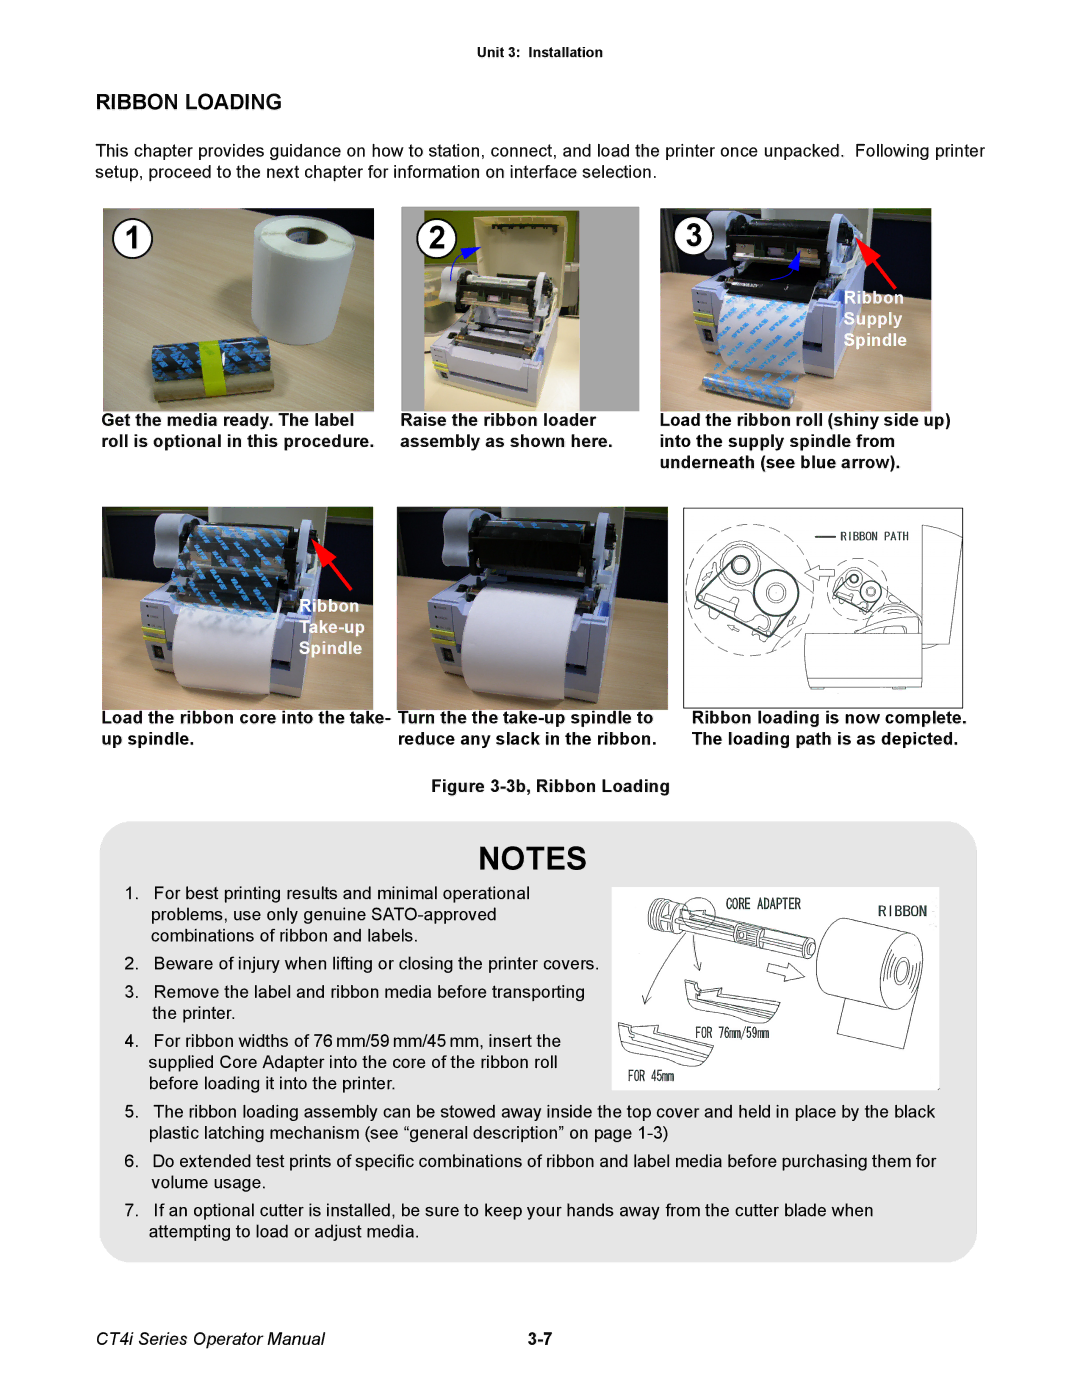
1
Get the media ready. The label roll is optional in this procedure.
Ribbon
Take-up
Spindle
Load the ribbon core into the take- up spindle.
2
Raise the ribbon loader assembly as shown here.
Turn the the
3
Ribbon
Supply
Spindle
Load the ribbon roll (shiny side up) into the supply spindle from underneath (see blue arrow).
Ribbon loading is now complete. The loading path is as depicted.
Figure 3-3b, Ribbon Loading
NOTES
1.For best printing results and minimal operational problems, use only genuine
2.Beware of injury when lifting or closing the printer covers.
3.Remove the label and ribbon media before transporting the printer.
4.For ribbon widths of 76 mm/59 mm/45 mm, insert the supplied Core Adapter into the core of the ribbon roll before loading it into the printer.
5.The ribbon loading assembly can be stowed away inside the top cover and held in place by the black plastic latching mechanism (see “general description” on page
6.Do extended test prints of specific combinations of ribbon and label media before purchasing them for volume usage.
7.If an optional cutter is installed, be sure to keep your hands away from the cutter blade when attempting to load or adjust media.
CT4i Series Operator Manual |