6. If | tooth | does | not touch | the same | amount | ... | the | |||||
mechanism | underneath | must |
| be adjusted to | make | the | ||||||
blade PARALLEL |
| to | GROOVE. |
|
|
|
|
| ||||
A. | Rear | trunnion | must | be | moved | TOWARD | the | |||||
| combination |
| square | if | there | is | a space | between | ||||
| marked | tooth | and | end | of | square | in step 4, |
|
| |||
B, | Rear trunnion | must | be |
| moved |
| AWAY | from | the | |||
| square | if | marked | tooth | pushes | square | out | of | ||||
| position | in | the | groove. |
|
|
|
|
|
|
| |
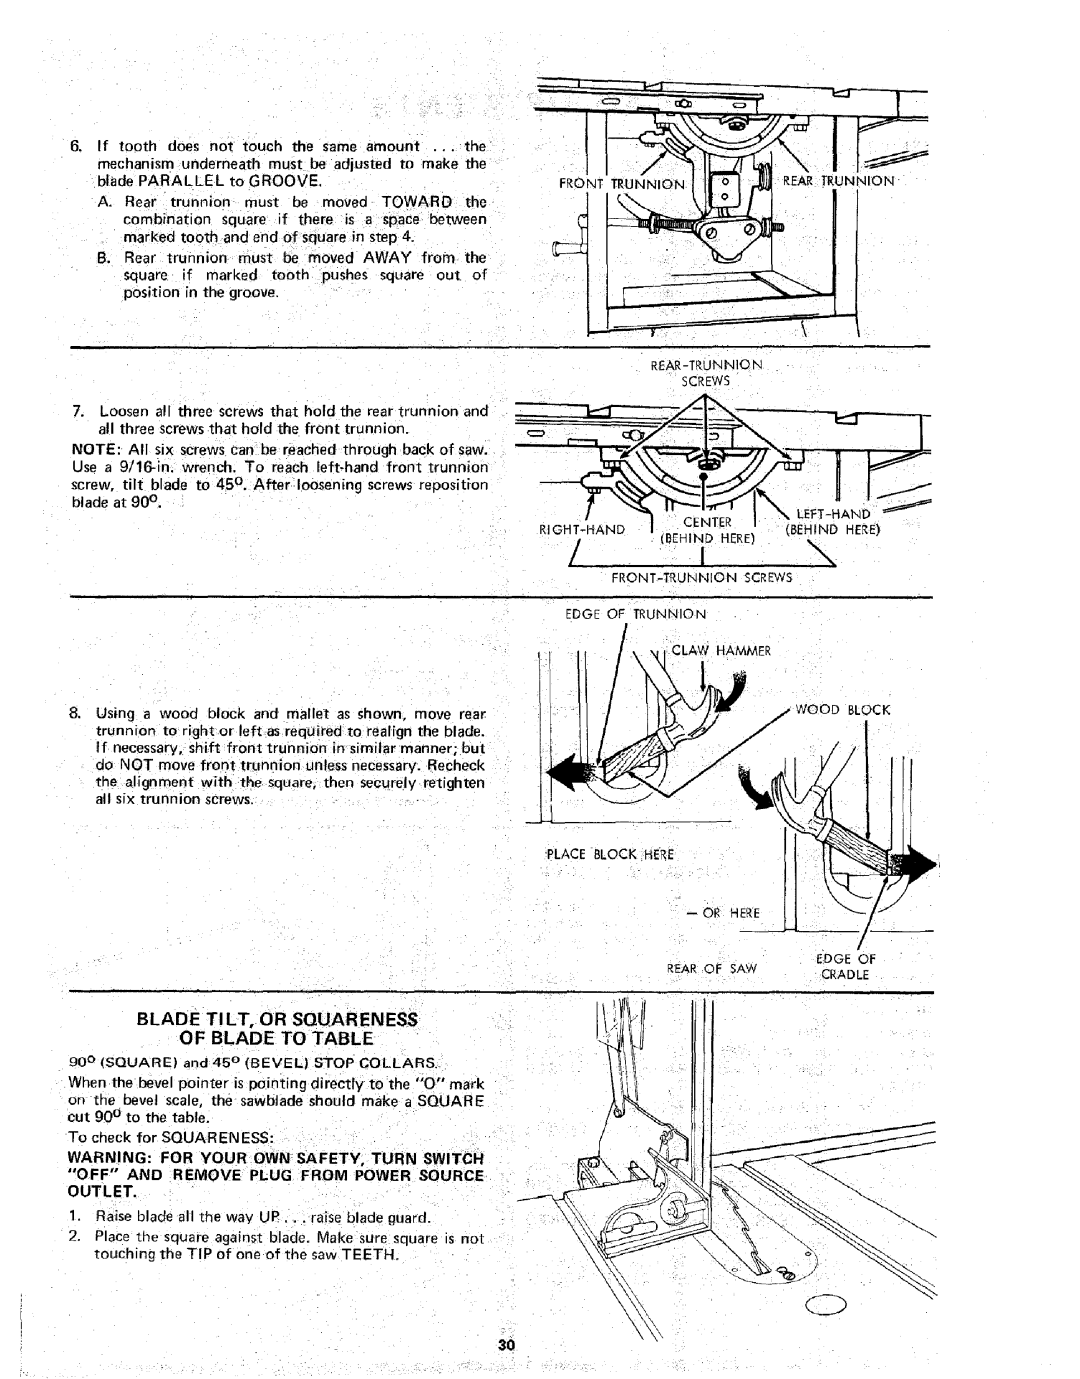
7.Loosen all three screws that hold the rear trunnion and all three screws that hold the front trunmon.
NOTE: All six screws can be reached through back of saw. Use a
screw, tilt blade to 45 °. After loosening screws reposition blade at 90 ° .
Using a wood block and mallet as shown, move rear trunnion to right or left as required to realign the blade. If necessary, shift front trunnion in similar manner; but do NOT move front trunnion unless necessary. Recheck
the alignment w th the square, then secure y ret ghten all six trunmon screws.
BLADE TILT, OR SQUARENESS
OF BLADE TO TABLE
gO ° (SQUARE) and 45 ° (BEVEL) STOP COLLARS.
When the bevel oointer is pointing directly to the "0" mark on the bevel scale, the sawblade should make a SQUARE cut 90 ° to the table.
To check for SQUAR EN ESS:
WARNING: FOR YOUR OWN SAFETY, TURN SWITCH
"OFF" AND REMOVE PLUG FROM POWER SOURCE
OUTLET.
1.Raise blade all the way UP... raise blade guard
2.Place the square against blade. Make sure square is not touching the TIP of one of the saw TEETH.
FRONT TRUNNION | REAR TRUNNION |
SCREWS
/ l
EDGE OF TRUNNION
OCK
_1
'PLACEBLOCK HERE
--OR HERE
EDGE OF
REAR OF SAW
CRADLE
3O