Check all supplied accessories in the carton to be sure that all pieces are present and in good condition. A checklist of accessories is shown below for your reference:
1 Beer Tap Assembly Including:
1 Black Faucet Handle
1 Gasket for Beer Tap
1 Beer Line (transparent tube) attached to Beer Tap
1 Black Rubber Washer for Connection of Beer Line to Keg Tap
1 CO2 Regulator
1 CO2 Cylinder
1 Keg Tap (American Sankey Type)
1 Cleaning Kit
1 CO2 Gas Line (Red Tube)
2 Hose Clamps
1 CO2 Cylinder Retainer (with bolt and nut)
1Guardrail
1Drip Tray
4Casters
1Wrench (for casters)
4Large
8Small
2Retainer Mounting Screws
2Wire Shelves
4Support Pins
Installing the Casters | Nut | |
Follow the steps below to install the |
| |
casters. |
| |
1. Empty the inside of the cabinet | Wrench | |
completely and lay the beer dis- | Caster | |
penser down sideways. We rec- | ||
|
ommend that you place a piece of cardboard or cloth underneath the cabinet to prevent dents or scratches to the cabinet.
2.Insert the casters into the holes on the bottom corners of the cabinet. Tighten each caster by turning the nut clockwise with the wrench provided.
3.Once all four casters have been tightened evenly, stand the cabinet in an upright position.
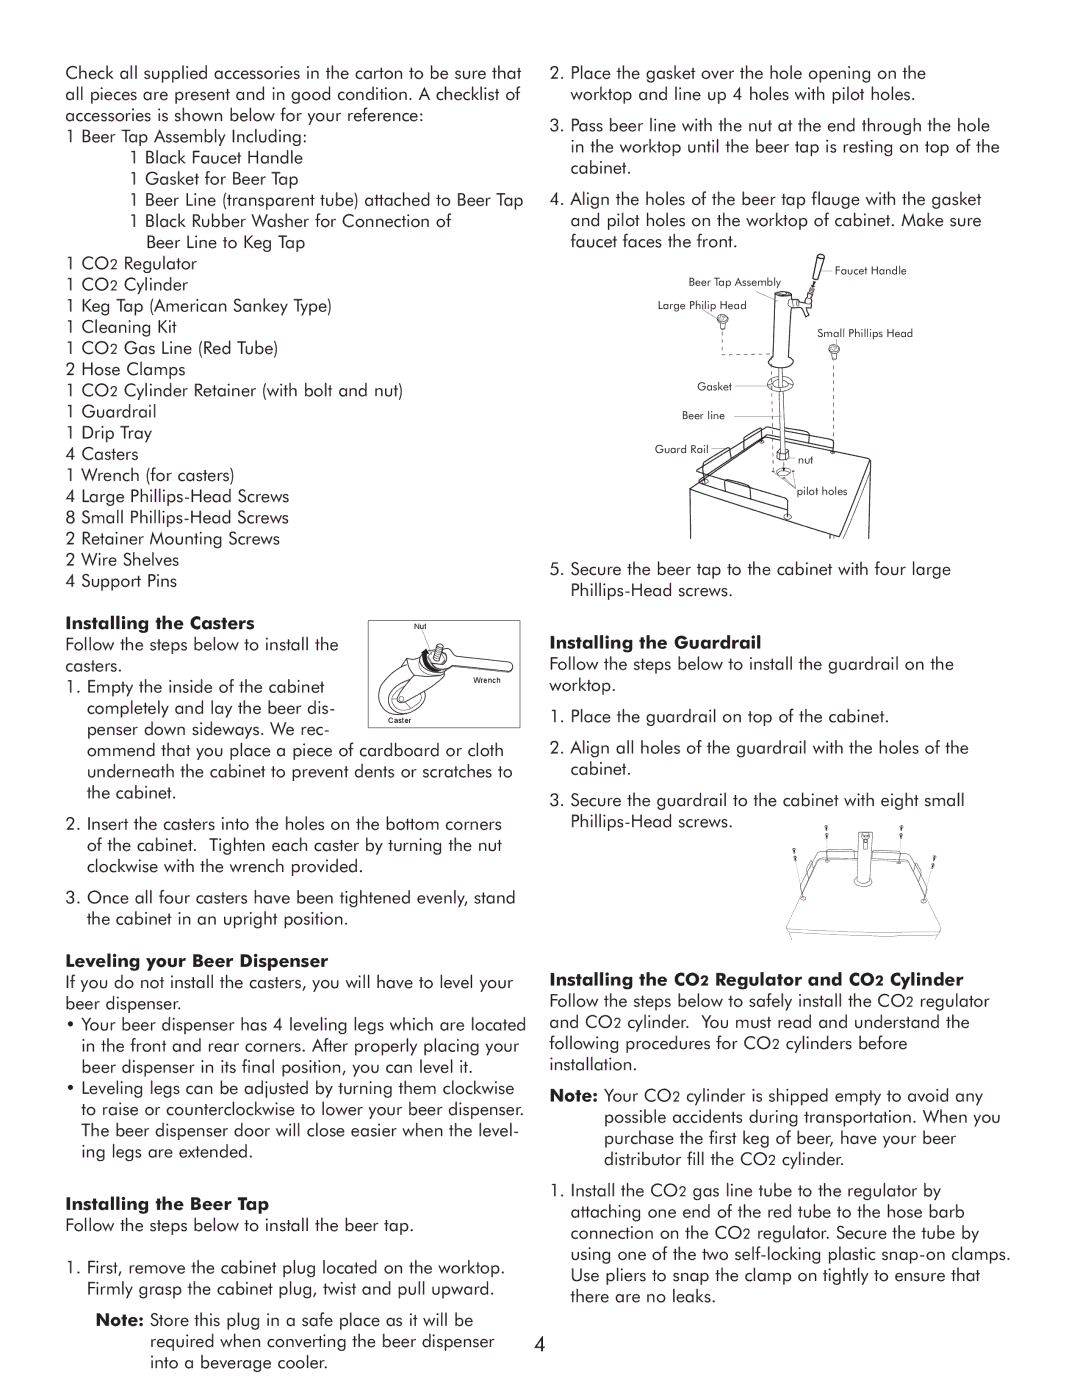
2.Place the gasket over the hole opening on the worktop and line up 4 holes with pilot holes.
3.Pass beer line with the nut at the end through the hole in the worktop until the beer tap is resting on top of the cabinet.
4.Align the holes of the beer tap flauge with the gasket and pilot holes on the worktop of cabinet. Make sure faucet faces the front.
Faucet Handle
Beer Tap Assembly
Large Philip Head
Small Phillips Head
Gasket
Beer line
Guard Rail
nut
pilot holes
5.Secure the beer tap to the cabinet with four large
Installing the Guardrail
Follow the steps below to install the guardrail on the worktop.
1.Place the guardrail on top of the cabinet.
2.Align all holes of the guardrail with the holes of the cabinet.
3.Secure the guardrail to the cabinet with eight small
Leveling your Beer Dispenser
If you do not install the casters, you will have to level your beer dispenser.
•Your beer dispenser has 4 leveling legs which are located in the front and rear corners. After properly placing your beer dispenser in its final position, you can level it.
•Leveling legs can be adjusted by turning them clockwise to raise or counterclockwise to lower your beer dispenser. The beer dispenser door will close easier when the level- ing legs are extended.
Installing the Beer Tap
Follow the steps below to install the beer tap.
1.First, remove the cabinet plug located on the worktop. Firmly grasp the cabinet plug, twist and pull upward.
Note: Store this plug in a safe place as it will be required when converting the beer dispenser into a beverage cooler.
Installing the CO2 Regulator and CO2 Cylinder Follow the steps below to safely install the CO2 regulator and CO2 cylinder. You must read and understand the following procedures for CO2 cylinders before installation.
Note: Your CO2 cylinder is shipped empty to avoid any possible accidents during transportation. When you purchase the first keg of beer, have your beer distributor fill the CO2 cylinder.
1.Install the CO2 gas line tube to the regulator by attaching one end of the red tube to the hose barb connection on the CO2 regulator. Secure the tube by using one of the two
4