
AR-157E, AR-153E specifications
The Sharp AR-157E and AR-153E are advanced multifunctional printers (MFPs) designed for small to medium-sized businesses. Both models are engineered with cutting-edge technology and are capable of meeting a variety of office needs, including printing, copying, and scanning, all in one compact device.One of the main features of the AR-157E and AR-153E is their impressive print speed. The AR-157E can produce up to 15 pages per minute, while the AR-153E achieves an output of up to 13 pages per minute. This efficiency is vital for busy environments, reducing waiting times and enhancing productivity.
Both models are equipped with a user-friendly control panel featuring a large LCD display, which makes navigation intuitive and straightforward. This design allows users to easily access functions and settings without extensive training or experience.
In terms of print quality, the AR-157E and AR-153E deliver exceptional results with a resolution of up to 600 x 600 dpi. This ensures that documents, whether text or graphics, are sharp and professional-looking. The printers also support multiple paper sizes and types, making them versatile for various printing tasks, from standard office documents to marketing materials.
One of the key technologies incorporated into both models is Sharp’s Slow Start technology. This feature minimizes energy consumption during idle periods, contributing to lower operating costs while being environmentally friendly. Additionally, the automatic duplexing capability allows users to print on both sides of the paper, further reducing paper usage and costs.
The security of documents is also a focal point for these models. They provide advanced security features, including user authentication and data encryption, ensuring that sensitive information remains protected.
Both the AR-157E and AR-153E are designed to enhance workplace efficiency. Their compact dimensions make them suitable for offices with limited space, while their robust construction ensures durability and reliability over time.
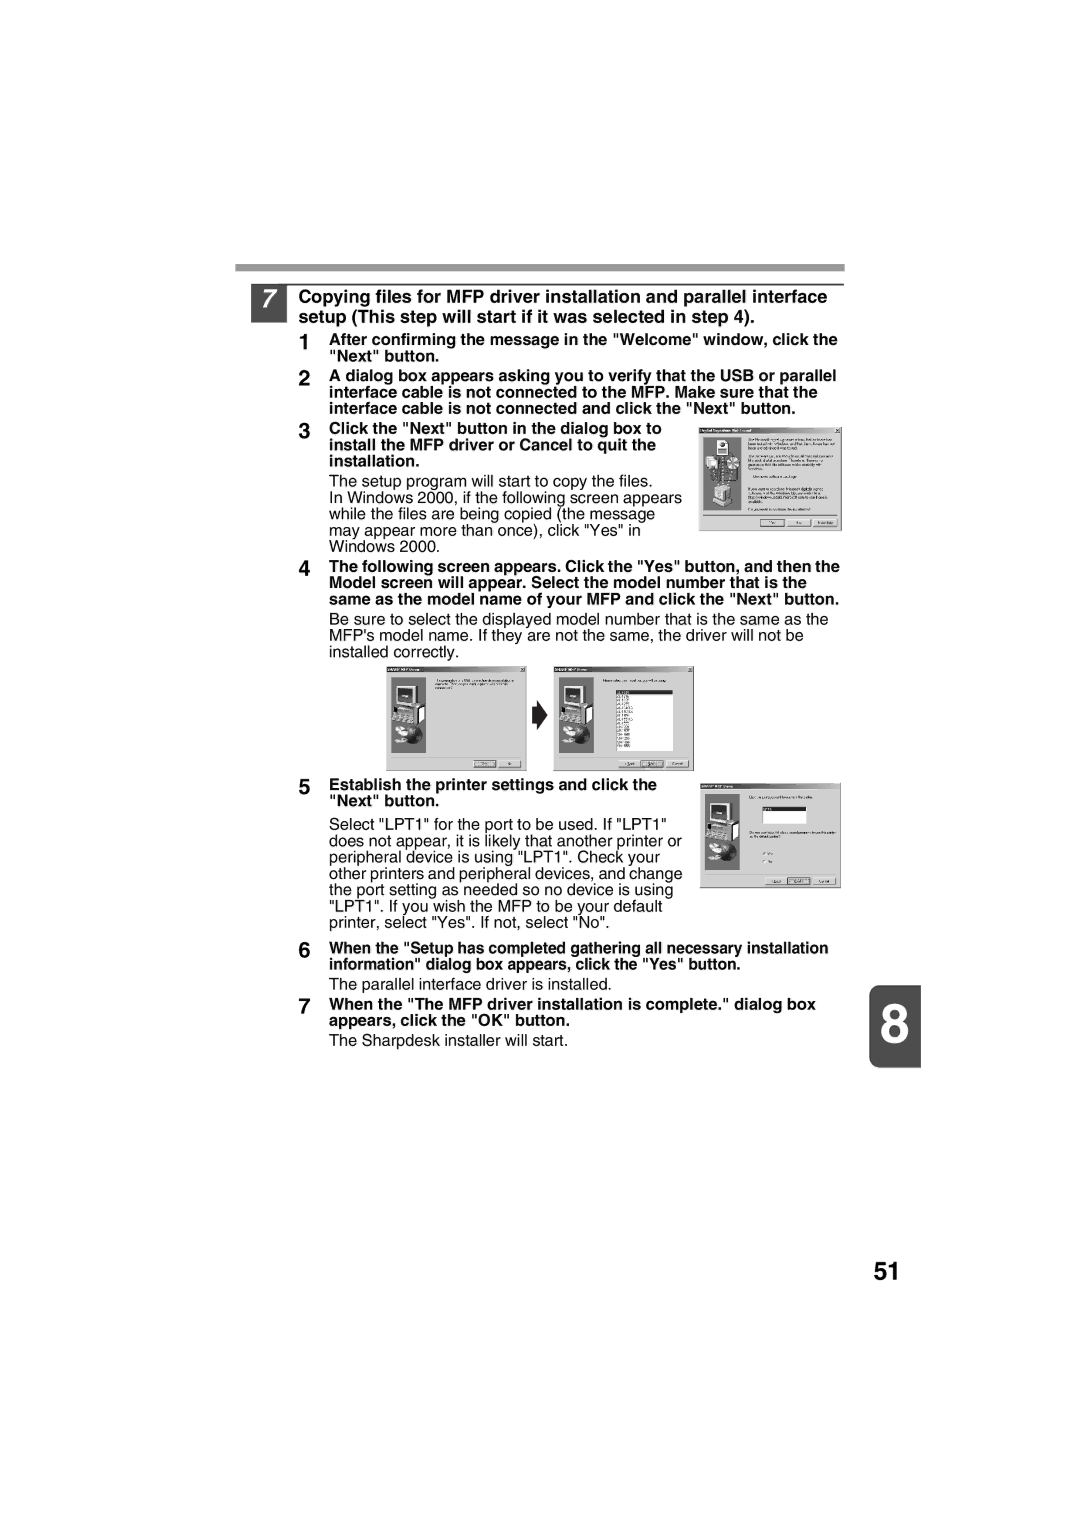
In summary, the Sharp AR-157E and AR-153E multifunction printers offer a compelling mix of speed, quality, and efficiency. With their advanced technologies, user-friendly features, and emphasis on security, these models stand out as excellent choices for any office environment looking to streamline their document management processes.