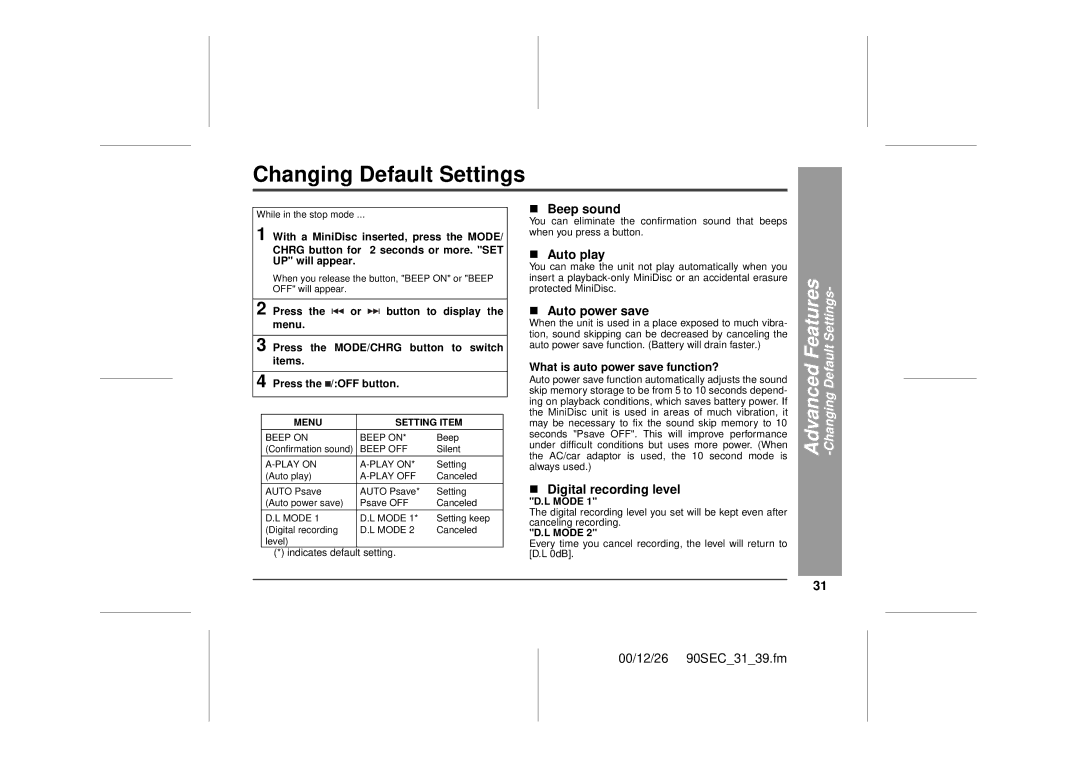
Changing Default Settings
While in the stop mode ...
1 With a MiniDisc inserted, press the MODE/
CHRG button for 2 seconds or more. "SET UP" will appear.
When you release the button, "BEEP ON" or "BEEP OFF" will appear.
2 Press the ![]() or
or ![]() button to display the menu.
button to display the menu.
3 Press the MODE/CHRG button to switch items.
4 Press the ![]() /:OFF button.
/:OFF button.
MENU | SETTING ITEM | |
|
|
|
BEEP ON | BEEP ON* | Beep |
(Confirmation sound) | BEEP OFF | Silent |
|
|
|
Setting | ||
(Auto play) | Canceled | |
|
|
|
AUTO Psave | AUTO Psave* | Setting |
(Auto power save) | Psave OFF | Canceled |
|
|
|
D.L MODE 1 | D.L MODE 1* | Setting keep |
(Digital recording | D.L MODE 2 | Canceled |
level) |
|
|
(*) indicates default setting.
„Beep sound
You can eliminate the confirmation sound that beeps when you press a button.
„Auto play
You can make the unit not play automatically when you insert a
„Auto power save
When the unit is used in a place exposed to much vibra- tion, sound skipping can be decreased by canceling the auto power save function. (Battery will drain faster.)
What is auto power save function?
Auto power save function automatically adjusts the sound skip memory storage to be from 5 to 10 seconds depend- ing on playback conditions, which saves battery power. If the MiniDisc unit is used in areas of much vibration, it may be necessary to fix the sound skip memory to 10 seconds "Psave OFF". This will improve performance under difficult conditions but uses more power. (When the AC/car adaptor is used, the 10 second mode is always used.)
„Digital recording level
"D.L MODE 1"
The digital recording level you set will be kept even after canceling recording.
"D.L MODE 2"
Every time you cancel recording, the level will return to [D.L 0dB].
Advanced Features |
|
31
00/12/26 90SEC_31_39.fm
