Basic Operations
Operation
3
4
Projector
| ON/OFF | LAMP |
|
POWER |
|
| |
|
|
| |
|
| TEMP. |
|
| KEYSTONE |
| |
INPUT |
| AUTO SYNC |
|
BACK |
| ENTER | MENU |
EXAMPLE ![]()
5INPUT 1 (RGB) Mode
d
INPUT 3 (VIDEO) Mode
6
7
8
Remote control
8
7
5
6 |
INPUT 1 (COMPONENT) Mode
g
f
INPUT2
s
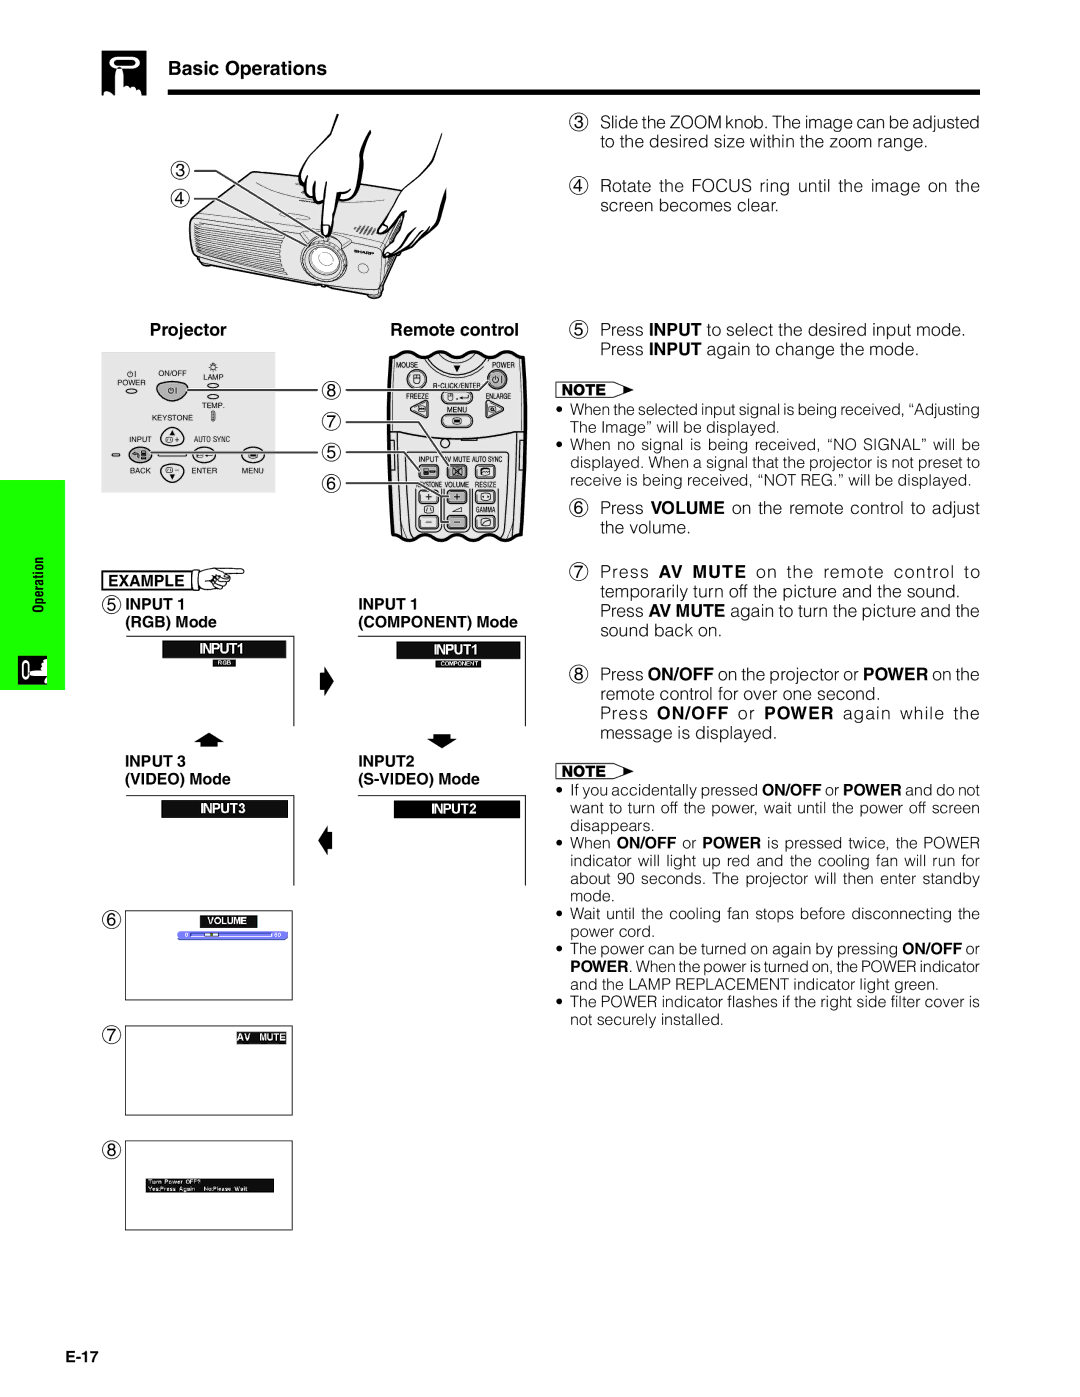
3Slide the ZOOM knob. The image can be adjusted to the desired size within the zoom range.
4Rotate the FOCUS ring until the image on the screen becomes clear.
5Press INPUT to select the desired input mode. Press INPUT again to change the mode.
•When the selected input signal is being received, “Adjusting The Image” will be displayed.
•When no signal is being received, “NO SIGNAL” will be displayed. When a signal that the projector is not preset to receive is being received, “NOT REG.” will be displayed.
6Press VOLUME on the remote control to adjust the volume.
7Press AV MUTE on the remote control to temporarily turn off the picture and the sound. Press AV MUTE again to turn the picture and the sound back on.
8Press ON/OFF on the projector or POWER on the remote control for over one second.
Press ON/OFF or POWER again while the message is displayed.
•If you accidentally pressed ON/OFF or POWER and do not want to turn off the power, wait until the power off screen disappears.
•When ON/OFF or POWER is pressed twice, the POWER indicator will light up red and the cooling fan will run for about 90 seconds. The projector will then enter standby mode.
•Wait until the cooling fan stops before disconnecting the power cord.
•The power can be turned on again by pressing ON/OFF or POWER. When the power is turned on, the POWER indicator and the LAMP REPLACEMENT indicator light green.
•The POWER indicator flashes if the right side filter cover is not securely installed.
