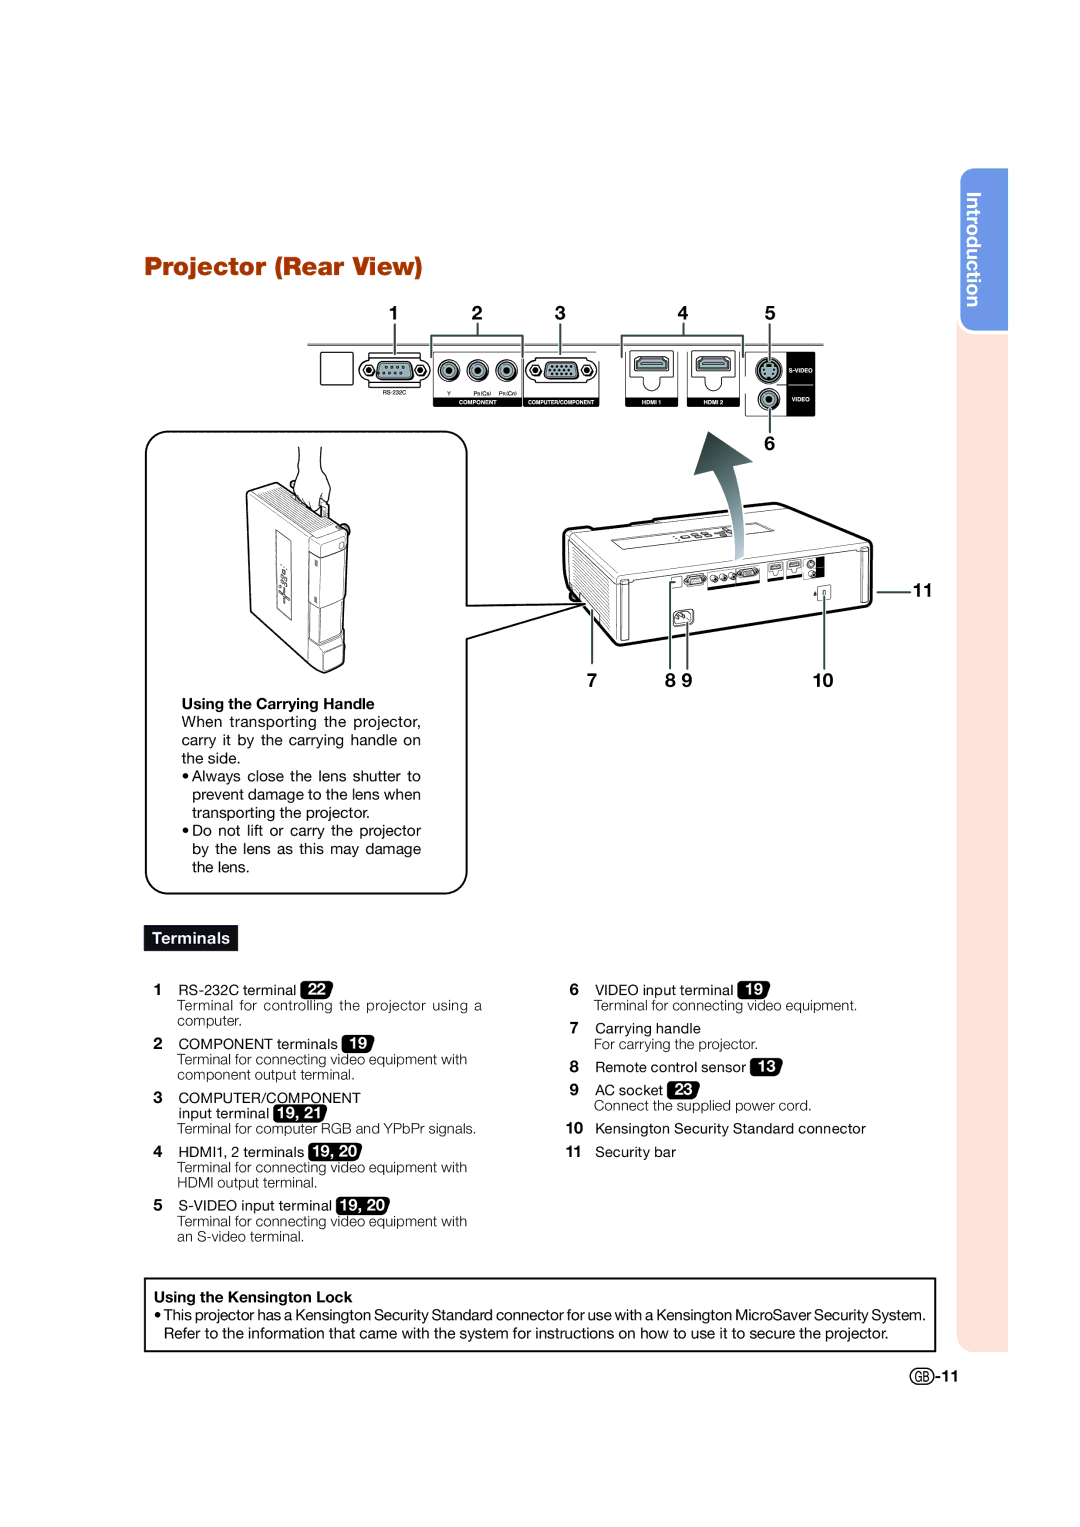
Projector (Rear View)
1 | 2 | 3 | 4 | 5 | |||||
|
|
|
|
|
|
|
|
|
|
|
|
|
|
|
|
|
|
|
|
|
|
|
|
|
|
|
|
|
|
6
11
|
|
|
|
|
|
|
|
|
|
7 |
|
| 10 | |
8 9 | ||||
Using the Carrying Handle When transporting the projector, carry it by the carrying handle on the side.
•Always close the lens shutter to prevent damage to the lens when transporting the projector.
•Do not lift or carry the projector by the lens as this may damage the lens.
Introduction
Terminals
1
Terminal for controlling the projector using a computer.
2COMPONENT terminals 19
Terminal for connecting video equipment with component output terminal.
3COMPUTER/COMPONENT input terminal 19, 21
Terminal for computer RGB and YPbPr signals.
4HDMI1, 2 terminals 19, 20
Terminal for connecting video equipment with HDMI output terminal.
5
Terminal for connecting video equipment with an
6VIDEO input terminal 19
Terminal for connecting video equipment.
7Carrying handle
For carrying the projector.
8Remote control sensor 13
9AC socket 23
Connect the supplied power cord.
10Kensington Security Standard connector
11Security bar
Using the Kensington Lock
•This projector has a Kensington Security Standard connector for use with a Kensington MicroSaver Security System. Refer to the information that came with the system for instructions on how to use it to secure the projector.
![]() -11
-11